This year (2015) we build some beehives.

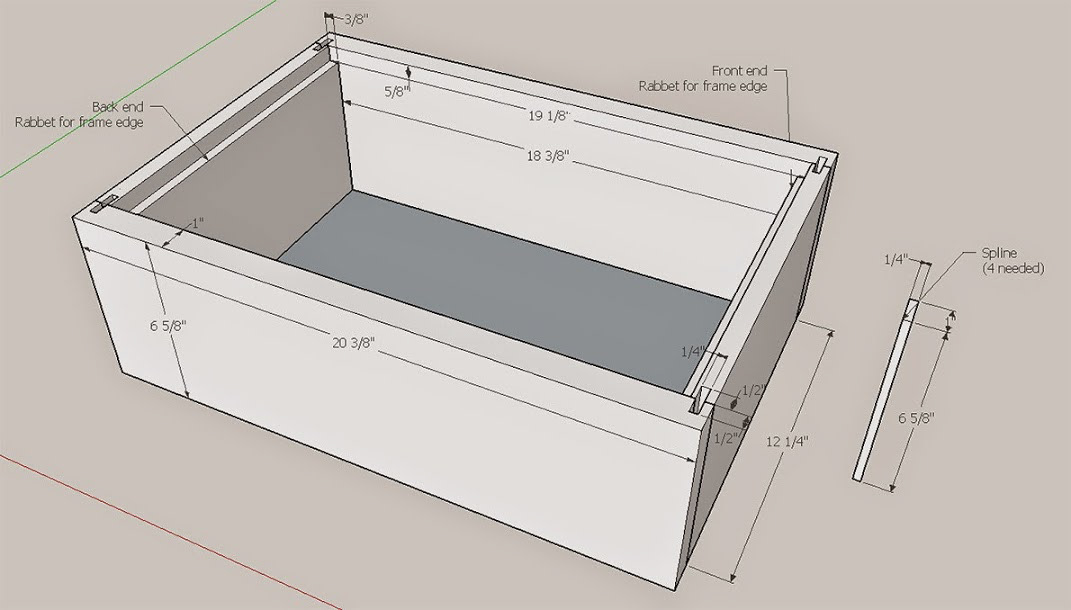
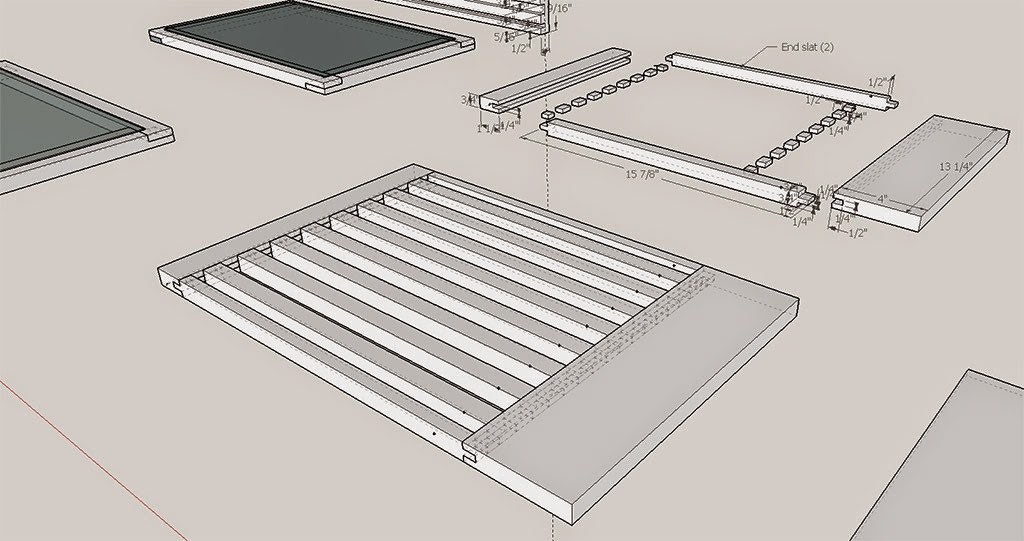
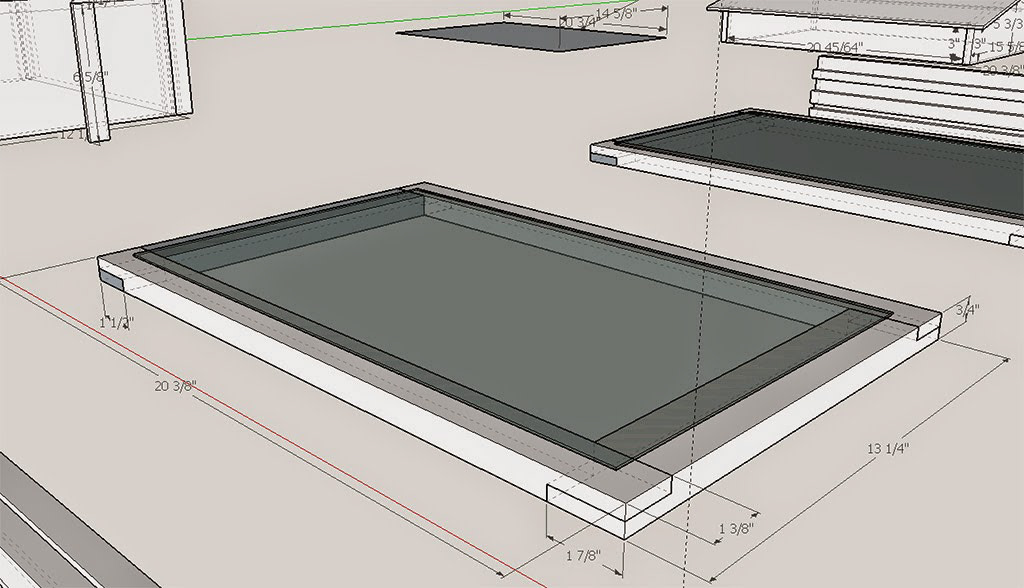
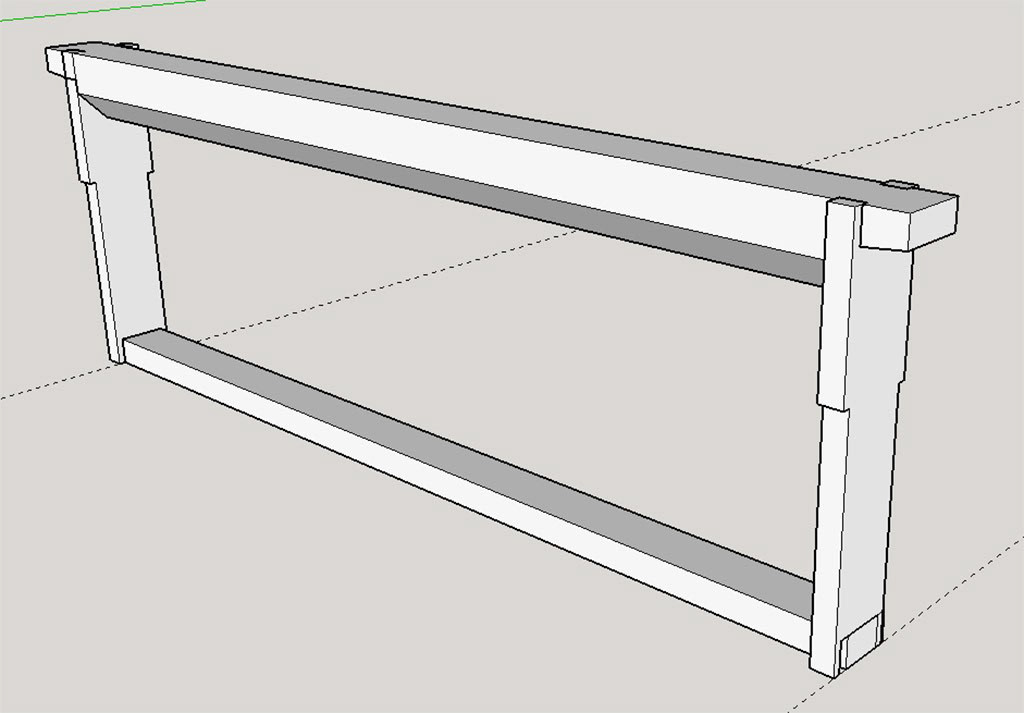
After looking for information in a lot of places, web, books, YouTube... We decide to make our own plans. This is the overall plan for the "medium" (one of the component of the beehive). This is adapted from the beautiful plans from Stephen Tilmann, but I though of recalculating them to use 1" boards that we would mill, instead of standard 3/4". I though, this would make the component a little heavier but also stronger. The drawings were calculated in Sketchup, of course!) (http://www.michiganbees.org/beekeeping/in-the-beekeepers-workshop/)
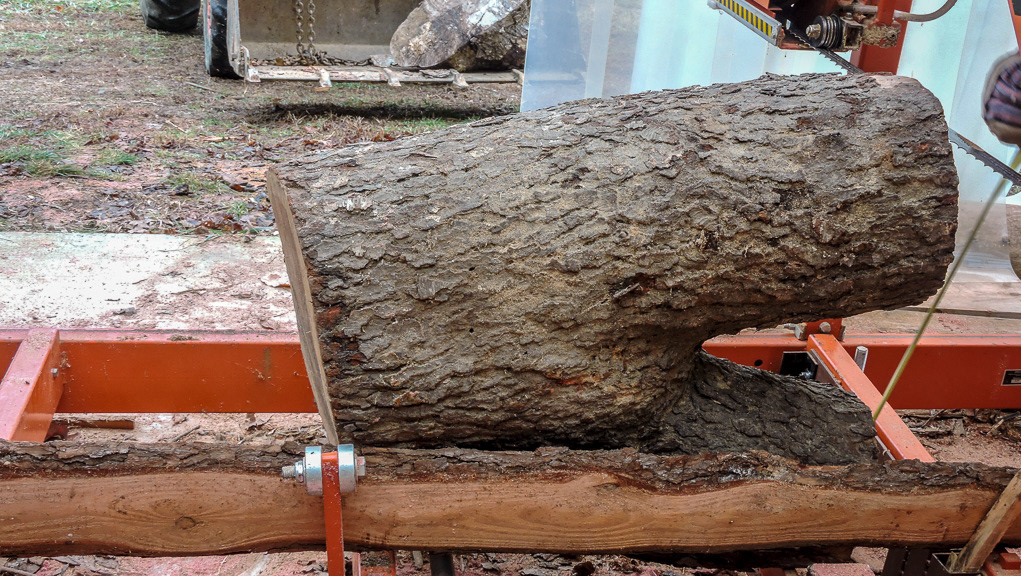
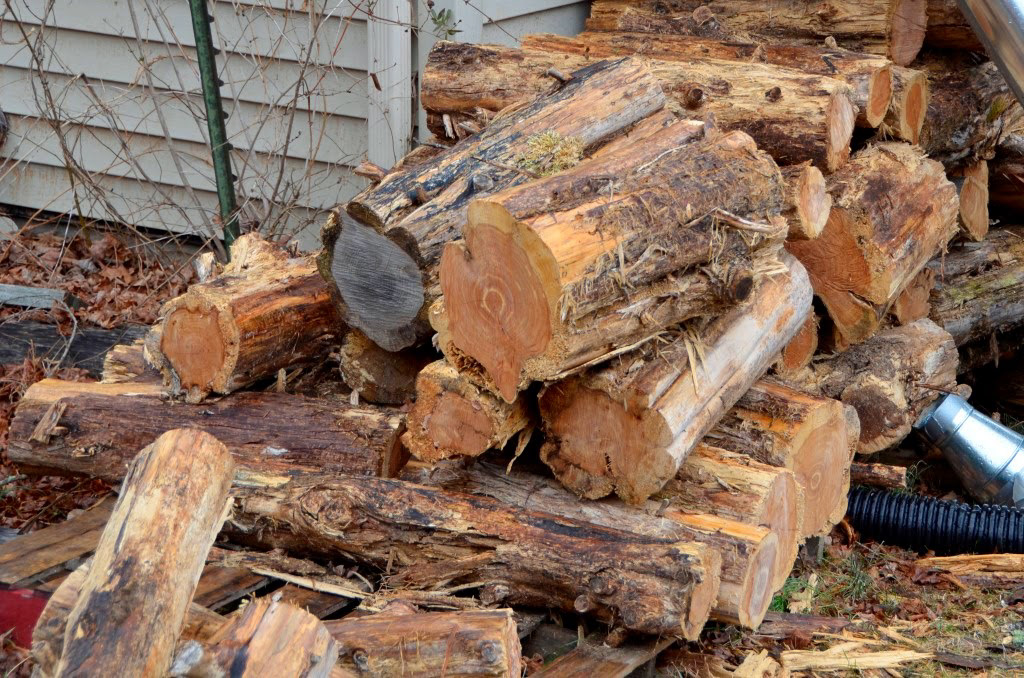
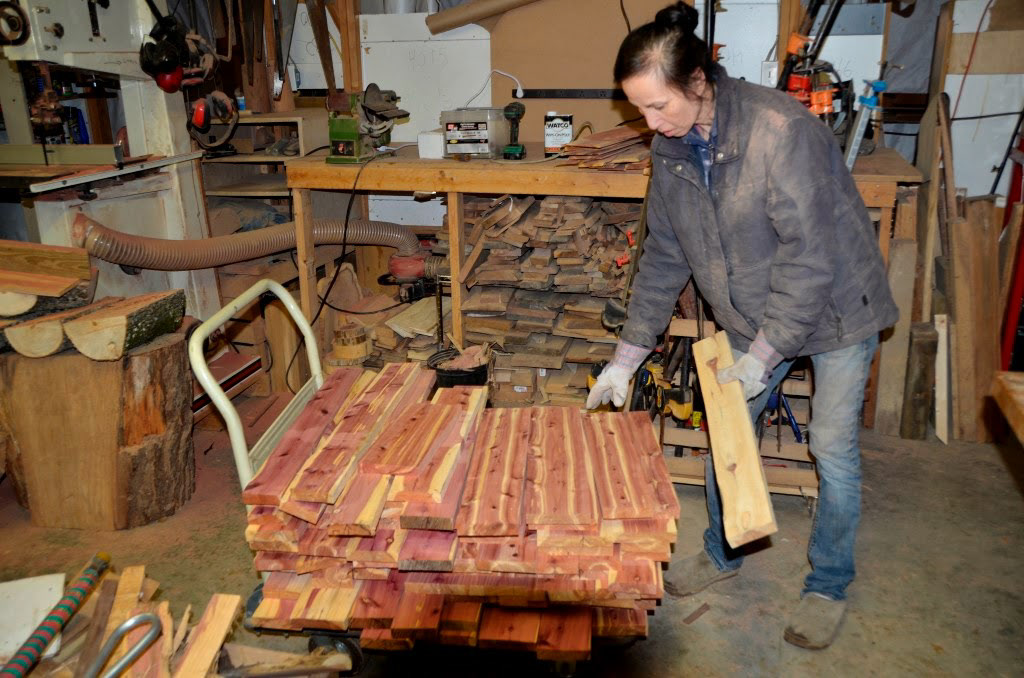
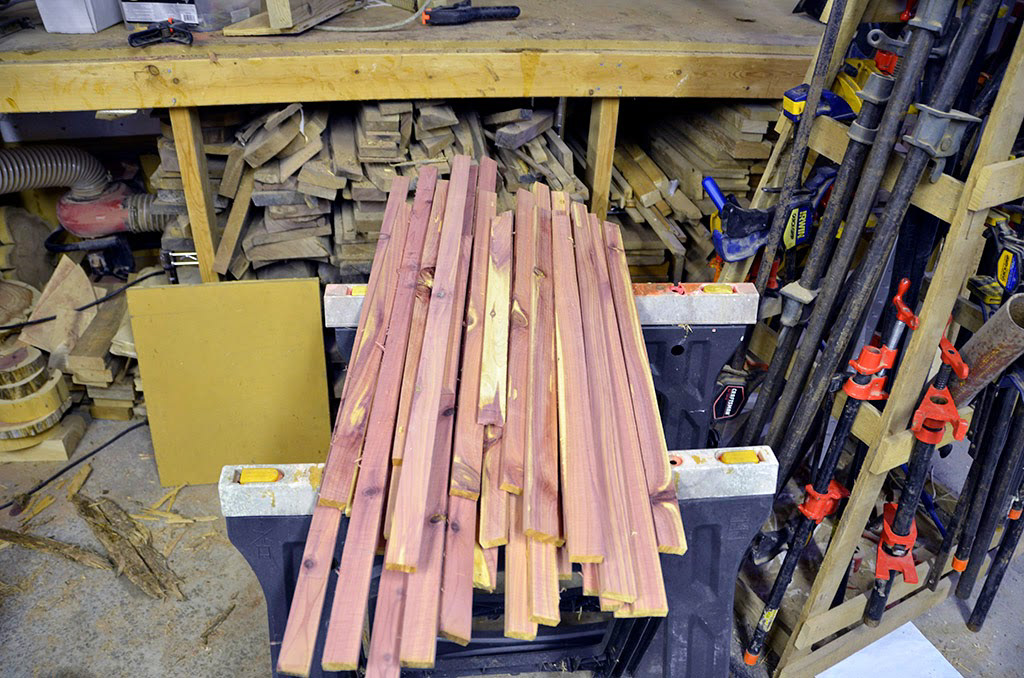
We had a stack of 5 years old cedar logs that we decided to use to try to build a beehive.
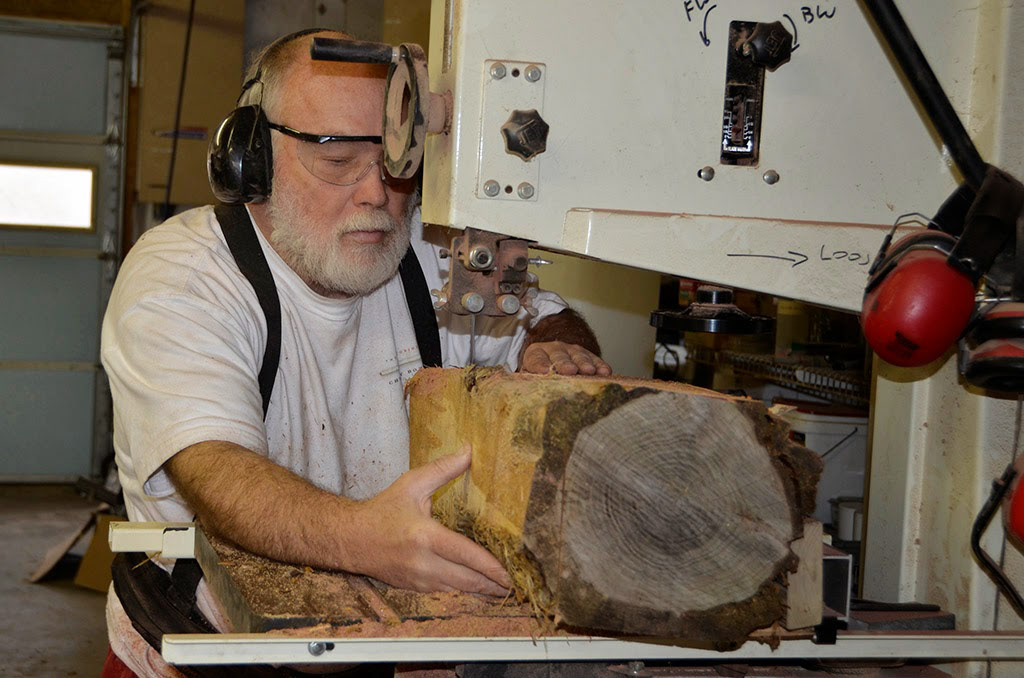
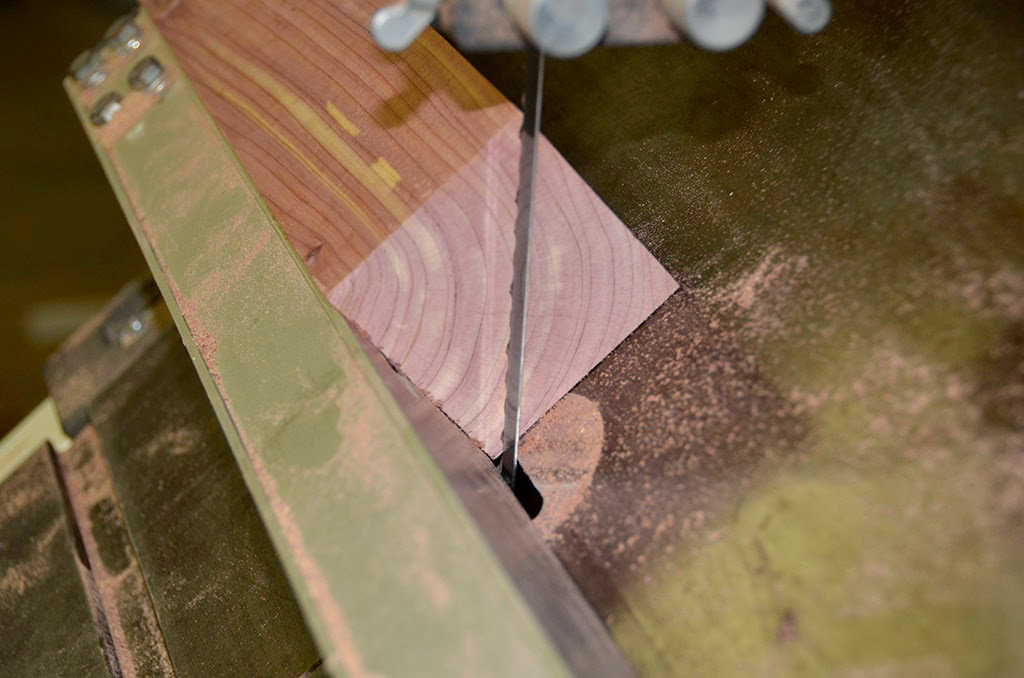
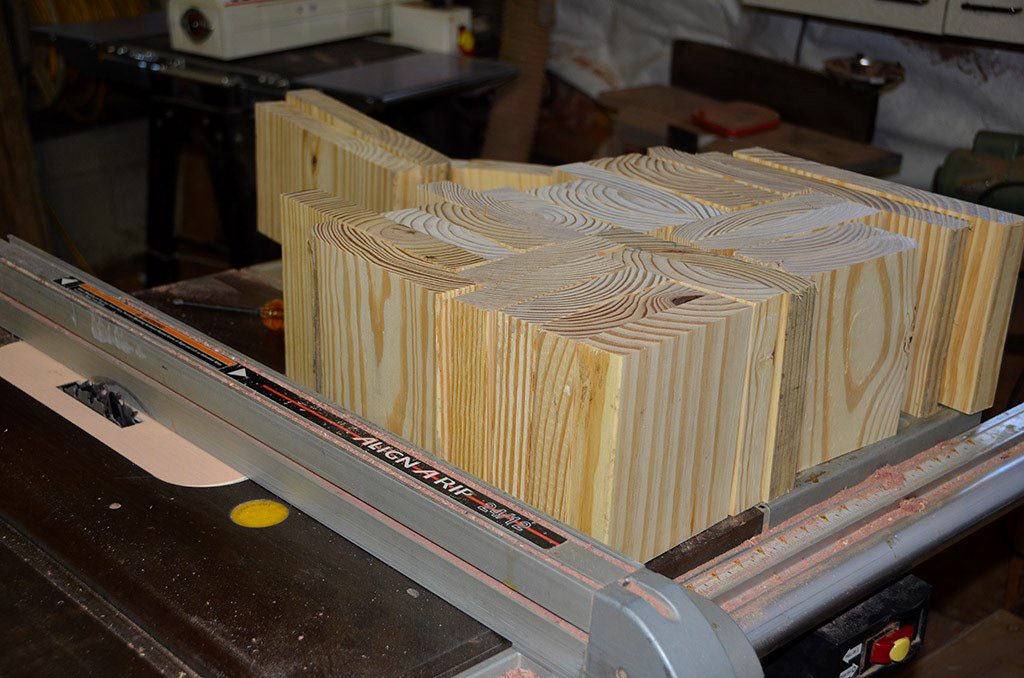
We build a sled to cut those logs on the bandsaw into short cants...
... a whole pile of cants!
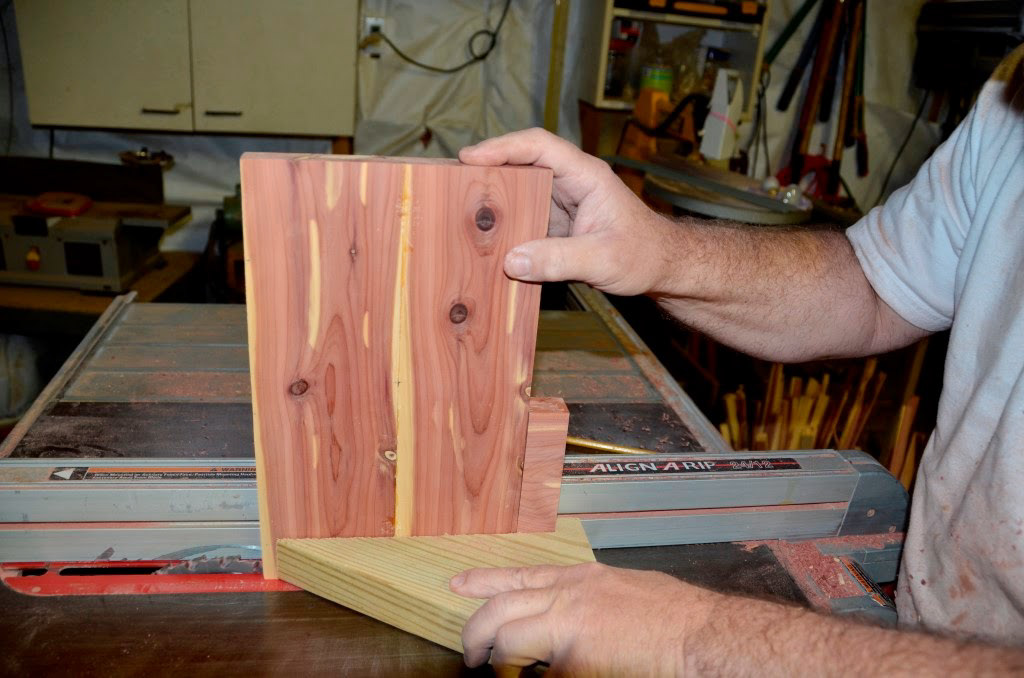
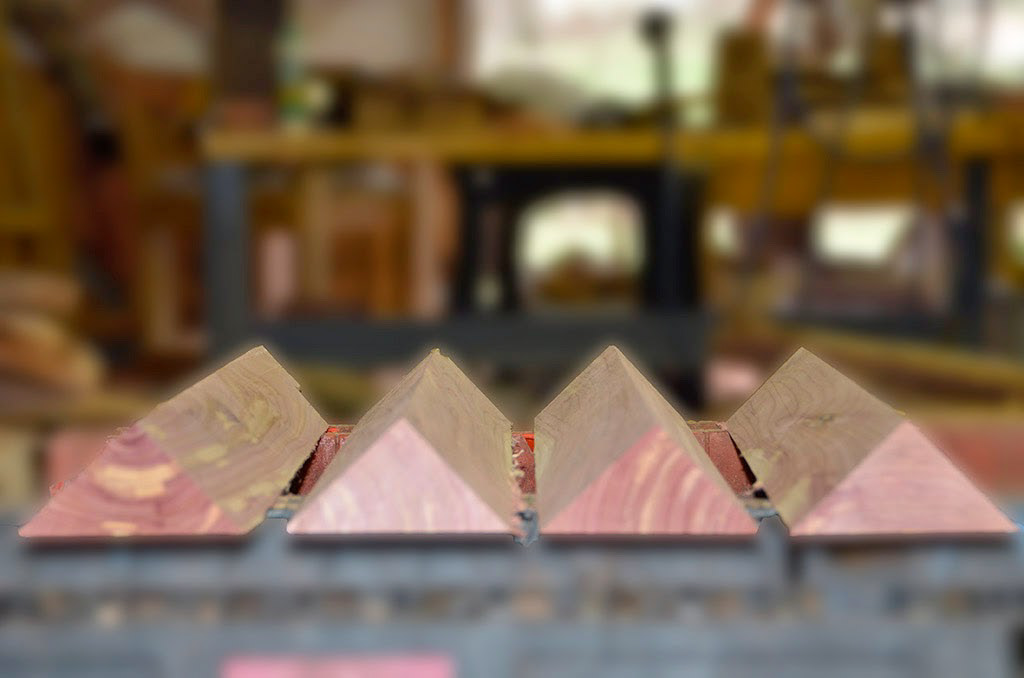
Then Thao picked the straightest edge...
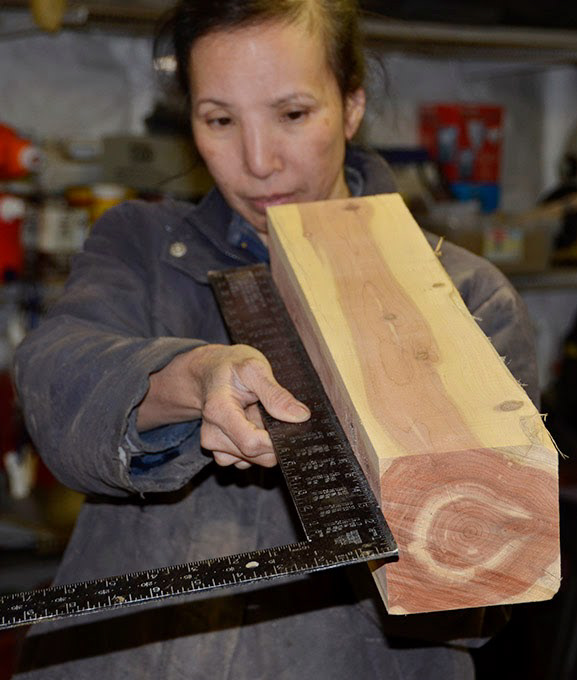
...and best 90 degree corner and marked them

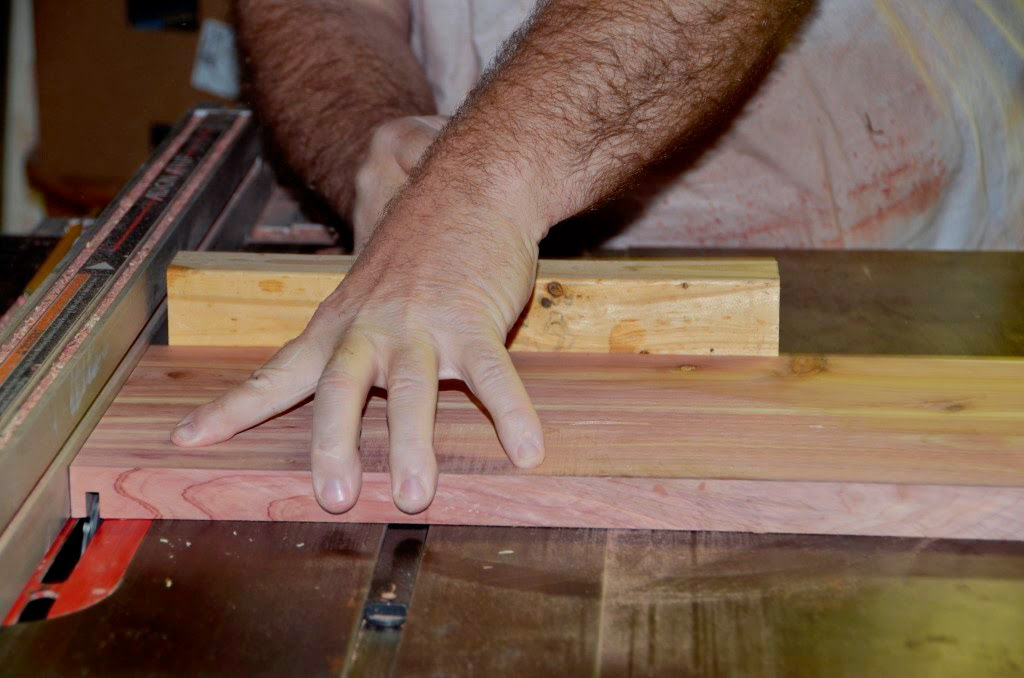
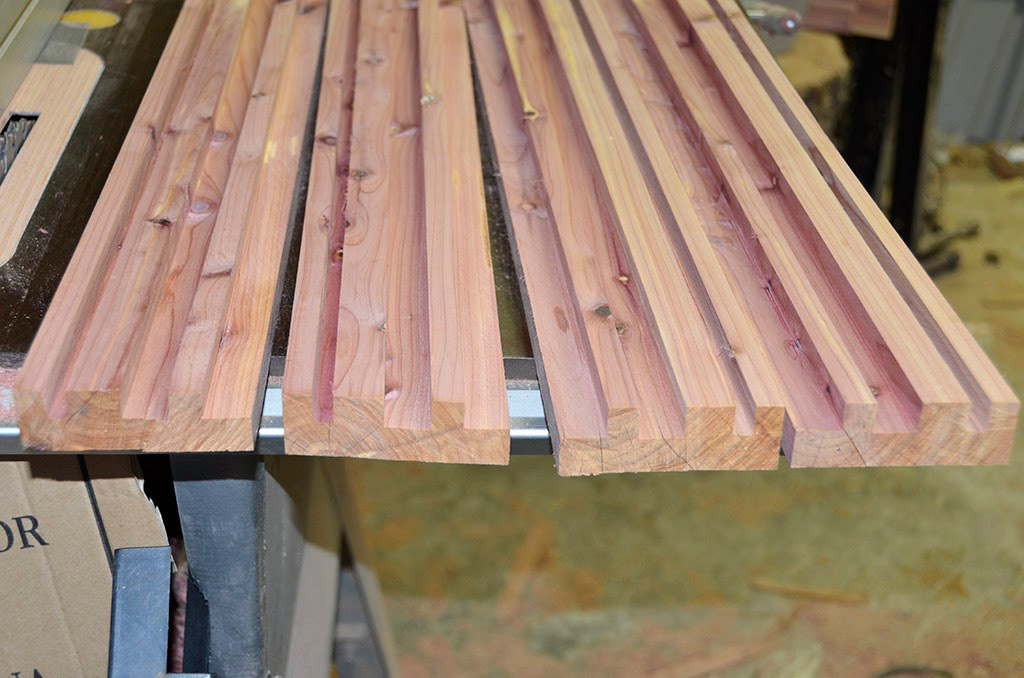
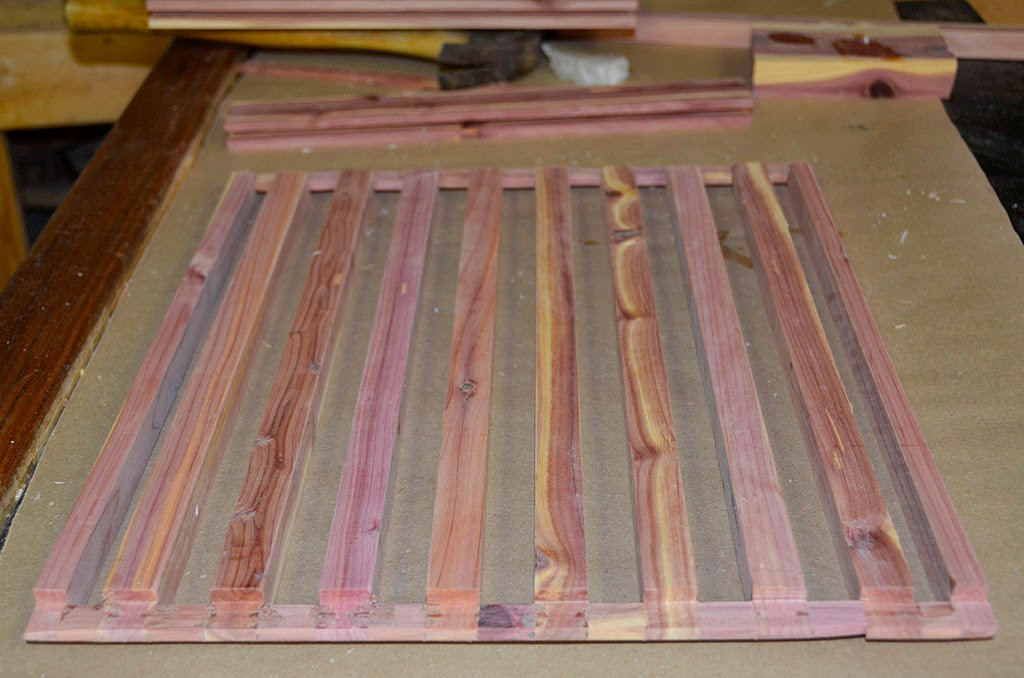
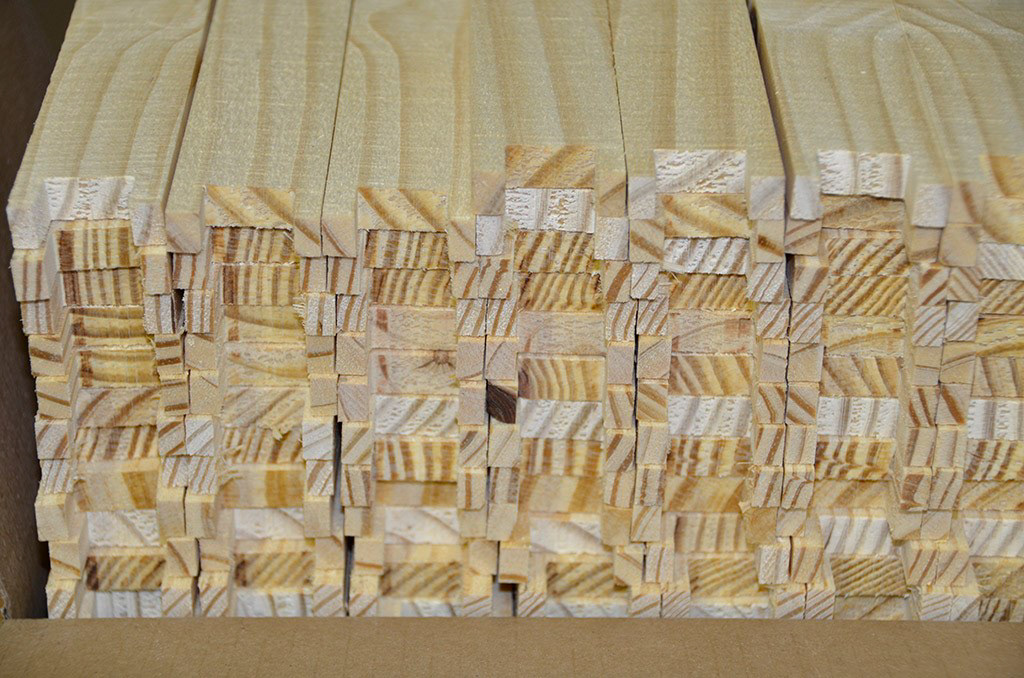
The cants were sliced into 1" 1/4 boards.

The logs we started with are not wide enough and the boards will have to be glues together to build the "medium" (the boxes that make the beehives).
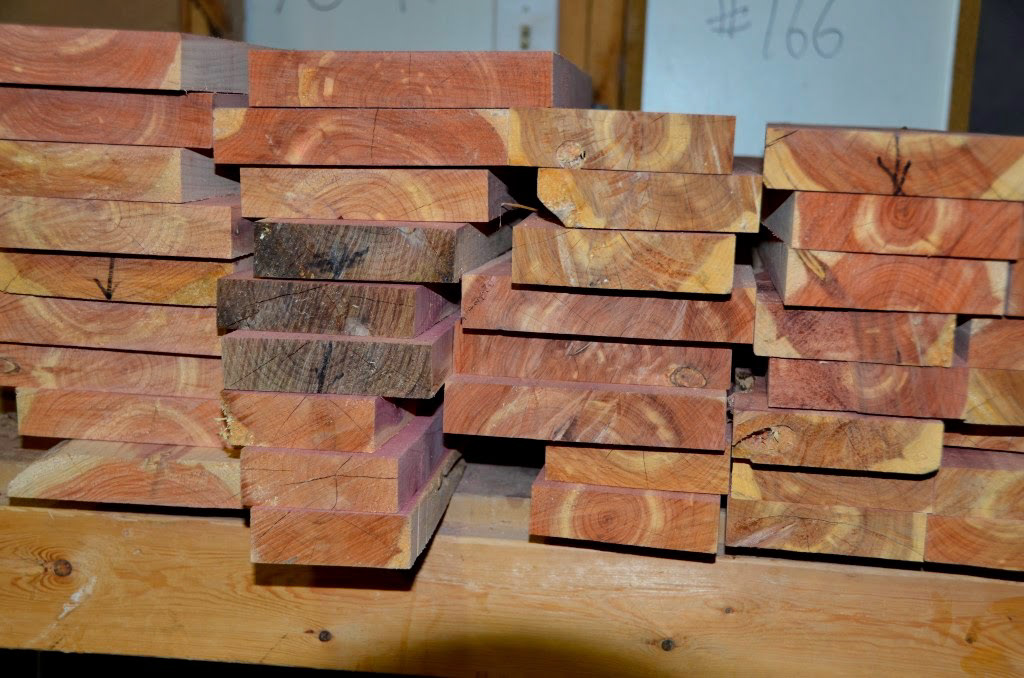
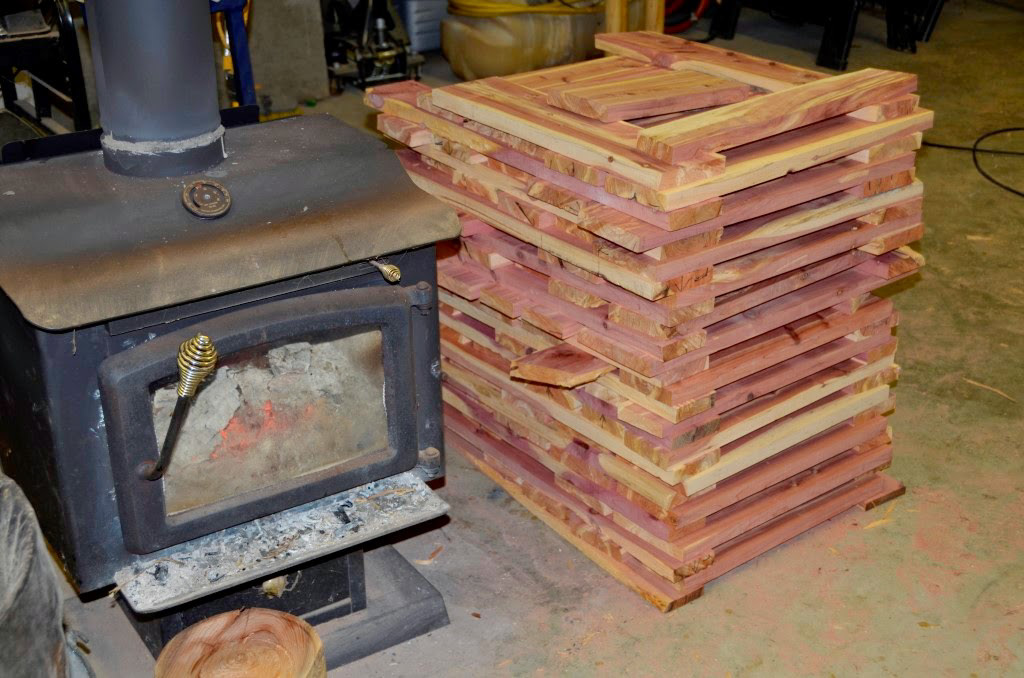
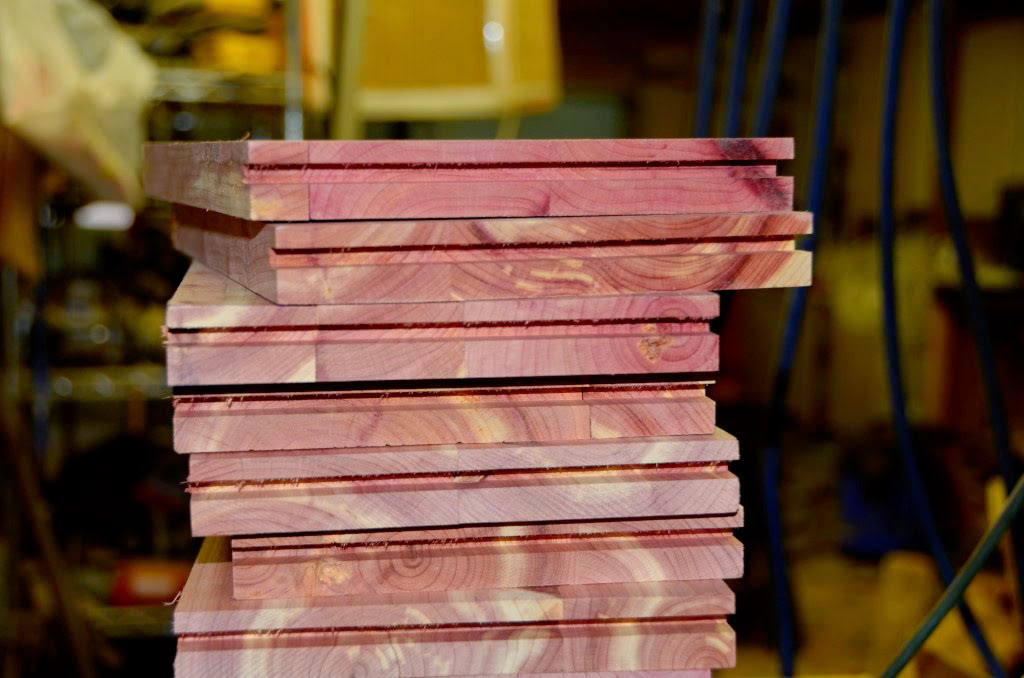
The boards, stacked but not edged yet.

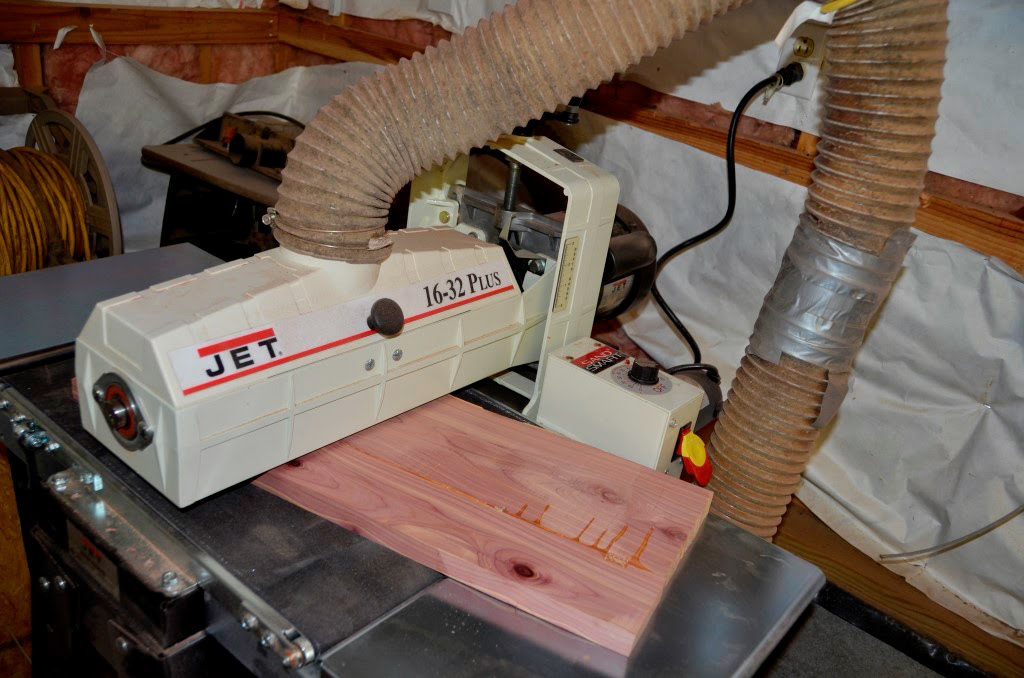
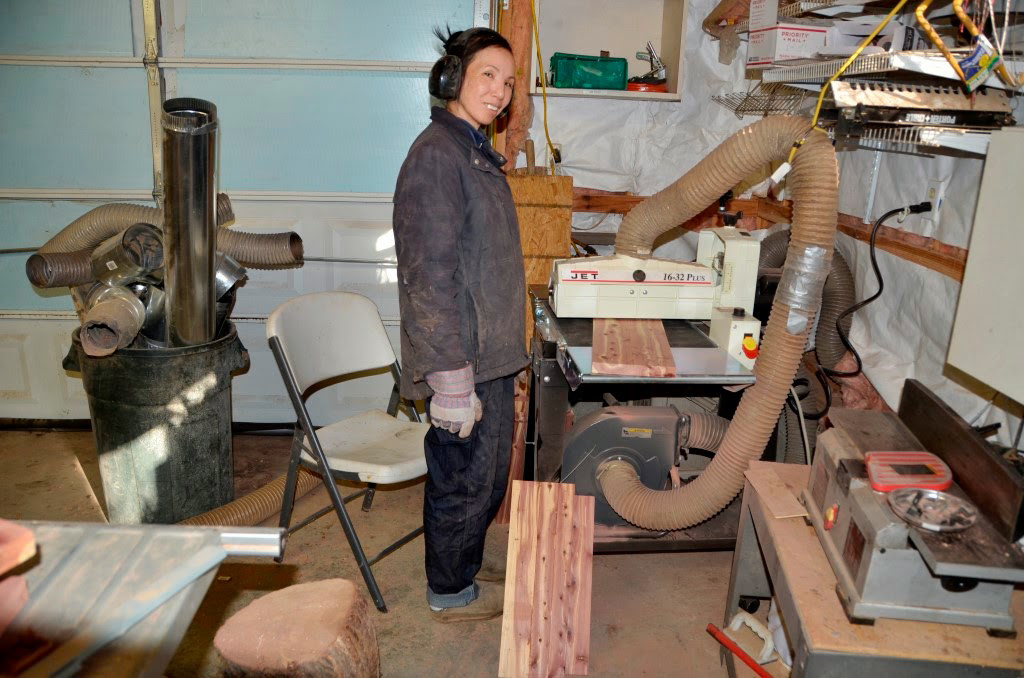
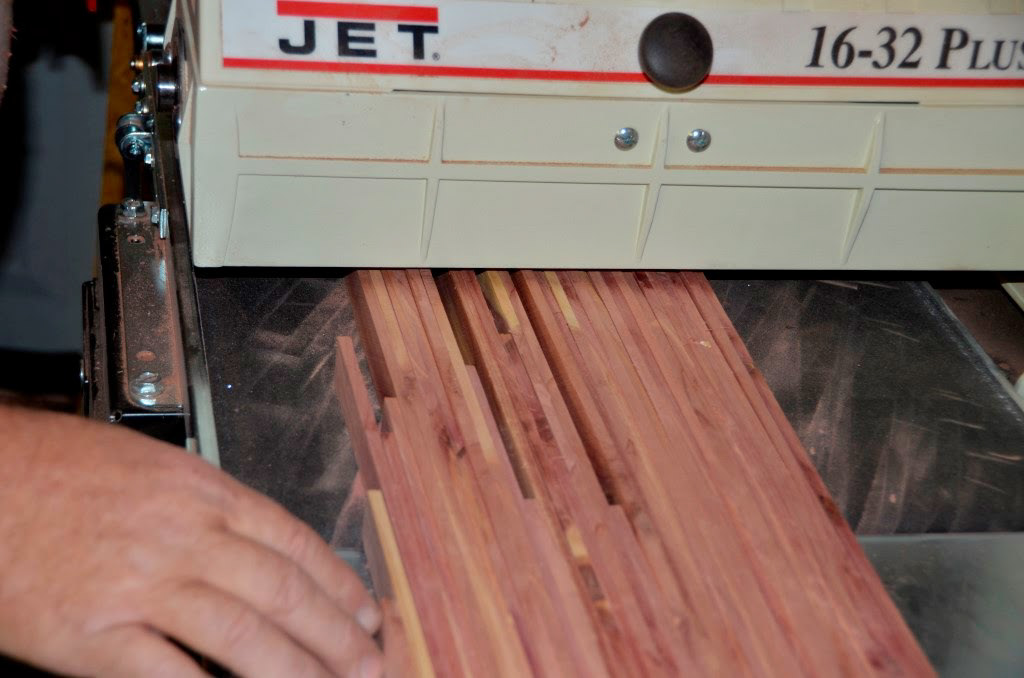
then we planed the boards both sides. I fed the boards
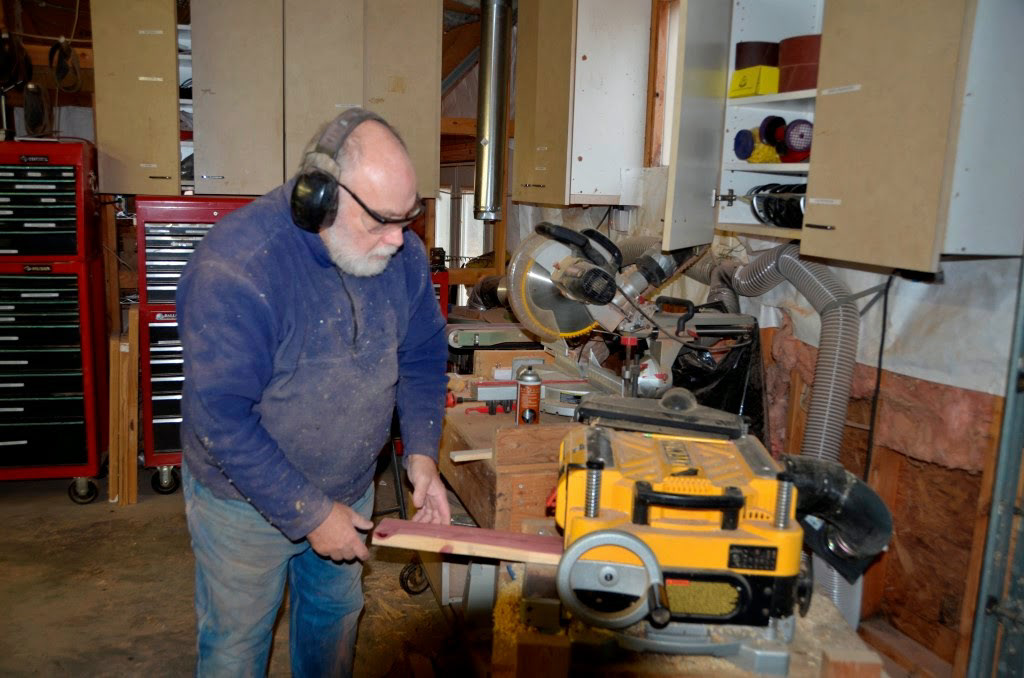
...while Thao sorted and organized them on the other side, very efficient!
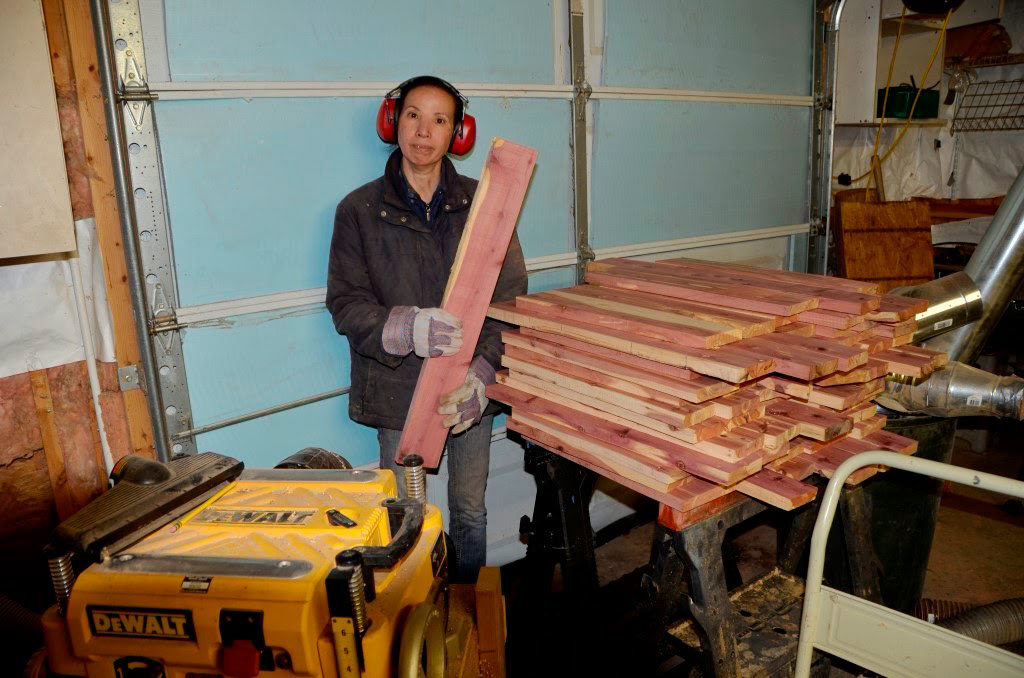
The boards after planning
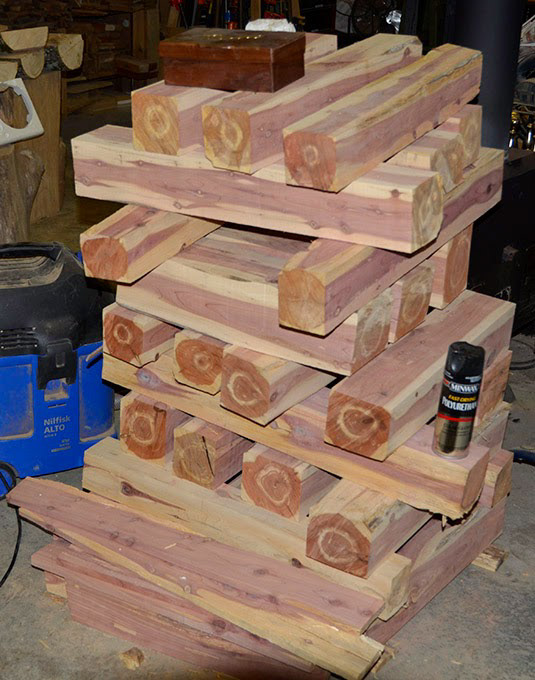
Stacked for the week.
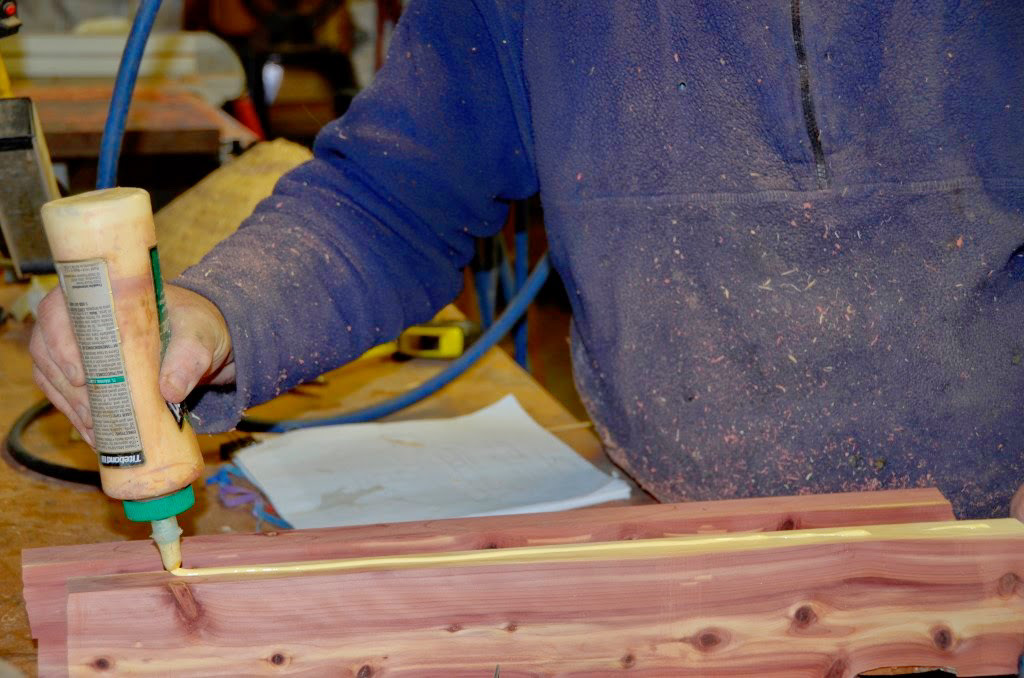
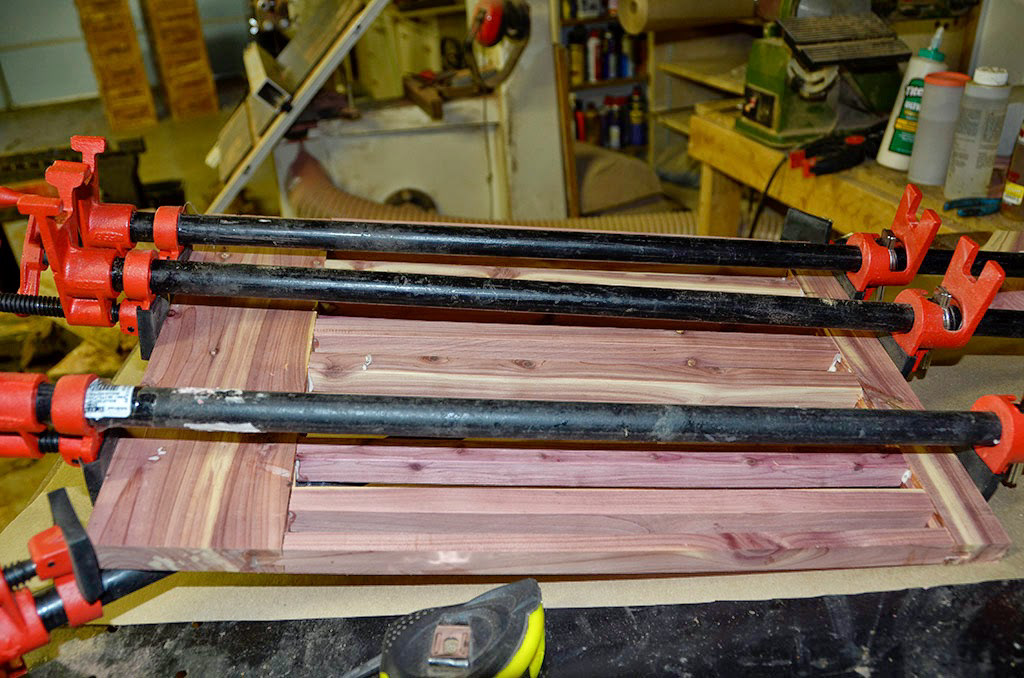
One edge trimmed, then plenty of glue!
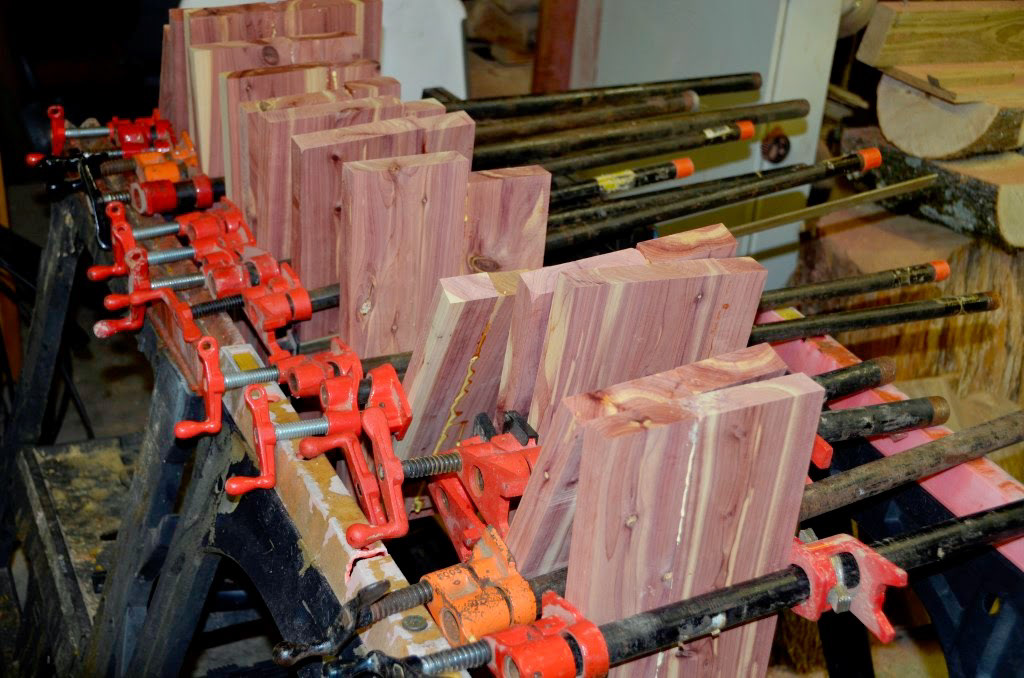
Drying! We had to do in batches as we did not have enough clamps.
Removing the excess glue.
Sanding the glued up panels.
A lot of sanding !
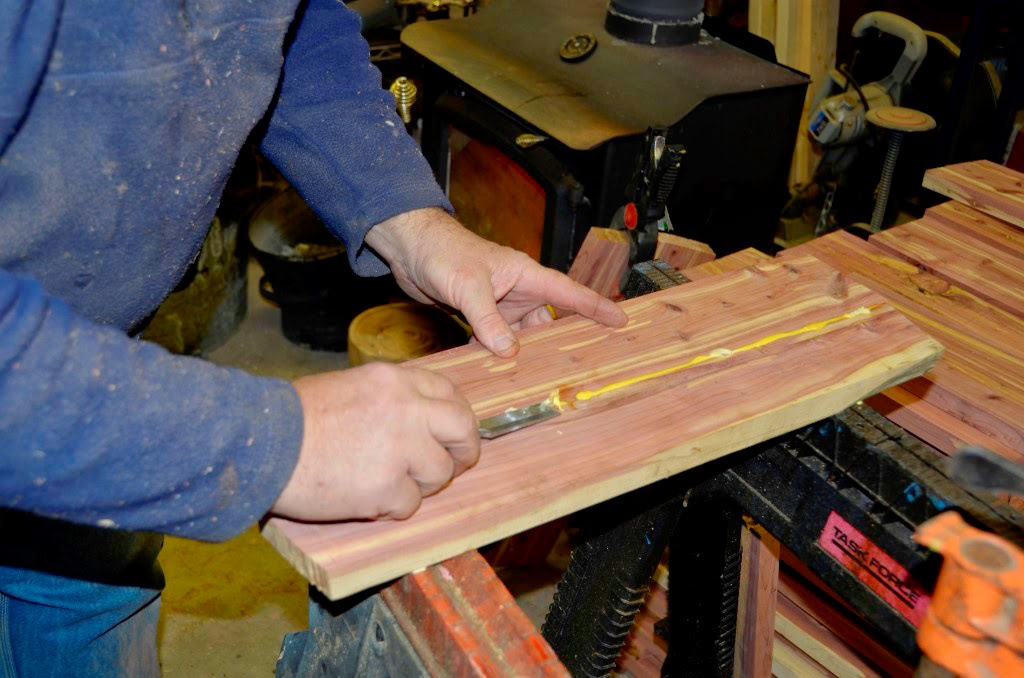
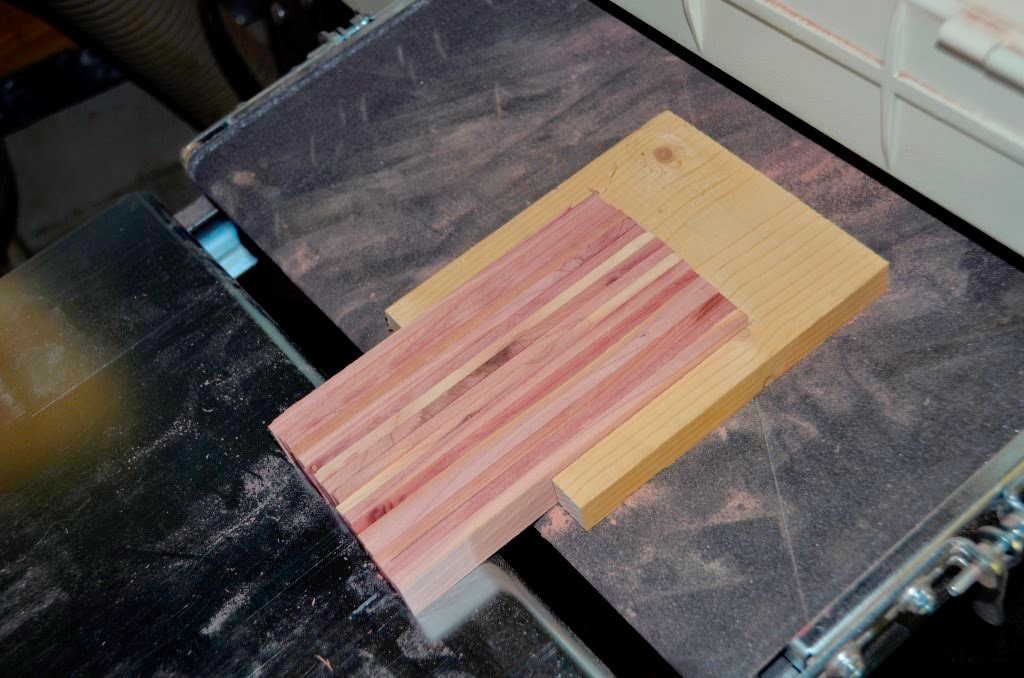
Trimming the first edge
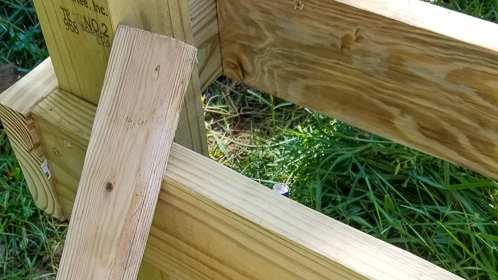
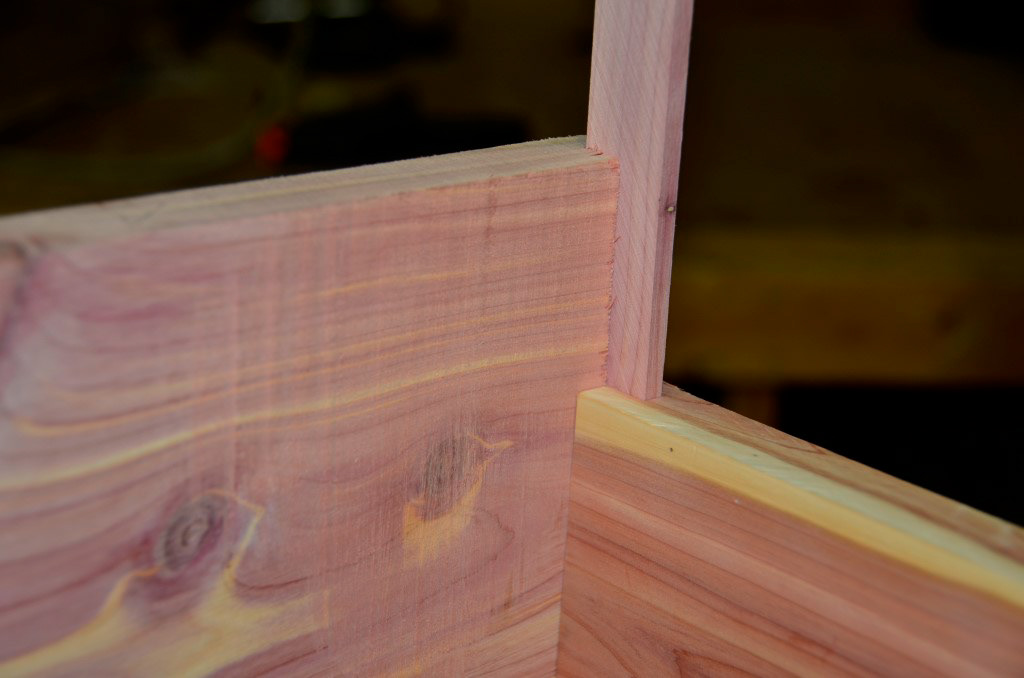
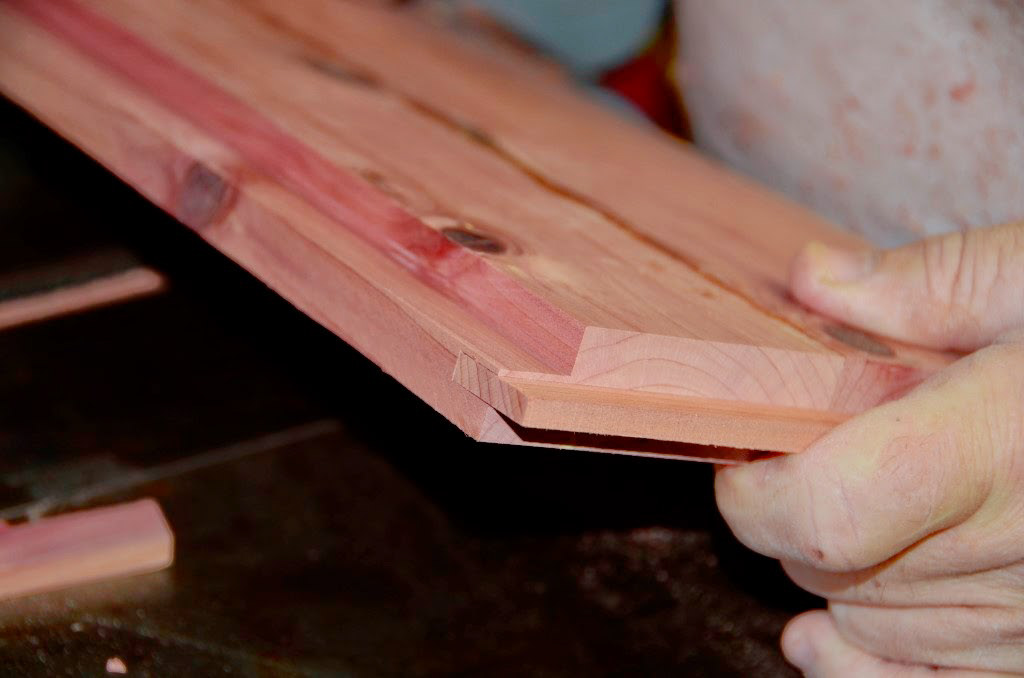
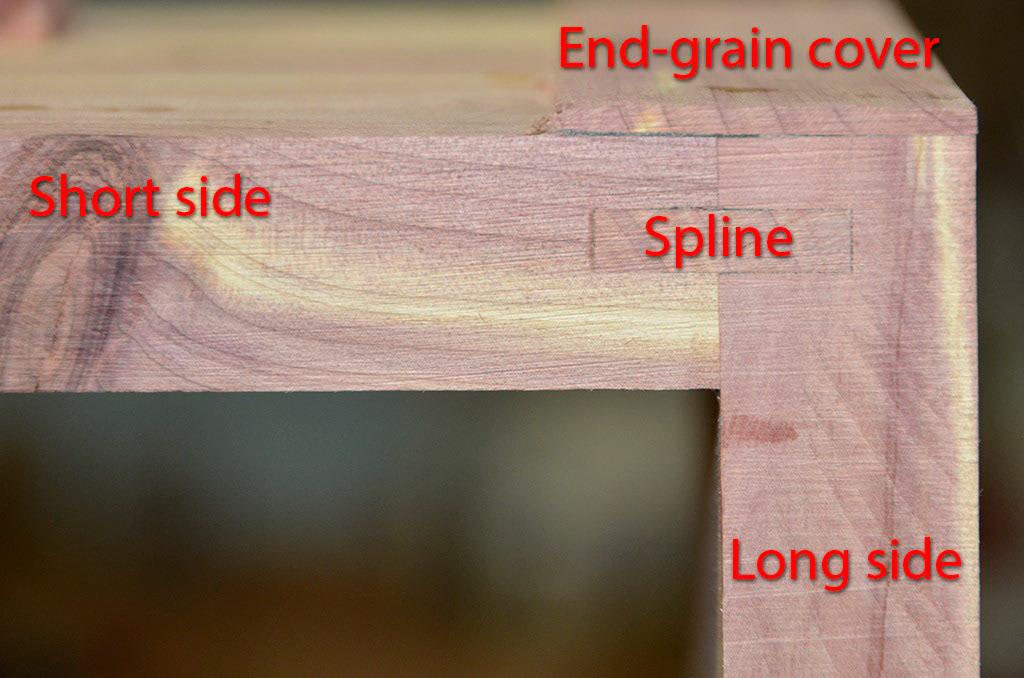
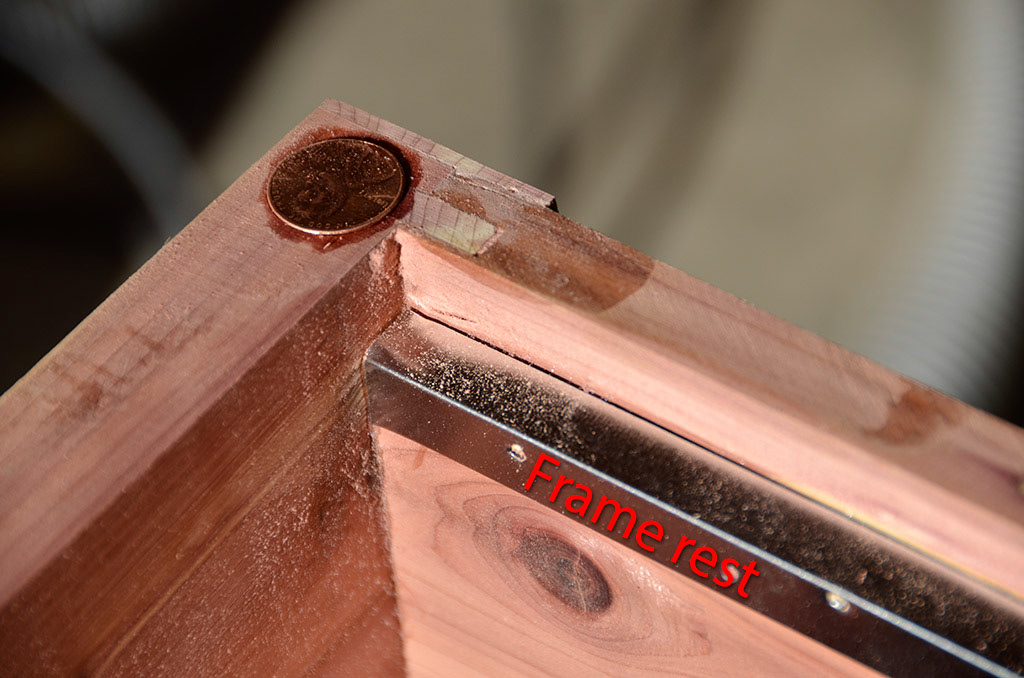
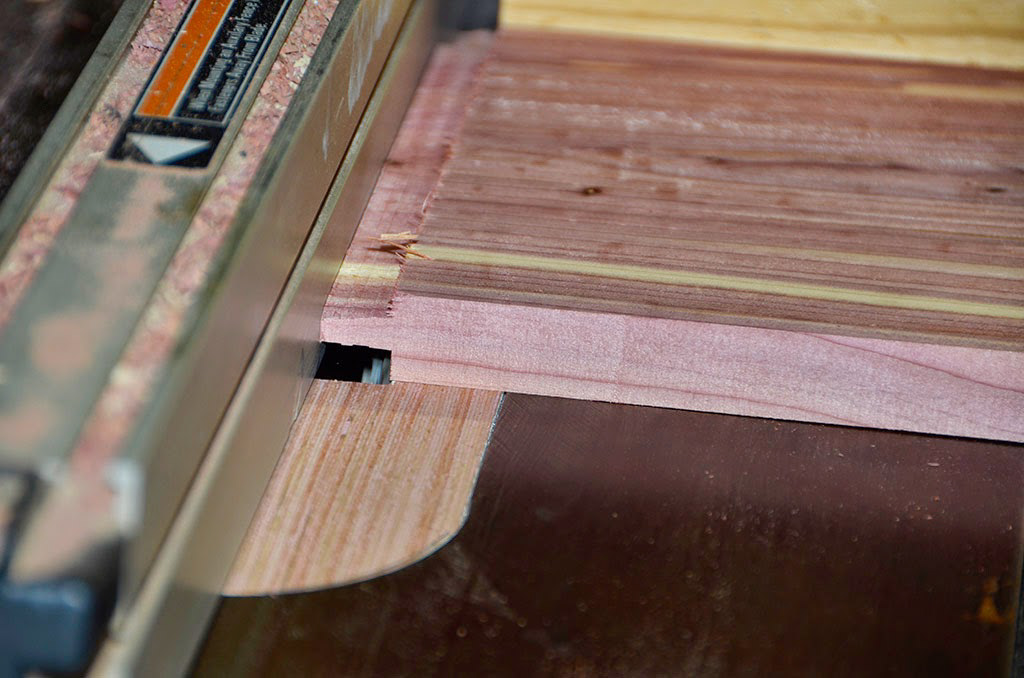
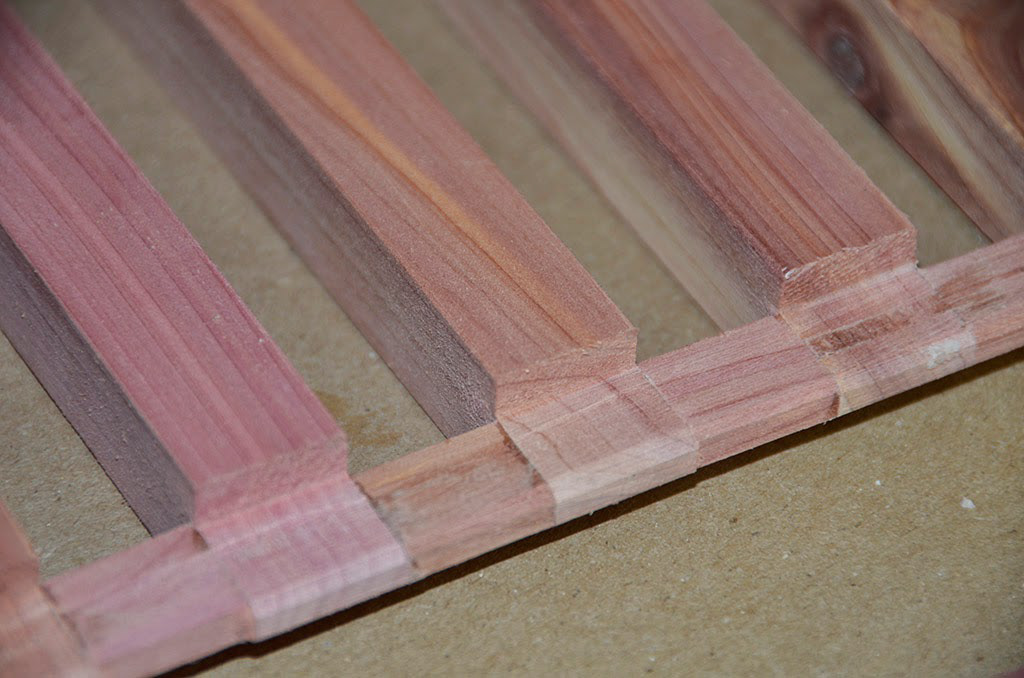
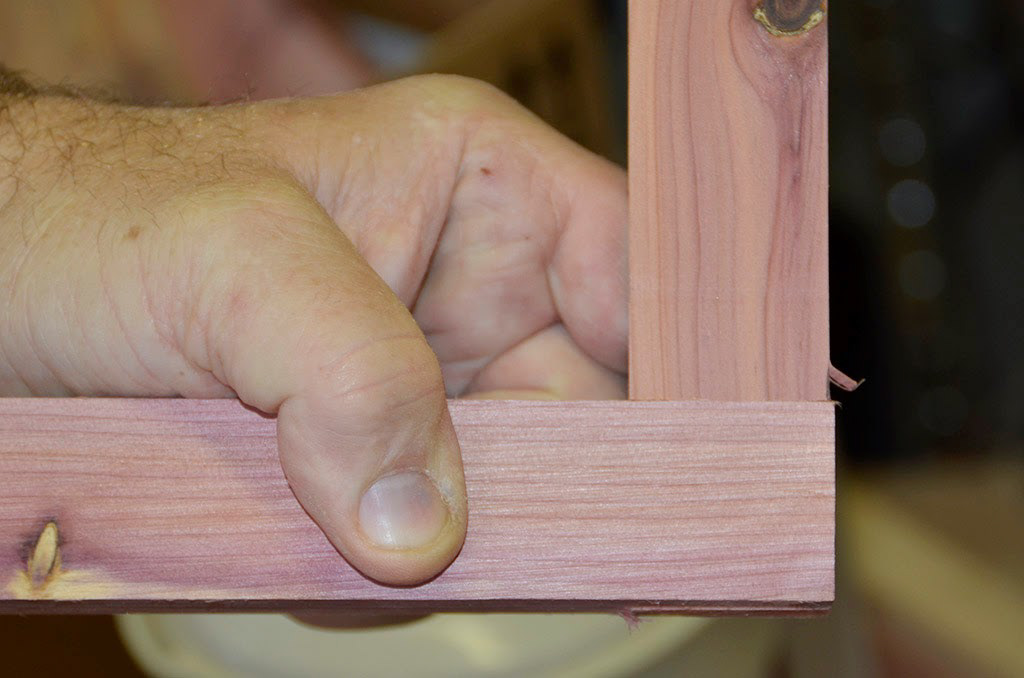
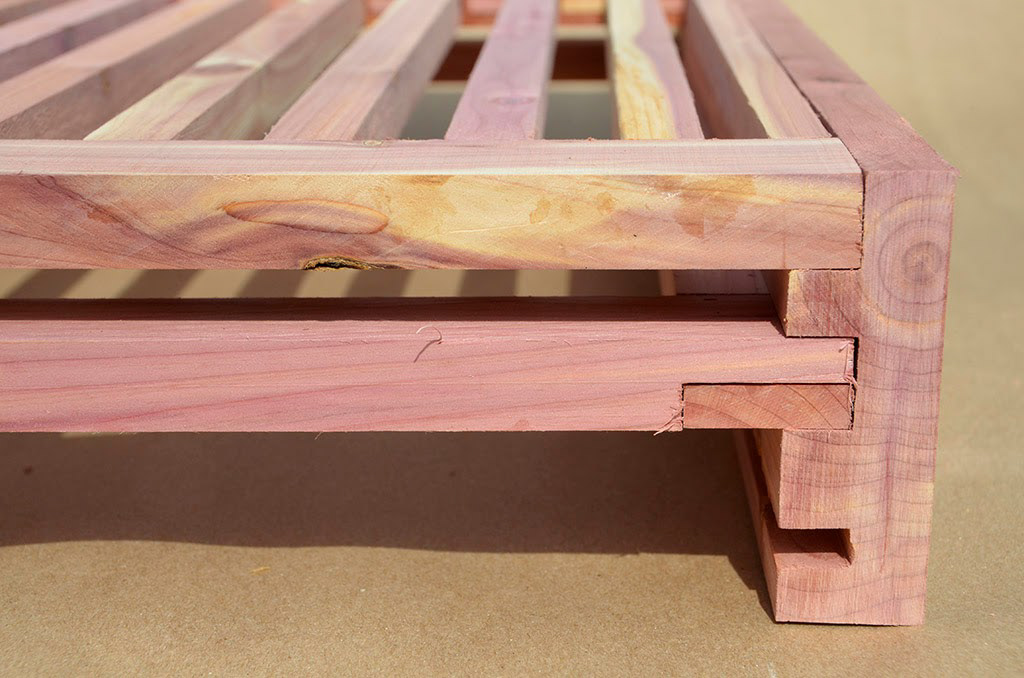
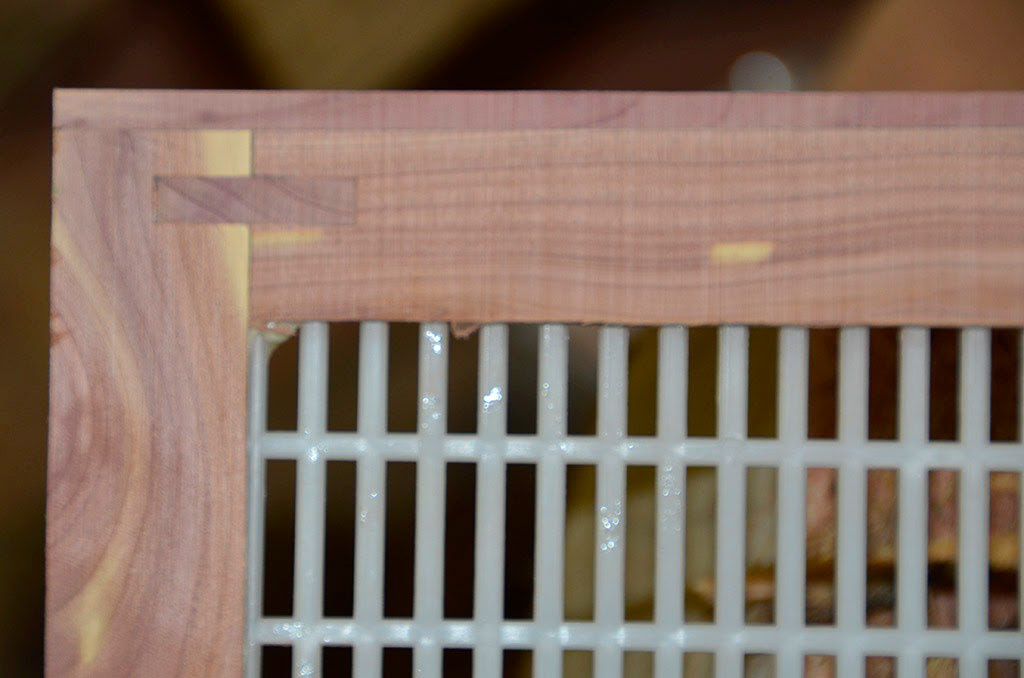
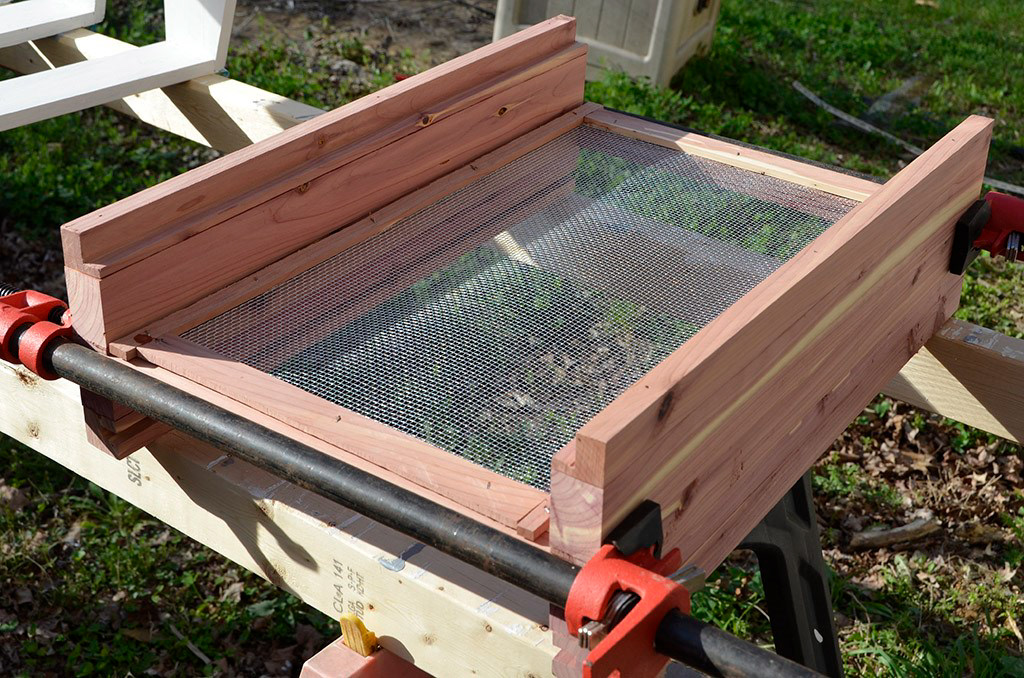
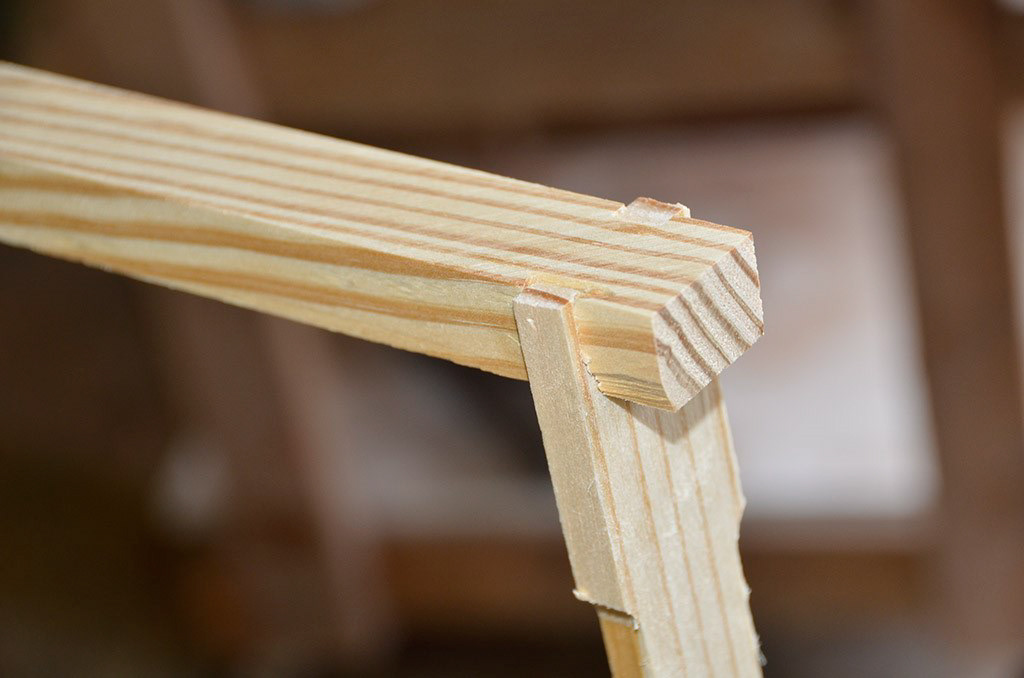
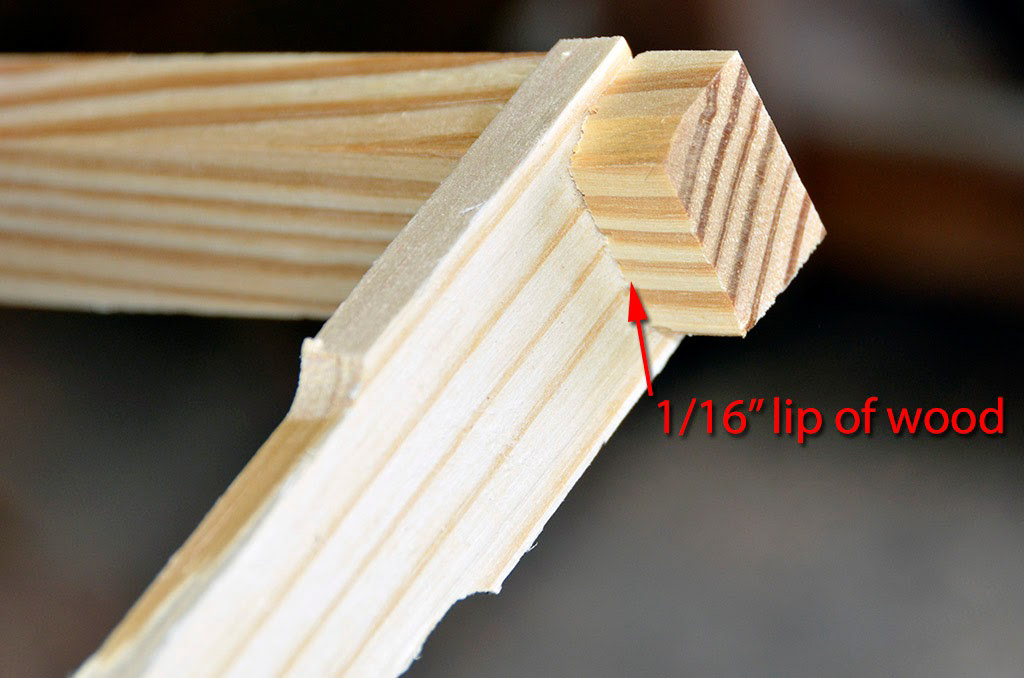
To join the short side to the longer side, there is a 1" wide, by 1/4" thick spline, that fits in a dado cut in both sides of the joint. By using 1" thick board, the spline can be "hidden" behind a thin lip of wood (blue arrow) that is on the vertical side of the frame rest
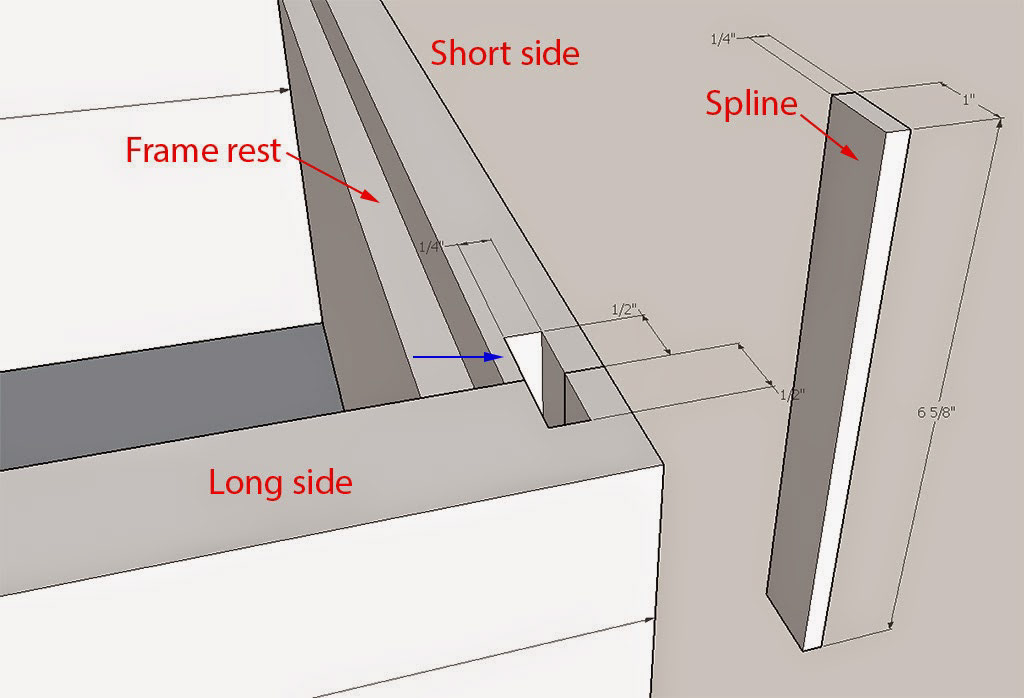
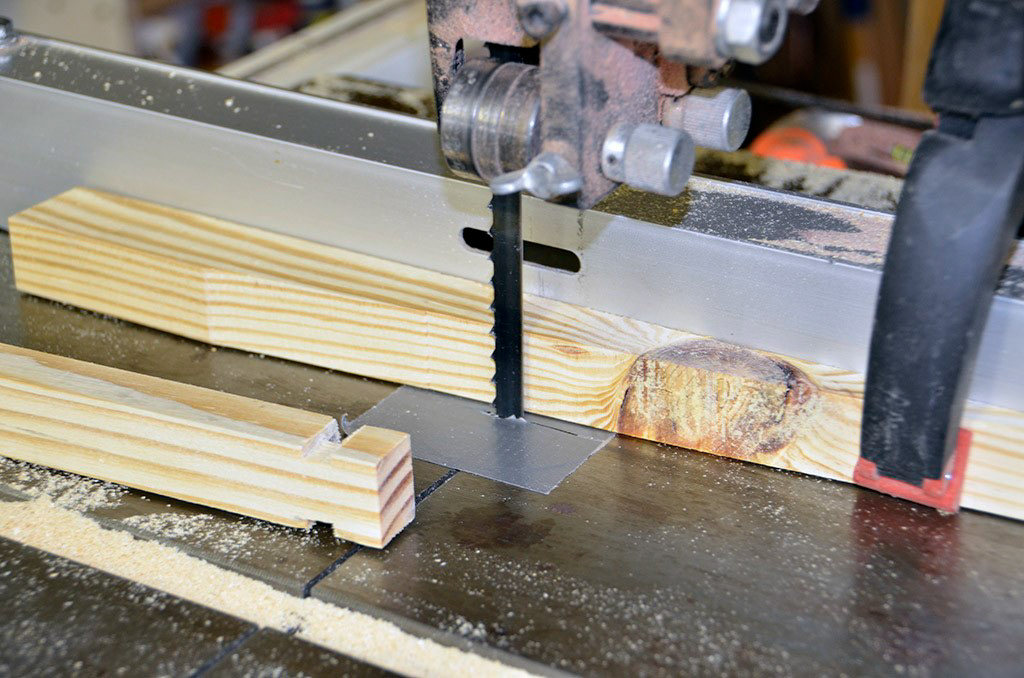
Cutting the dado at the end of the long boards
The dado on the short ends is cut with the board vertical. I should have used a "vertical tenon jig", but the boards are pretty short and light, and the ad-hoc push block, did a great job of keeping the board from moving. I used a small scrap behind the board to prevent tear out at the exit of the dado blade.
The dadoes cut in the short ends.
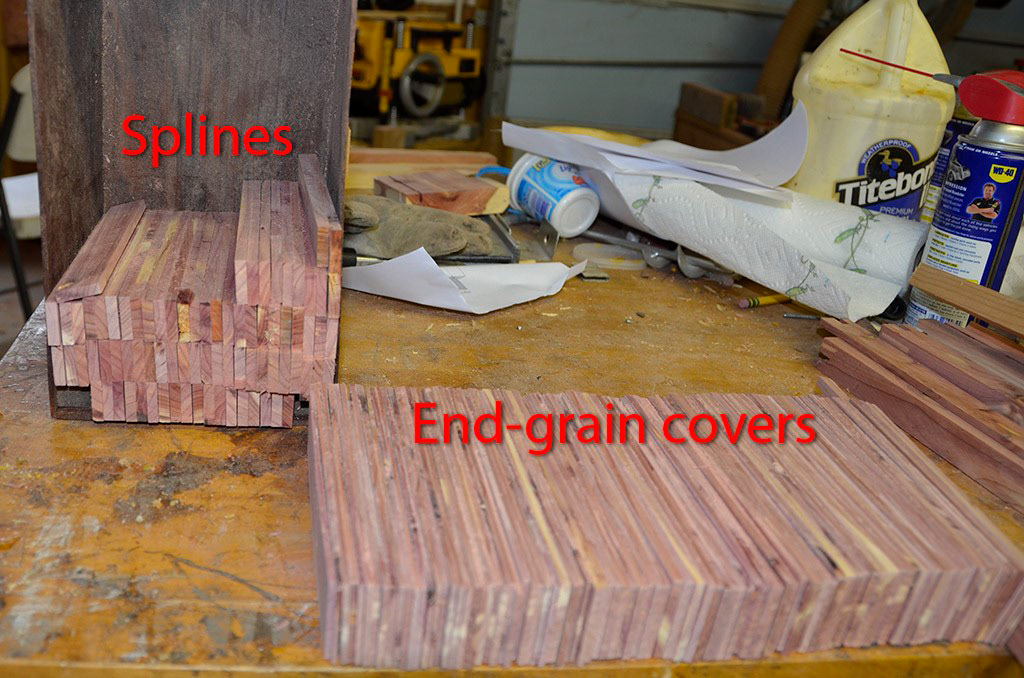
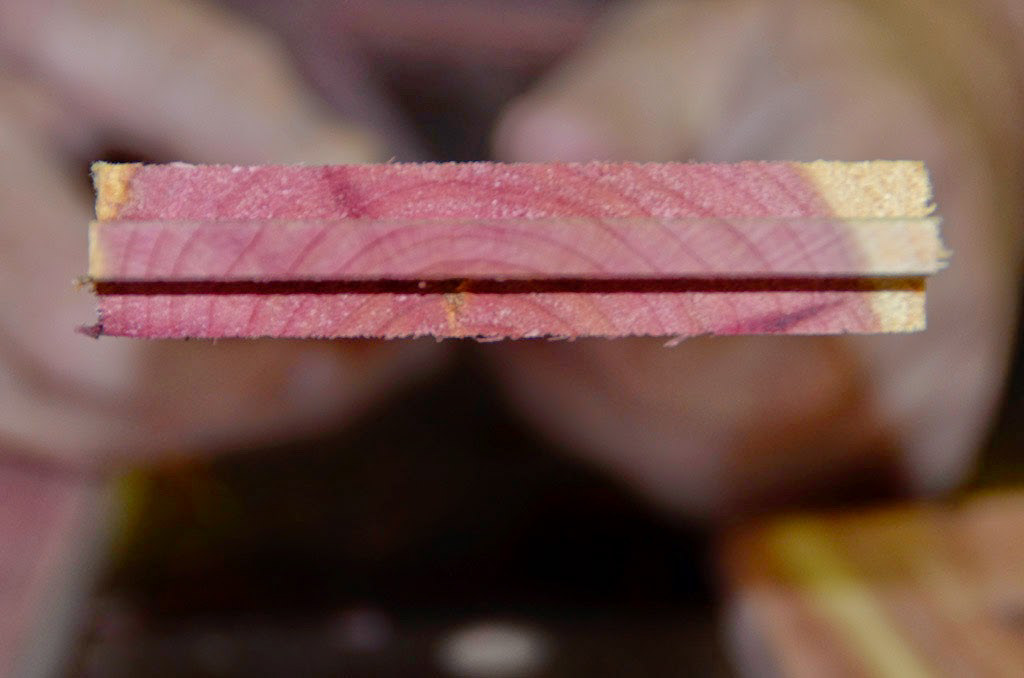
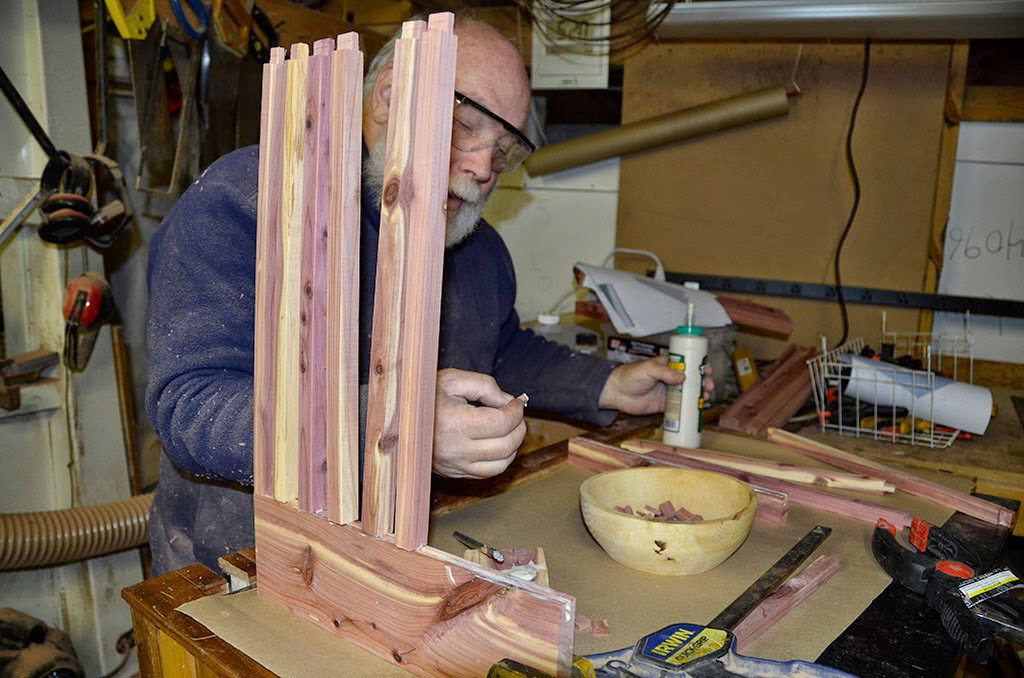
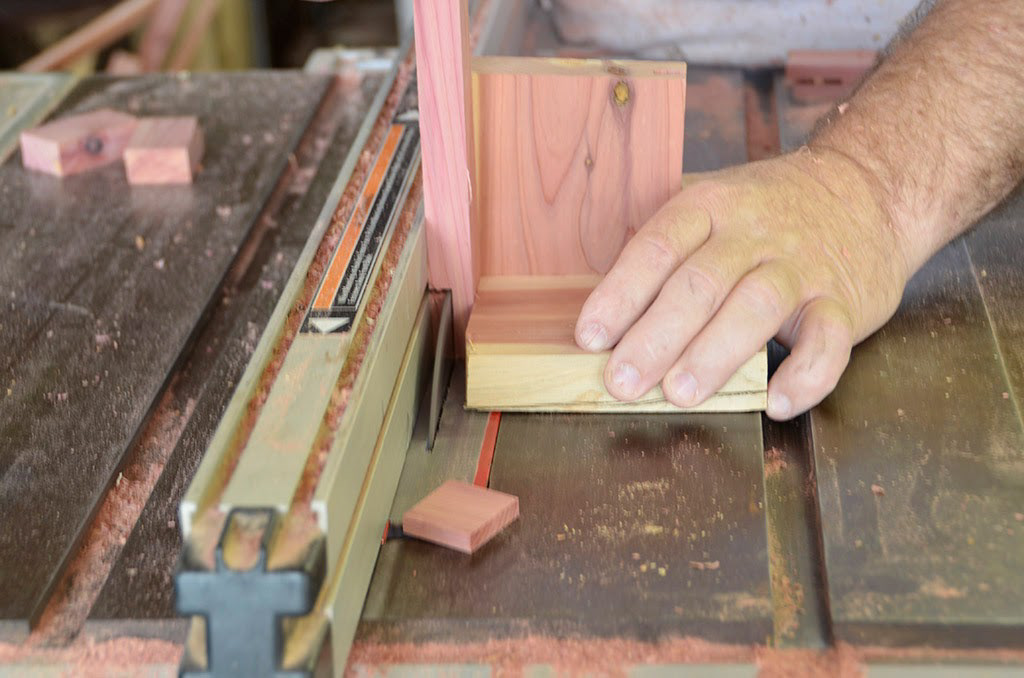
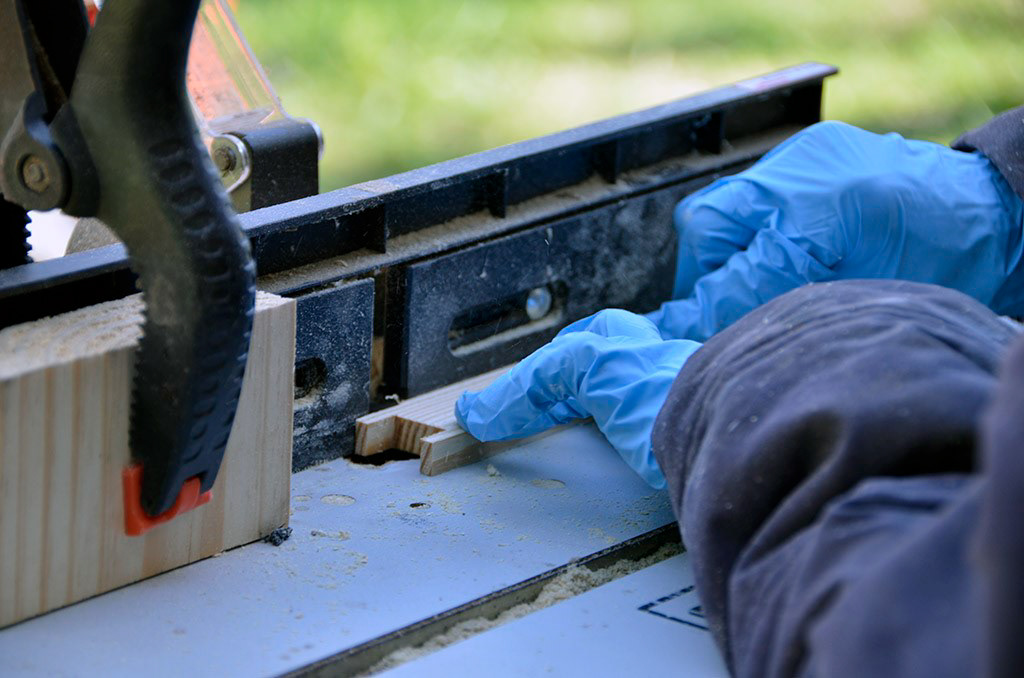
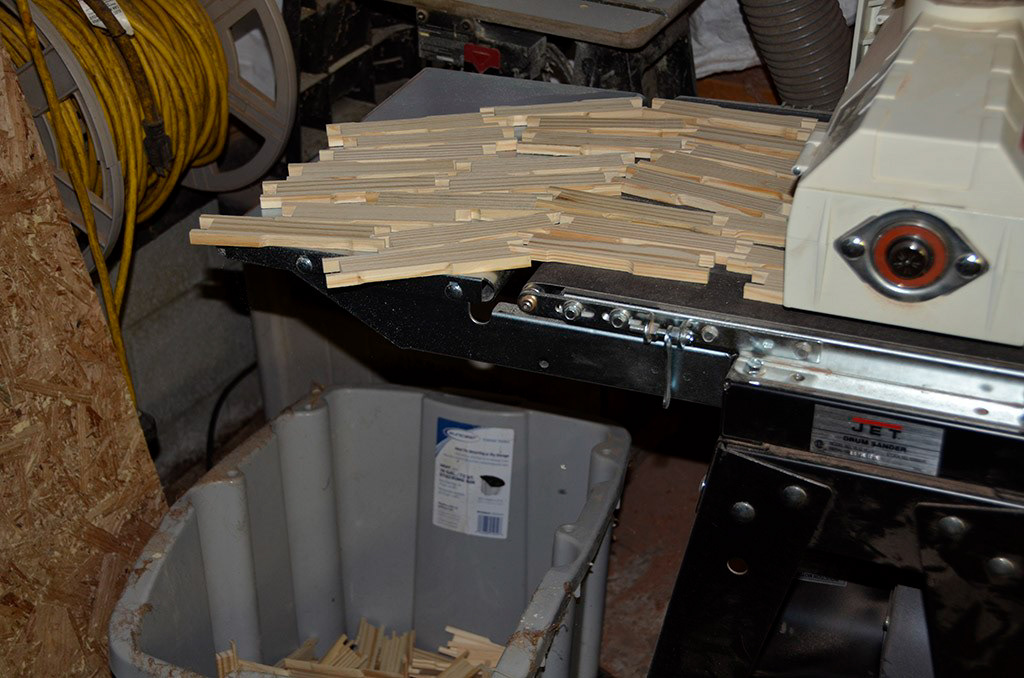
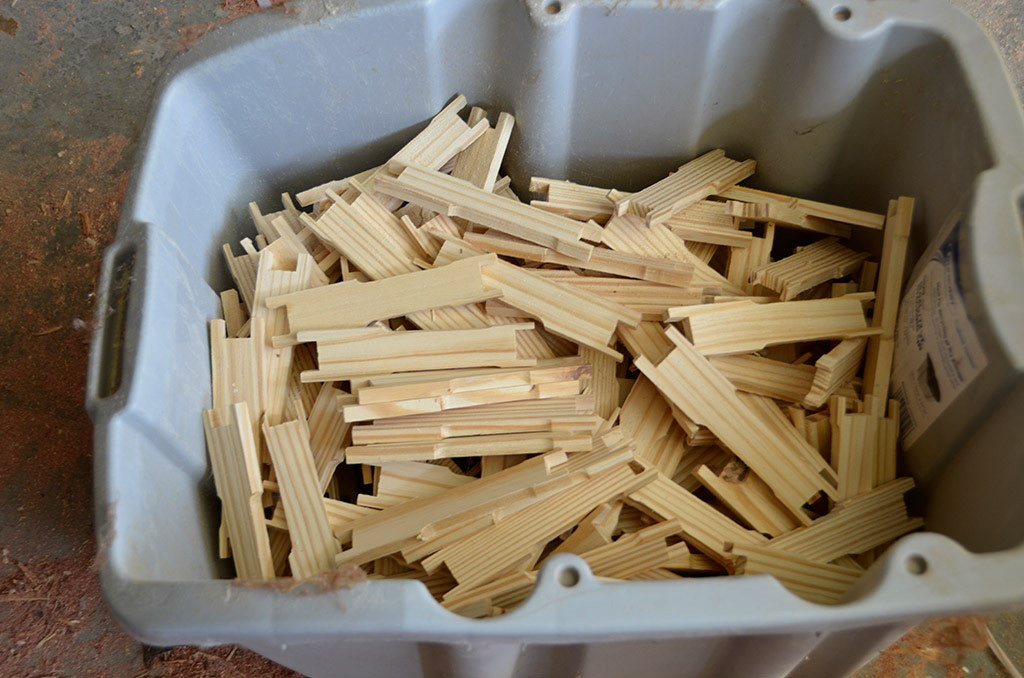
To make the splines, we cut many scraps into thin strips
which we first gang sanded
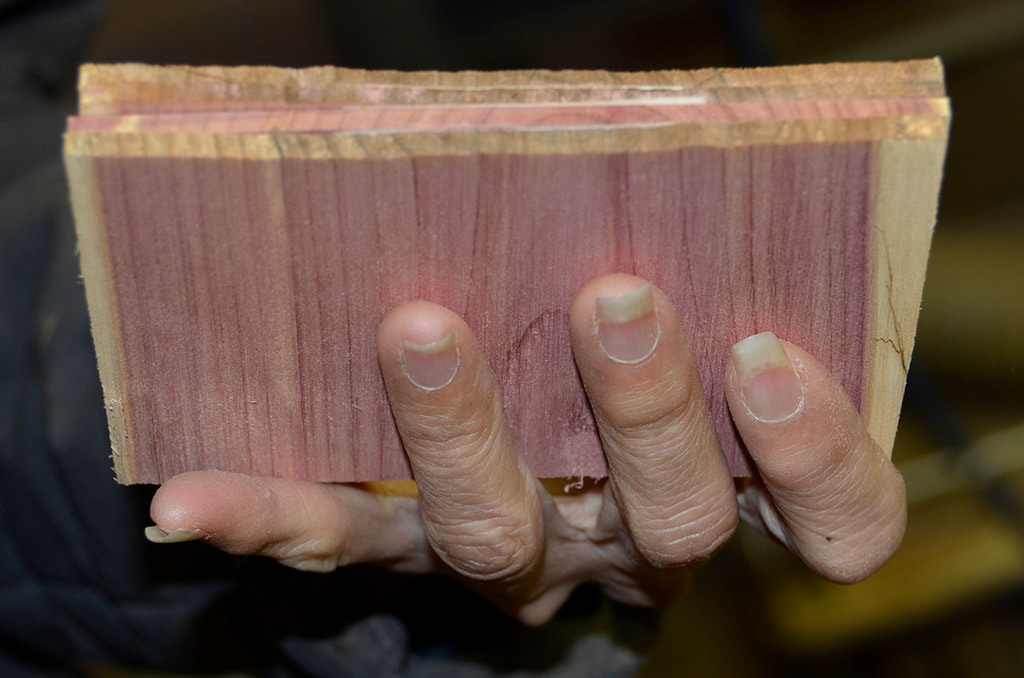
Then after Thao cut them all to "almost" size, they were sanded to final thickness with the small jig to hold them upright.
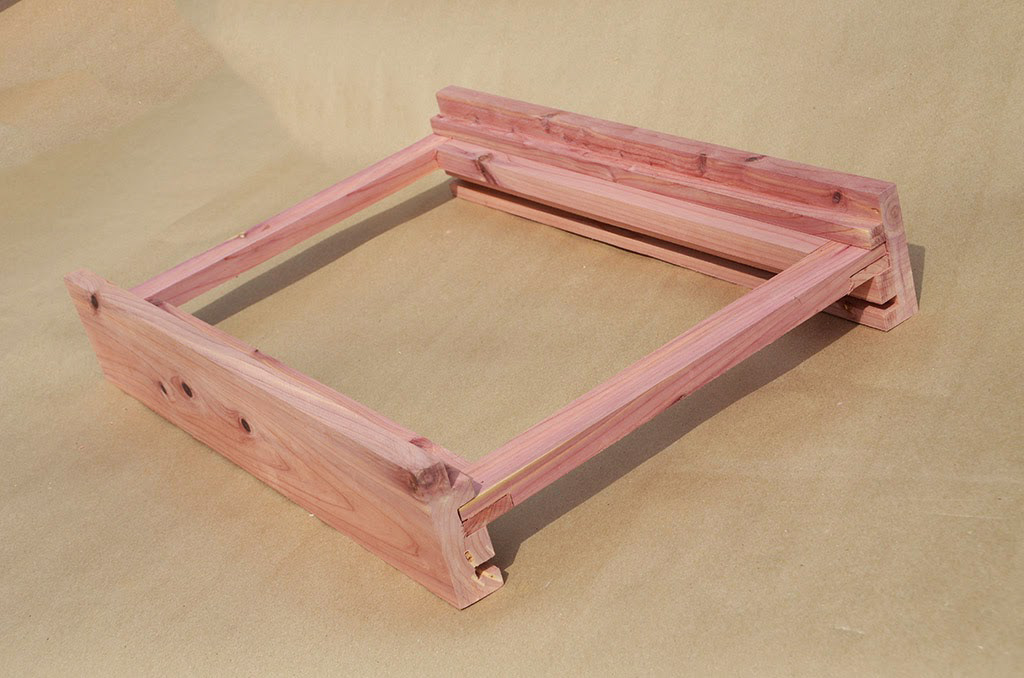
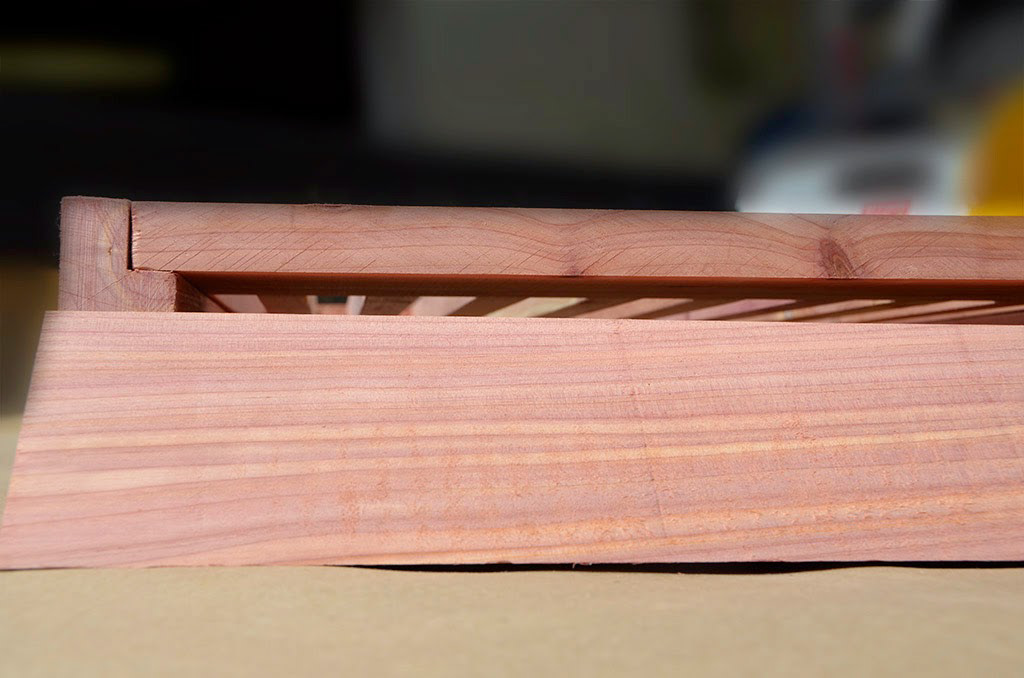
The sides finished "3 sides" (the last one will be trimmed after glue-up)
Fits pretty ok !
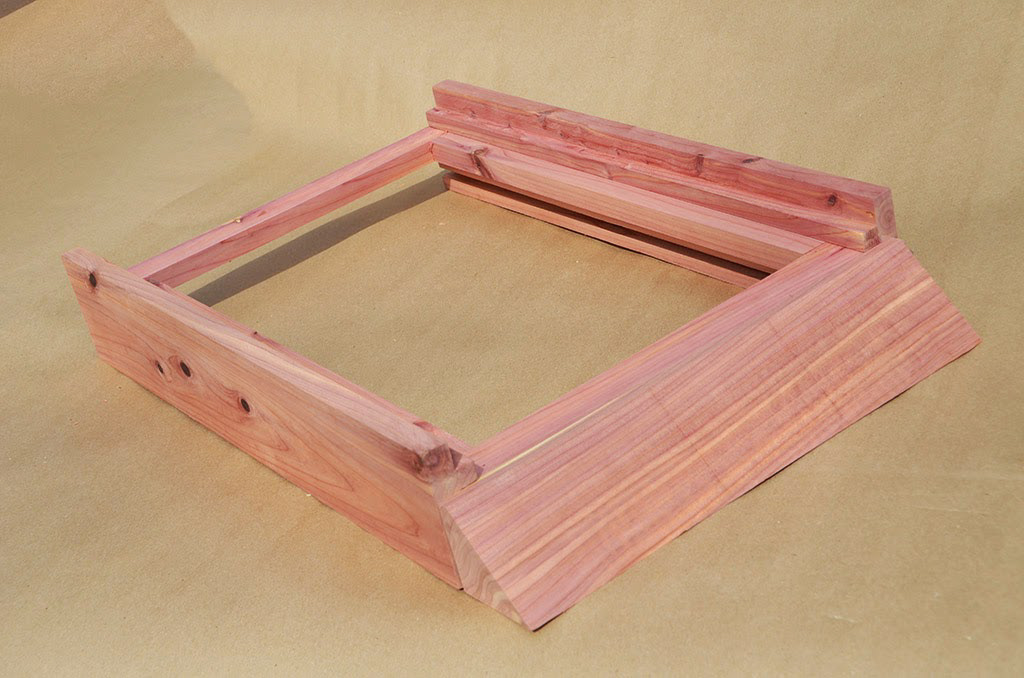
All 4 boards fits (the top will be trimmed later)
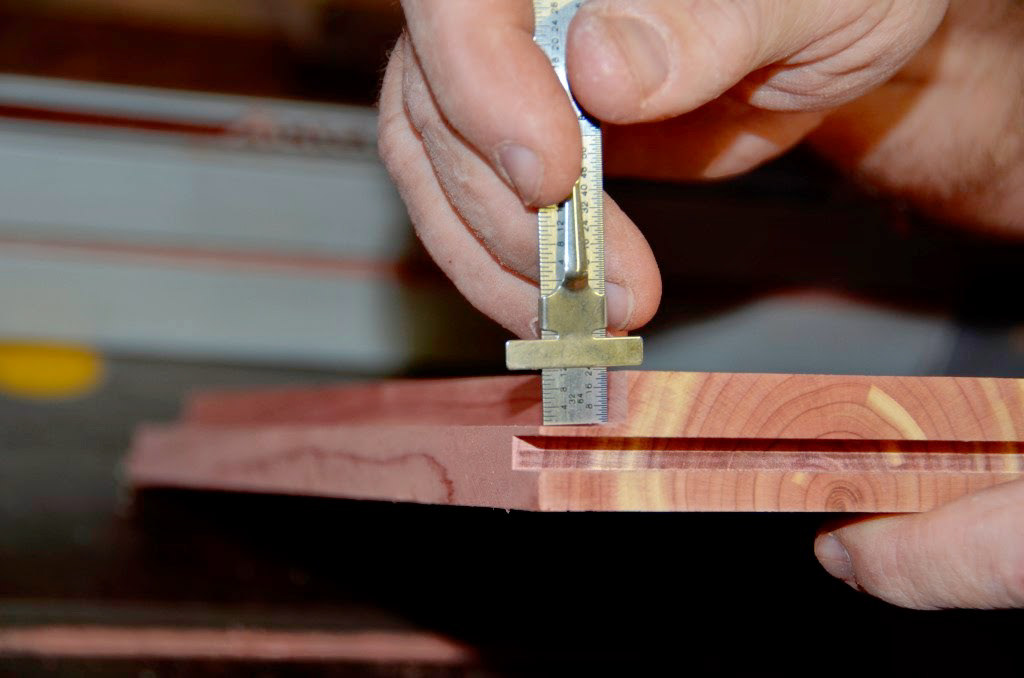
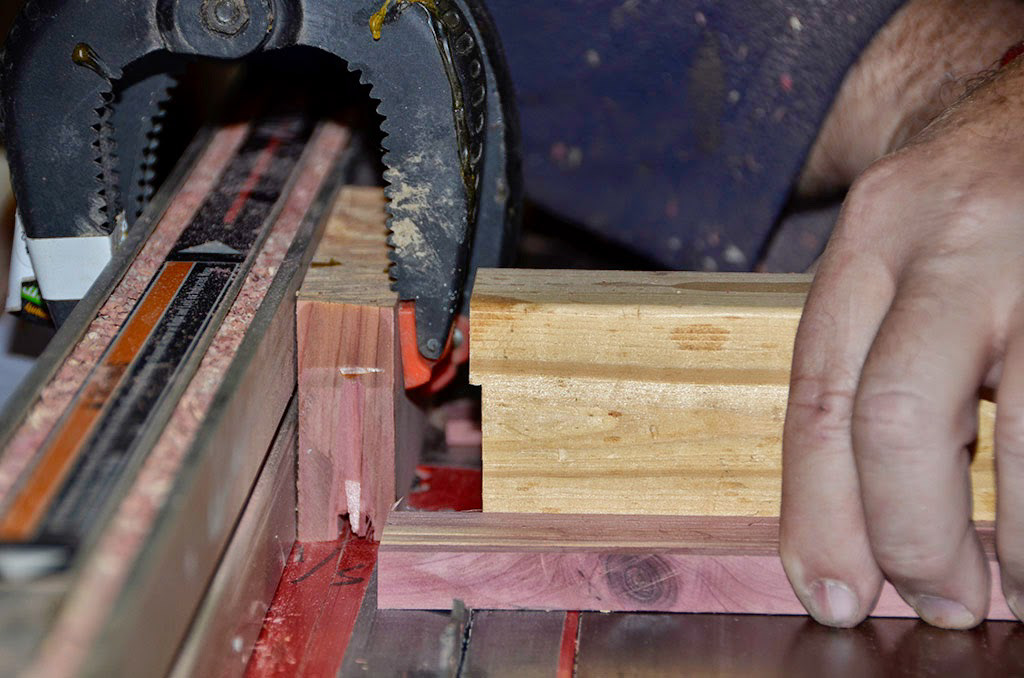
Time to cut the rabbet on which the frames will rest (see drawing before).
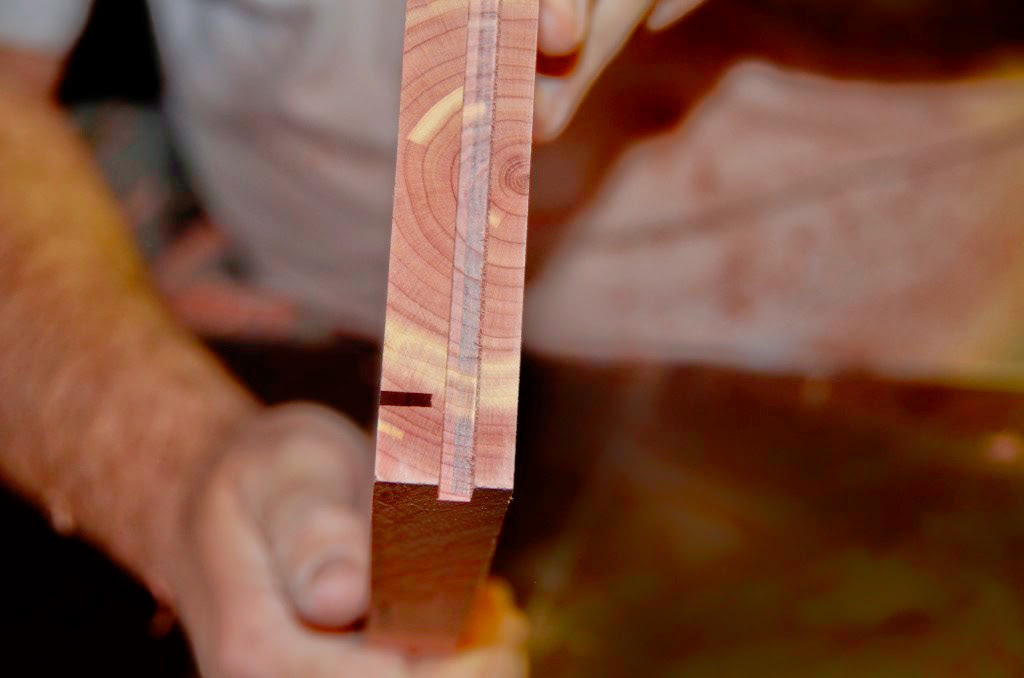
3/8" by 5/8". I am not used to that kind of precision ! For me anything below 1/2" is not worth considering, but I guess I have to make an exception.
The spline fits very well!
We prepared many splines to join the side. in order to avoid end-grain exposure to rain, we also cut scraps into many thin end-grain covers.
Close-up of the joint. The construction with spline and groove, pretty much assures that the joint will be correctly set at 90 degree.
And a bunch of hand grips. Traditionally handhold grips on beehives are carved into the wood. This has the advantage that the sides can be all flush with no protuberances. I worry that being a little clumsy --especially with gloves-- getting a good grips with those recessed handholds, would not be as easy as with protruding hand grips. The top is cut at 30 degrees to help shed rain. To speed up attaching the handles we made a jig that centered and aligned all the hand-grips. That jig did not look to fancy, so I labelled it, "just in case" one of us would consider it firewood :).

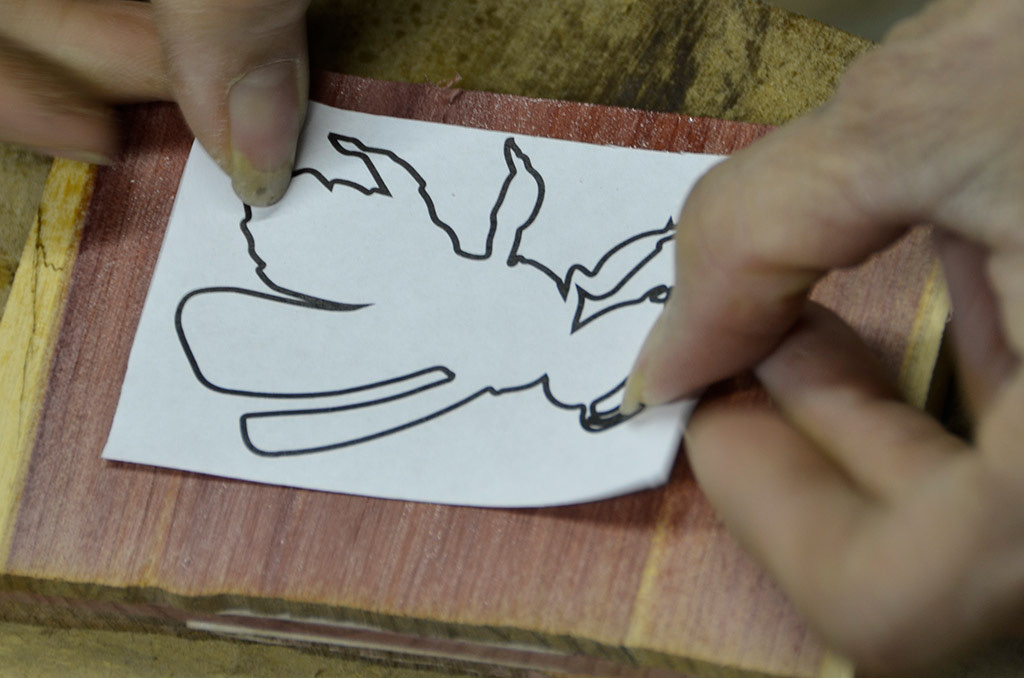
For decoration, Thao stacked some thin strips of cedar...
...using a drawing we modified,

...she glued it on the thin strips, and...
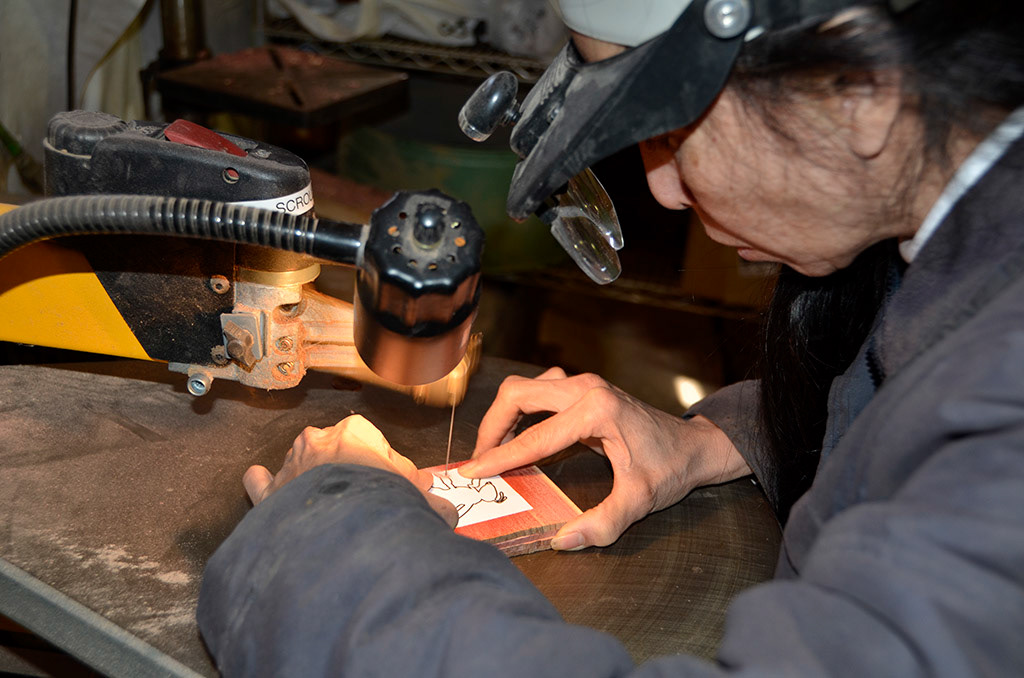
... cut them on the scroll-saw, ... a task she is much more precise then me at doing!
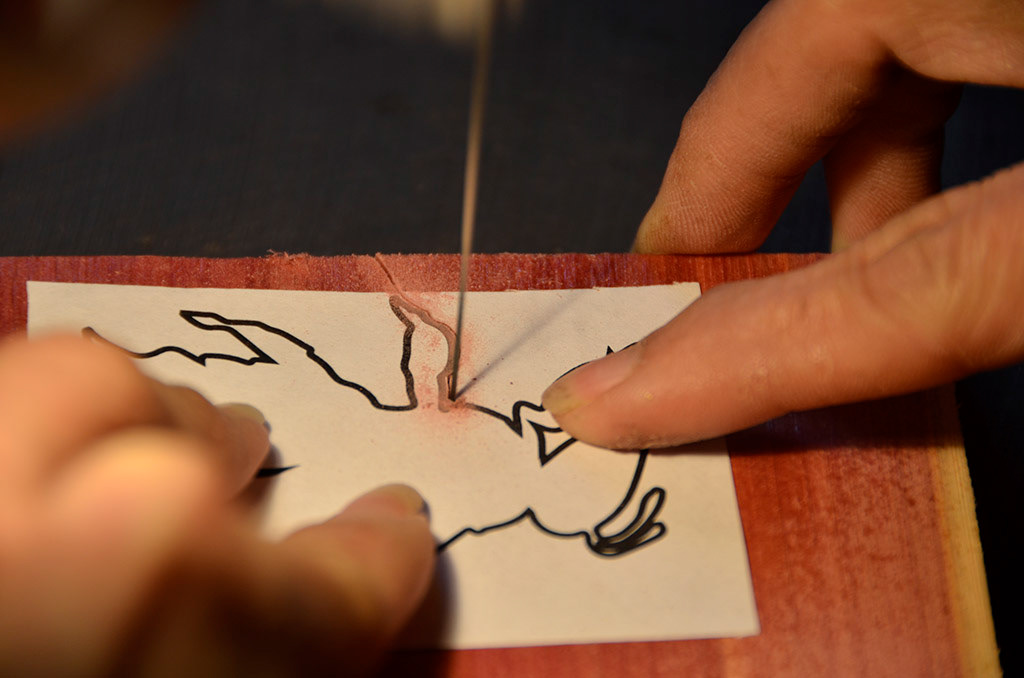
(note the "jewelers glasses!)
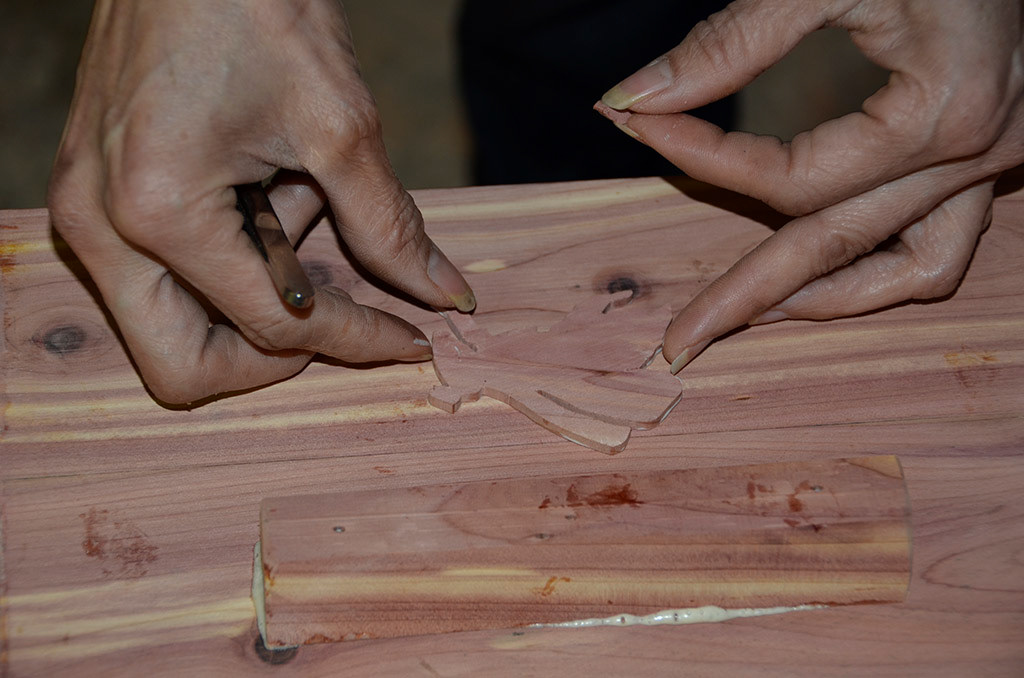
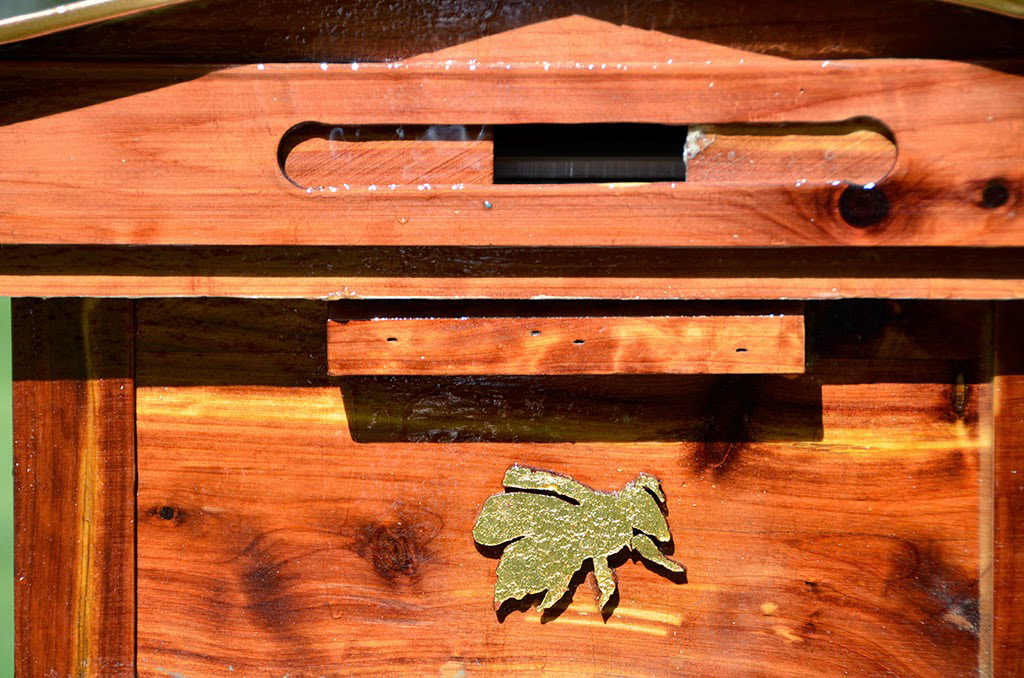
She then glued the bee to the short side of the "medium"
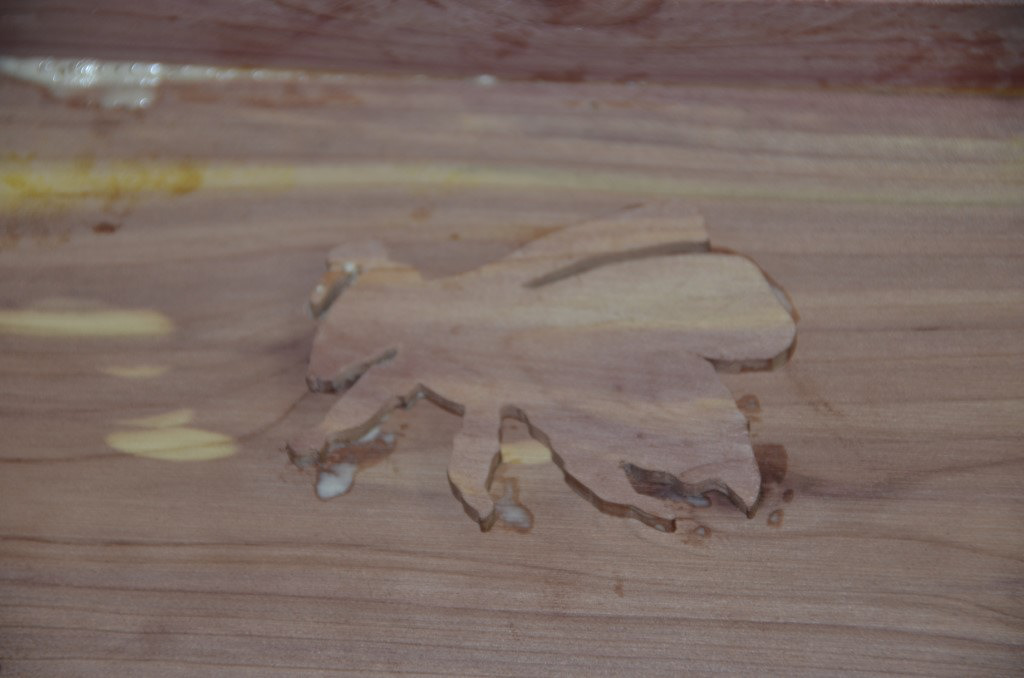
Then gilded the bee with 18-carat gold. Not sure how this will resist the elements, but fun to try ...

... and pretty "Golden Bee".

Bees glue all cracks in their hives with "propolis". So to open a beehive a tool is used to "pry" away the different parts. I worried that the "hive tool" would ultimately damage the wood. So in each corner we recessed and glued a penny, for the hive tool pressure to be better distributed. A penny instead of a washer , as it is prettier and copper will not rust. We also tacked a thin strip of metal along the frame rest, for the same reason: reduce hive-tool marks.
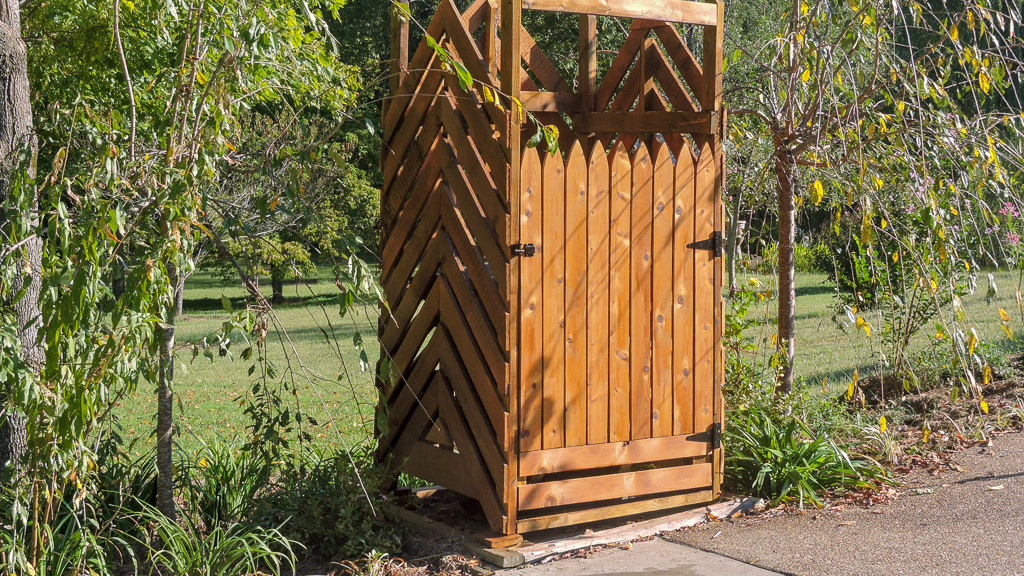
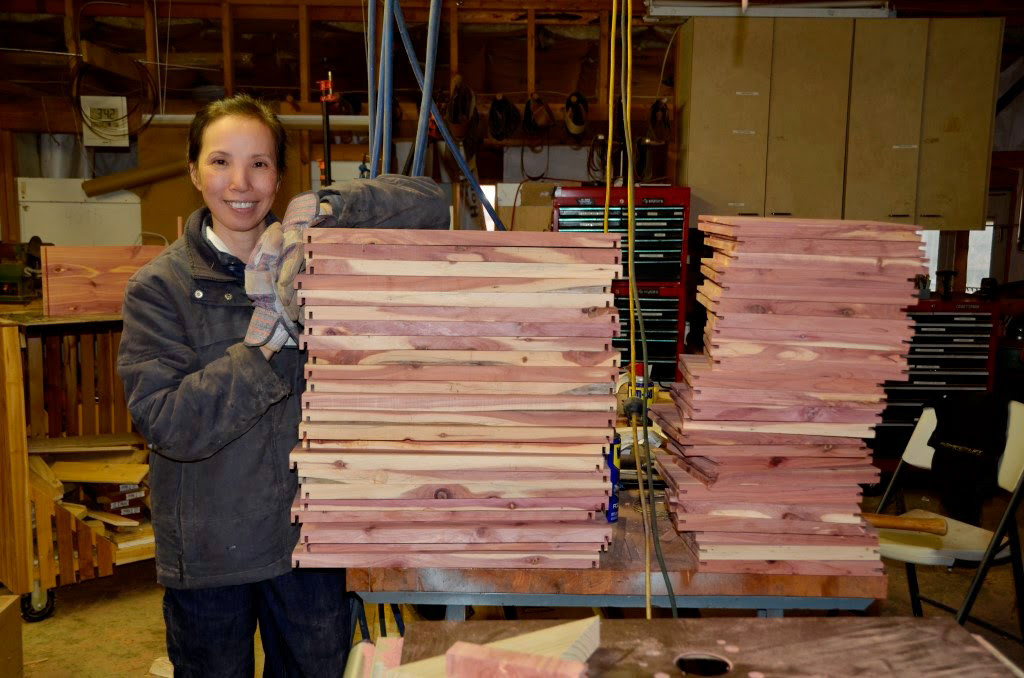
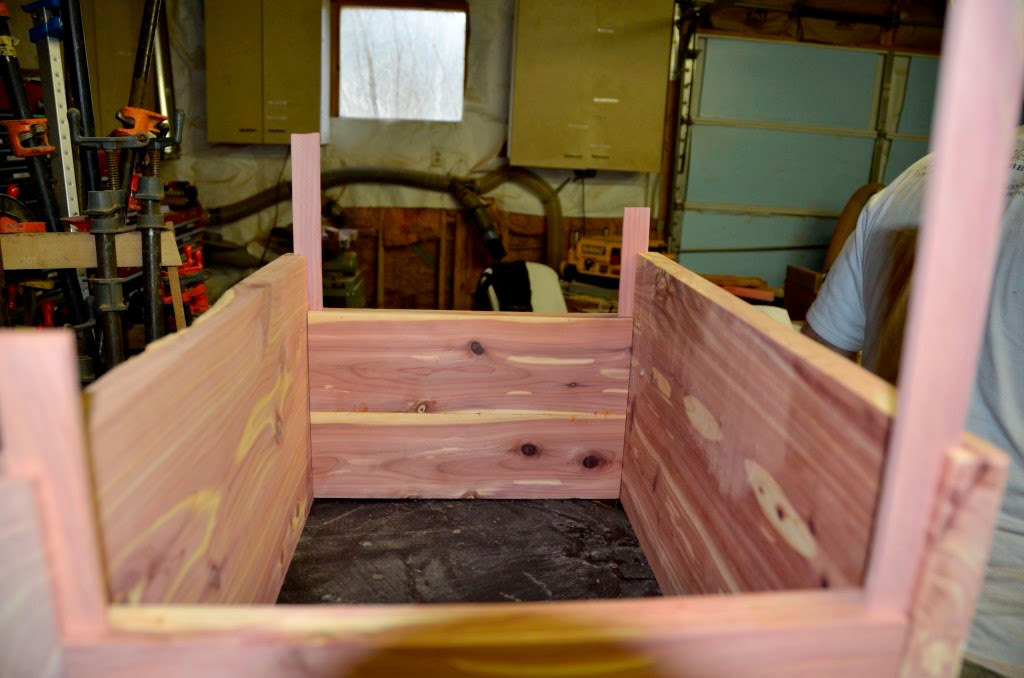
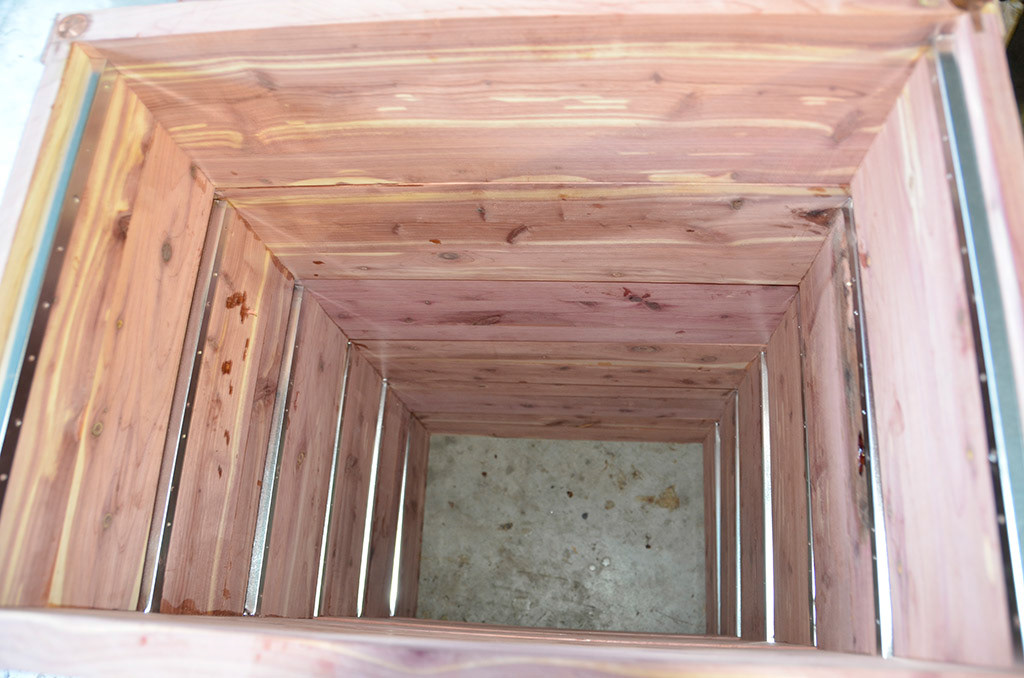
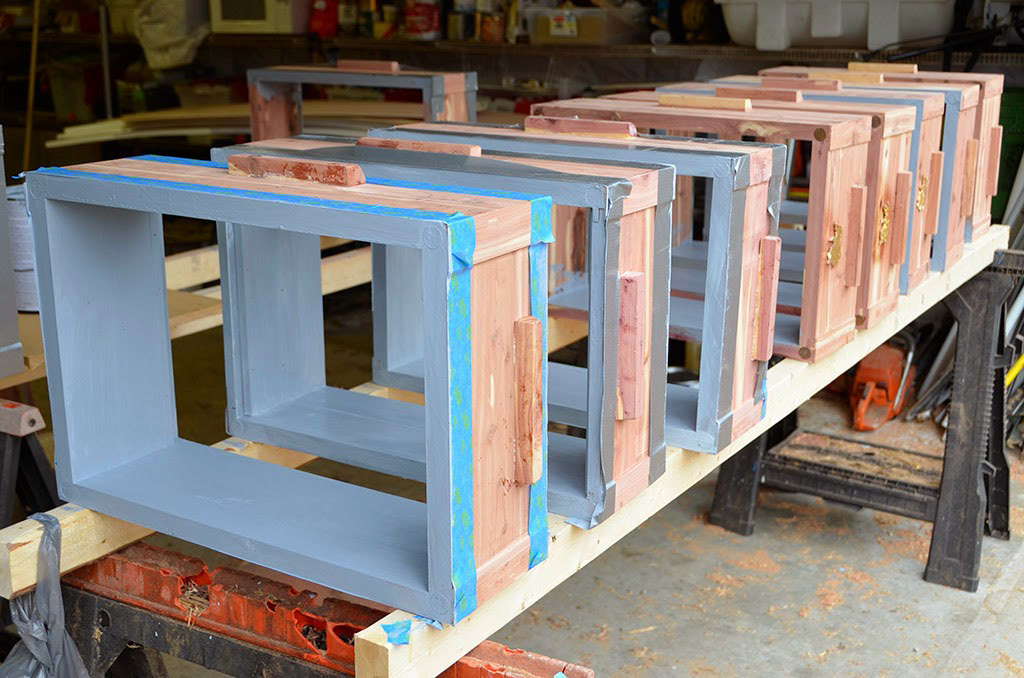
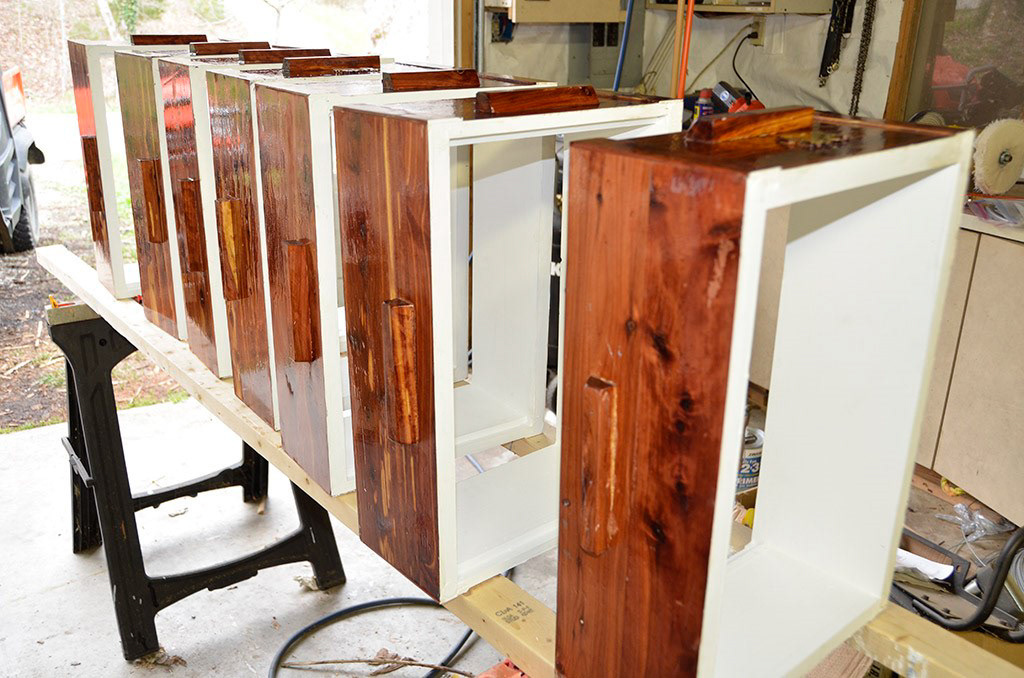
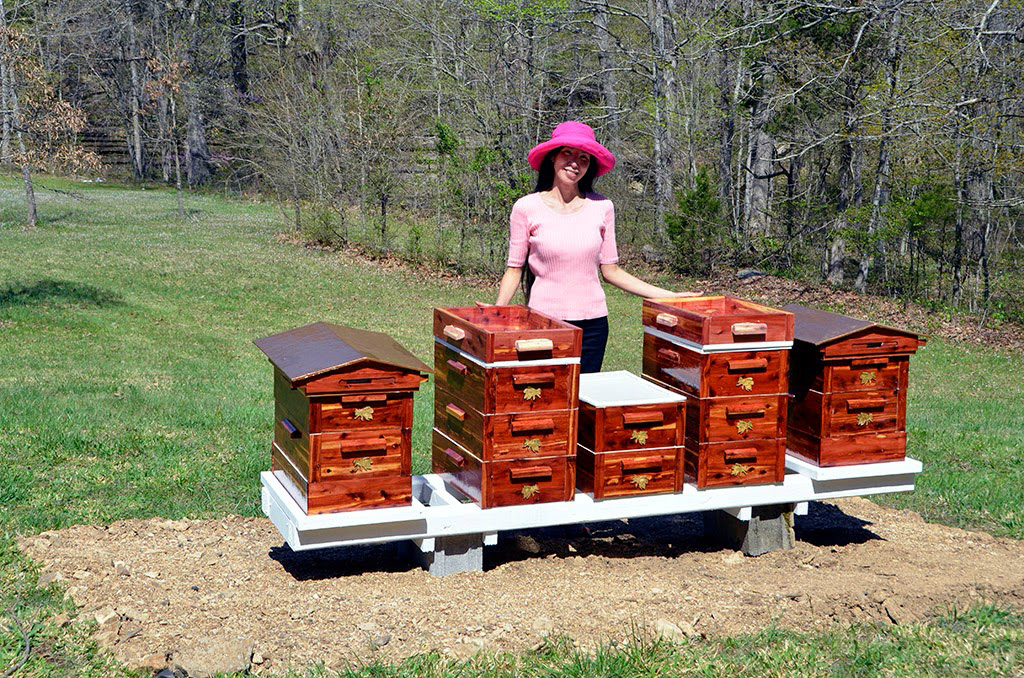
The 12 boxes ("medium") with their golden bees. Thao could easily fit inside each hive!

Inside view. Of course, we still have to make the "floor", the "roof" and all the frames on which the bees will build their combs.
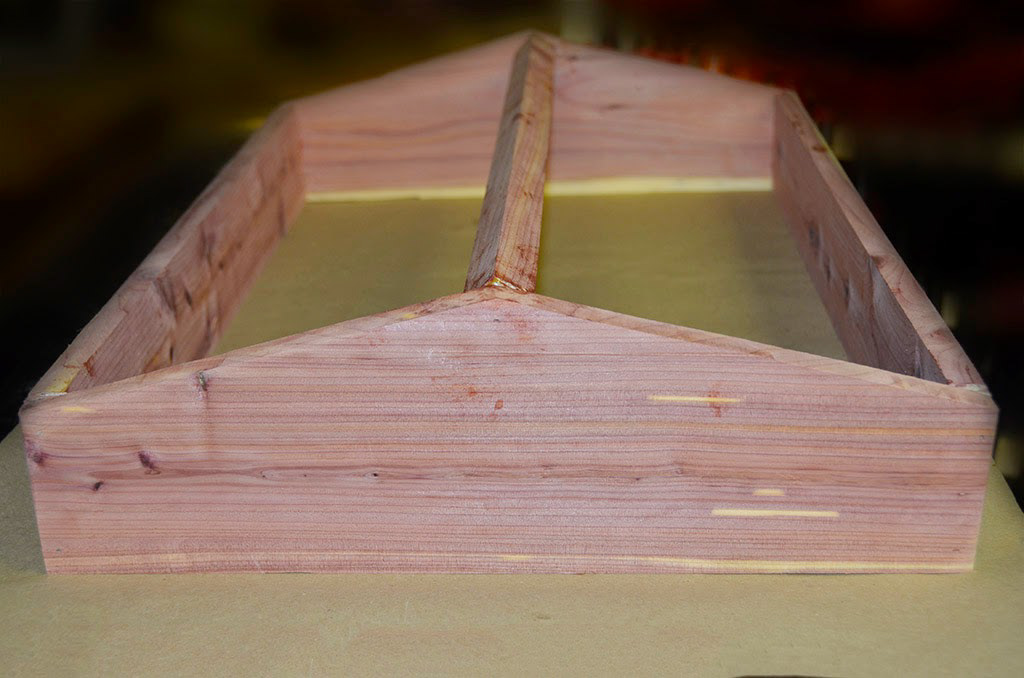
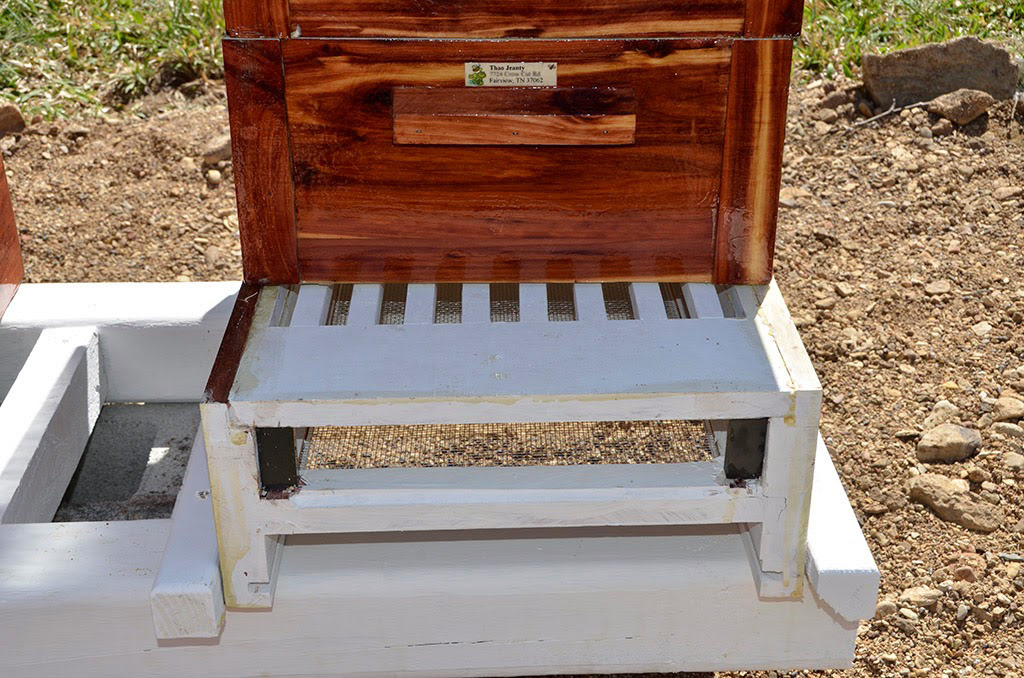
After the medium, time to make the hive stand. What we saw on line are usually several components, a stand on which a "screened bottom board" (itself composed of a screen part and a thin corrugated plastic underneath to trap the Varoa mites. Other people add also a slatted bottom rack where bees can hang around under the frames. I though an integrated stand that would include all 3 elements might be sturdier and less problems to stack up properly (again not trusting too much my fine motor skills with glove).
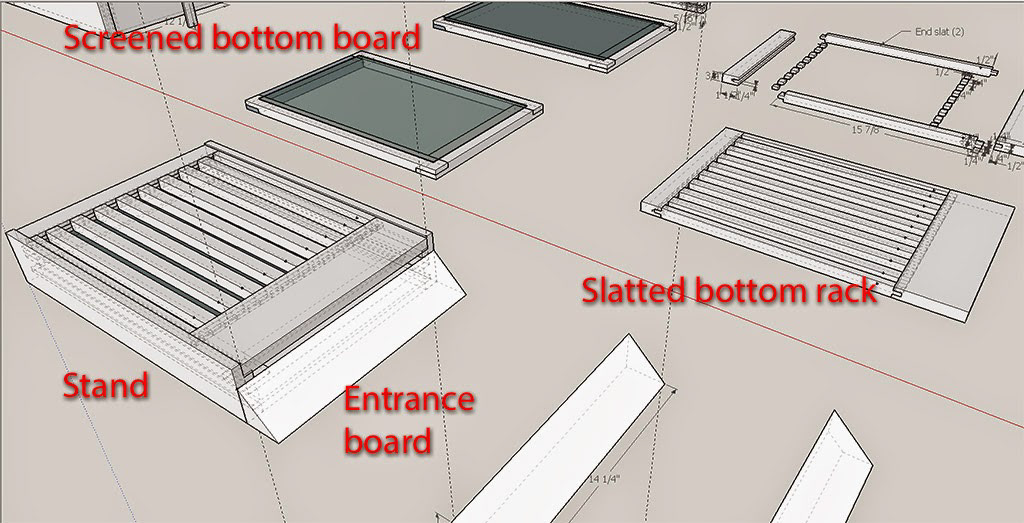
To include all three elements, the sides of the stand has 3 grooves, one each for the slatted bottom rack on top, for the screened bottom board in the middle, and for the corrugated plastic sheet at the bottom.
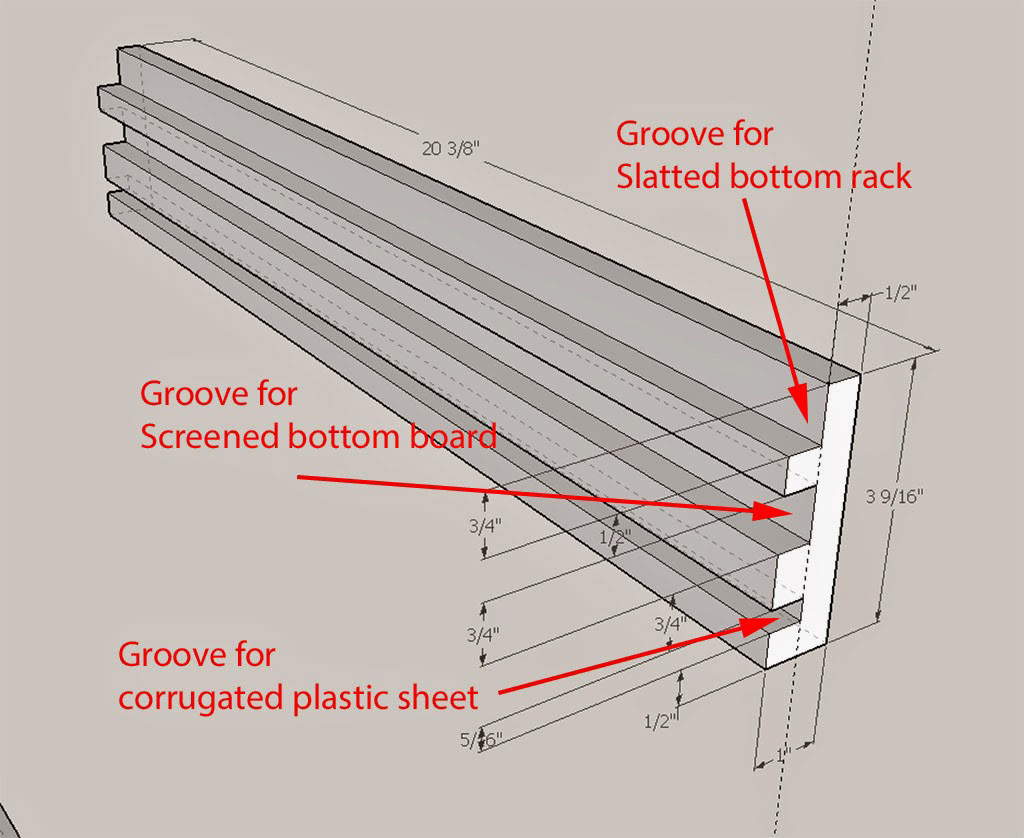
First job was to cut that top groove. Pretty easy as this is just 2 cuts at 90 degree.
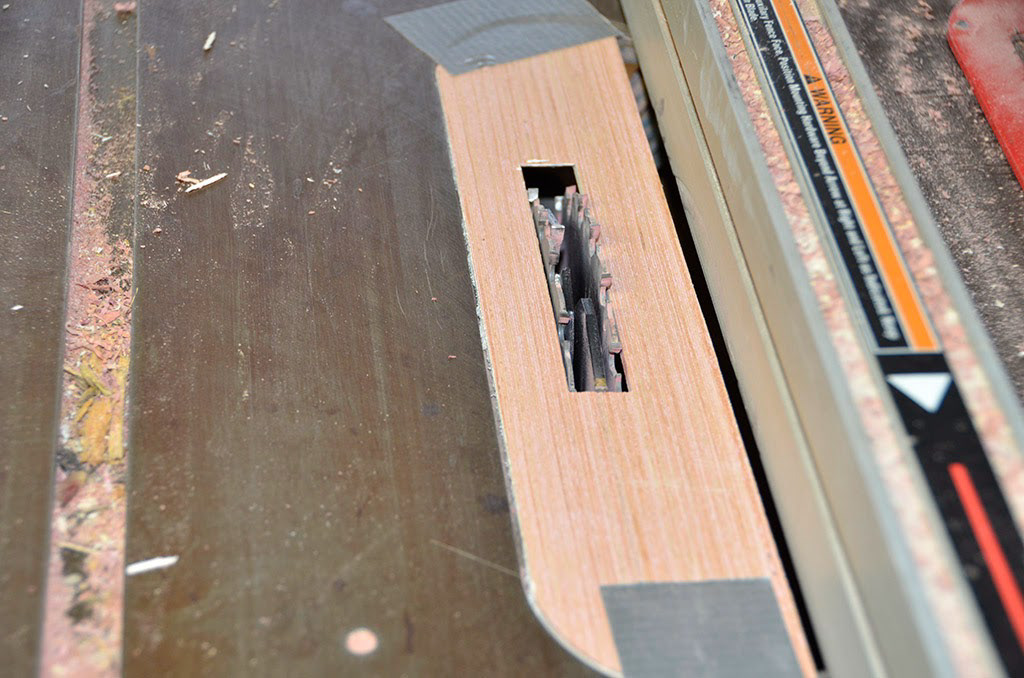
Cutting the groove for the screened bottom board is a little trickier since we had to use a wide dado blade (first time ever!) and we did not have a table saw insert to fit it.

So Thao took a scrap (too narrow, but.. no choice, that is all we had on hand) and quickly made a zero-clearance table insert.
Not perfect, but good enough for now, and surely better then balancing a board over the gaping hole, with this mean looking fast-spinning blade in it !
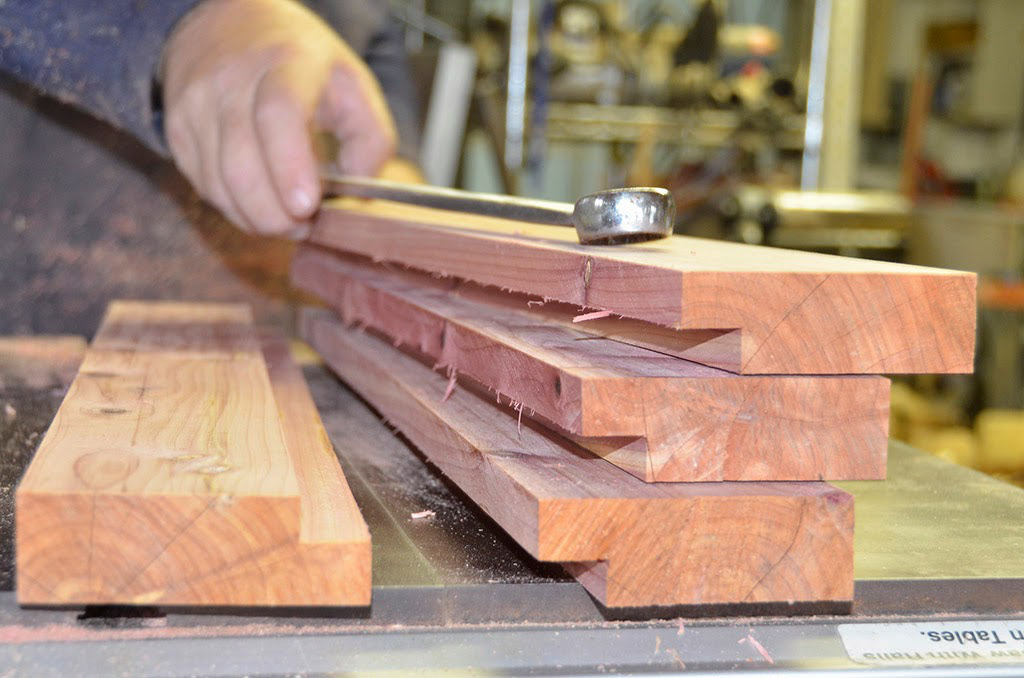
All four side boards prepared, but not trimmed to length yet.
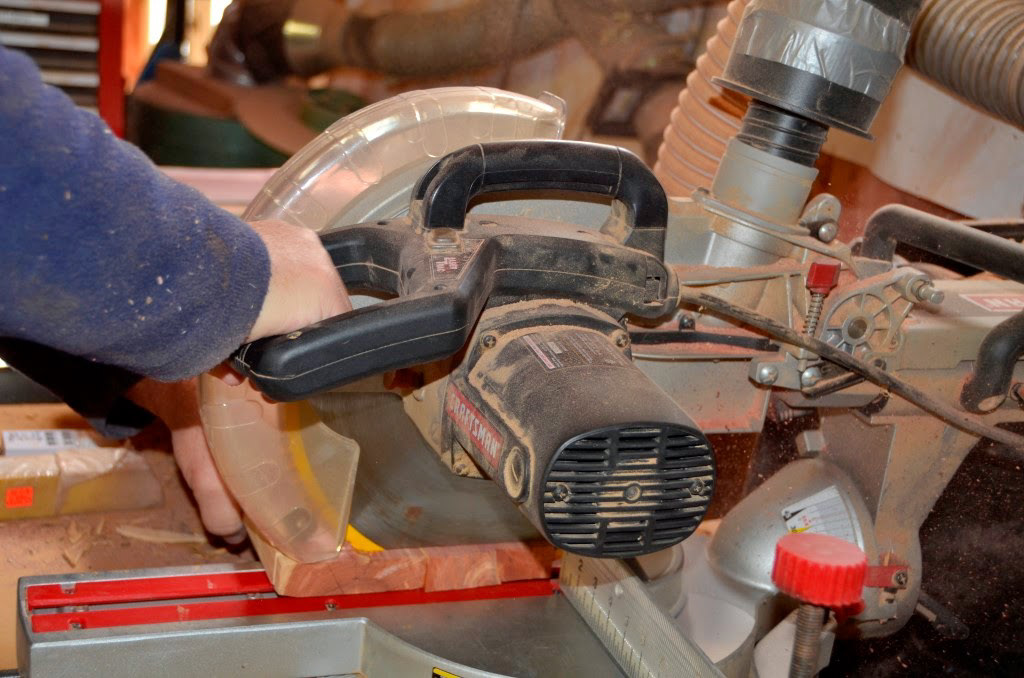
Next, we prepared the triangular shaped landing board by making a square cant and slicing it diagonal (first time I used the band saw in any other position that straight vertical !).
The bee's landings. Turned out I goofed up in the measurements and we will have to trim one side.
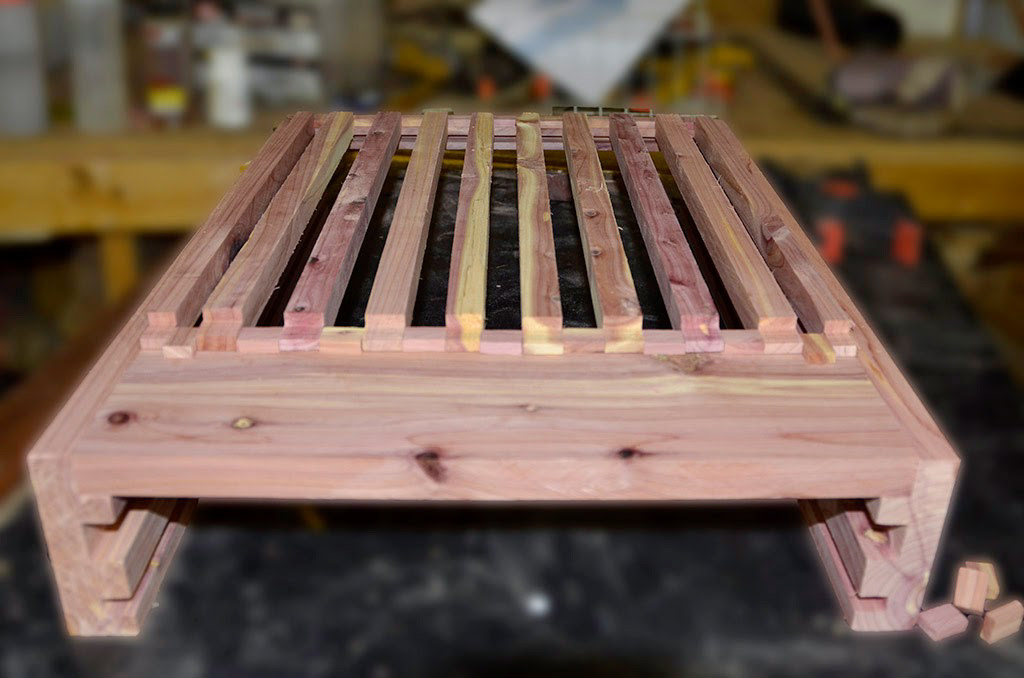
The slatted bottom rack. This part fits under the frames and provide a space for the bees to hangout and move around. Also it shades the inside of the entrance to decrease the light in the hive.
Next step was to prepare the slats for the slatted bottom rack. We gathered some boards and removed 1/4" on each side, for 1/2".
The edge
The boards were cut into 7/8" strips...

... that were sanded to final thickness of 3/4".
We then cut a bunch of little "sugar cubes", designed to fit between the slat and cover the groove into which the slat fit.
"Dry-fitting" the parts, with the slats on top of their support, instead of in between. Note the little "sugar cubes". This looked all good, but gluing was a lot harder then anticipated, with these many parts to fit.
Hard to glue, fit and squeeze all part in place, as they tend to move!
Got it!, and it is square!
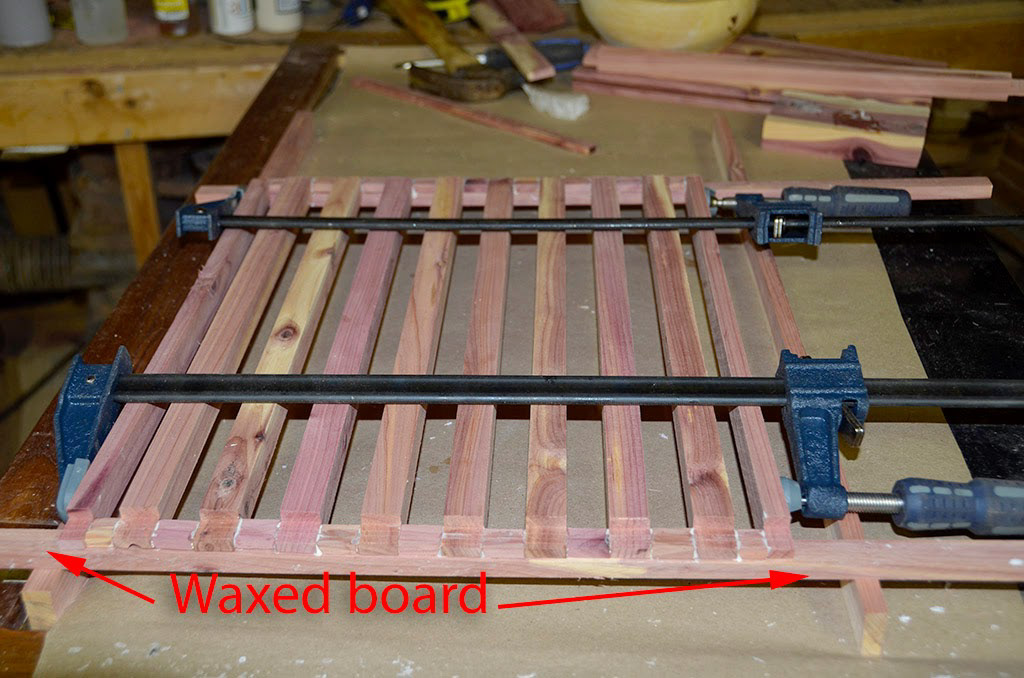
For the second board, Thao had a much better idea. We build a jig made with 2 waxed boards (so glue would not stick to them), and simply fitted all the parts with light clamping when all aligned. MUCH easier!

Just a light clamping.
The slats glues with the "sugar cubes", ready to be glued to the grooved end-boards.
Detail of the glue-up.
A light clamping and all is square.

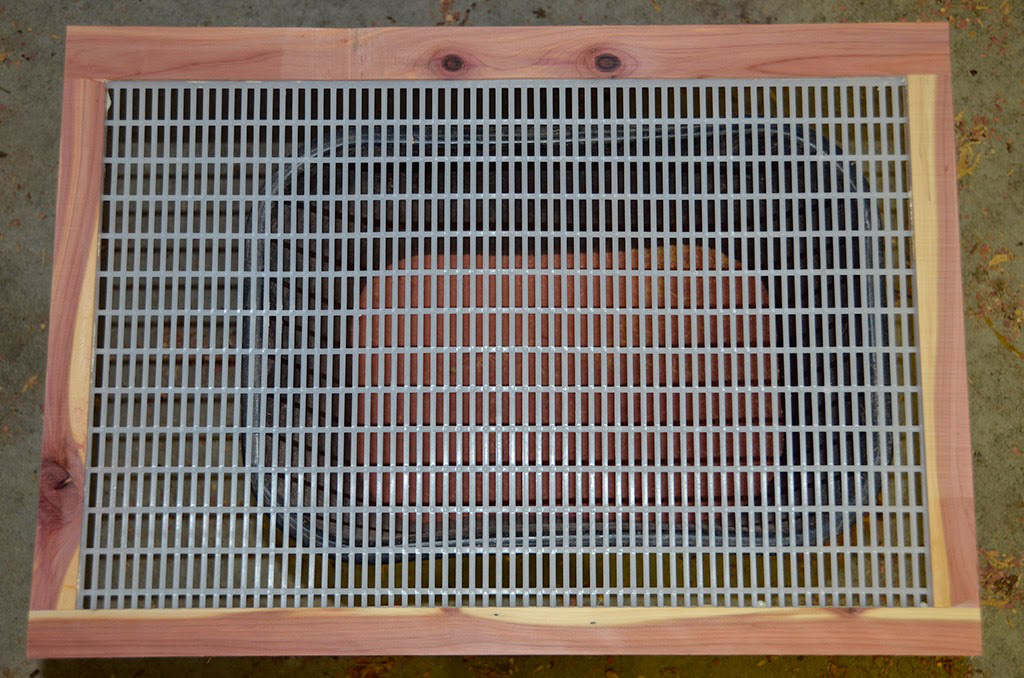
The next part to build is the "screened bottom board". The "screen" is a 1/8" mesh designed so that the Varoa mite fall through and can't find their way back onto the bees. I thought that with a farm Coop, a Tractor Supply and a Lowe's around, surely we could find this mesh locally, but no :( we had to order from Amazon.
The stiles and rails of the screened bottom board are united by a simple lap joint. Actually dividing each thickness in exactly 1/2 so that the combined thickness is exactly that of the rail, is a little tricky and it took a little finagling to get it right.
Yeah! It fits pretty good!
Dry-fitting the stand. The 2 side boards with the yet screenless "screened bottom board".
Dry-fitting the stand. The 2 side boards with the yet screenless "screened bottom board".
And now with the slatted bottom rack! All fits pretty good!

The "bee's view" of the entrance.
The back of the stand. The gap between the "slatted bottom rack" and the "screened bottom board" will be closed. The lowest notch is to slide a corrugated plastic sheet for the Varoa mite trap.
Starting to work on the "roof" (technically, the "telescoping cover"). Typically these are simply flat. I guess most of the beehive designs are made for commercial beekeepers that transport hundreds of beehives to area for pollination (almonds…) and for whom the simplest design that can be packed with no gap on big trucks is the best. We though a more traditional look was prettier.
Thao, ever the careful painter, starts to paint the inside of the hives. Yes we read ALL the arguments about painting beehives, that the bees don't care about it, that it is a waste of money, that the paint could be toxic (I don’t buy that dried up paint is toxic), etc etc.. To me the argument of Stephen Tillman, that paint will protect the wood from humidity, trumps all other arguments. Indeed many beekeepers use beehives that are really eyesores! Not in our garden!

The "Oops" primer from Lowe's (a customer's return) is an ugly grey, but the final paint will be white so that hopefully we can detect small hive beetles better.
We bought two "queen excluders". Actually because of some ordering snafus, they are a little different. Since those are made for standard beehives that have 3/4" walls and we have 1" walls, we build a very thin (3/8") frame to surround them.

Probably not very sturdy but pretty.
Detail of the compound joint to make the frame sturdier.
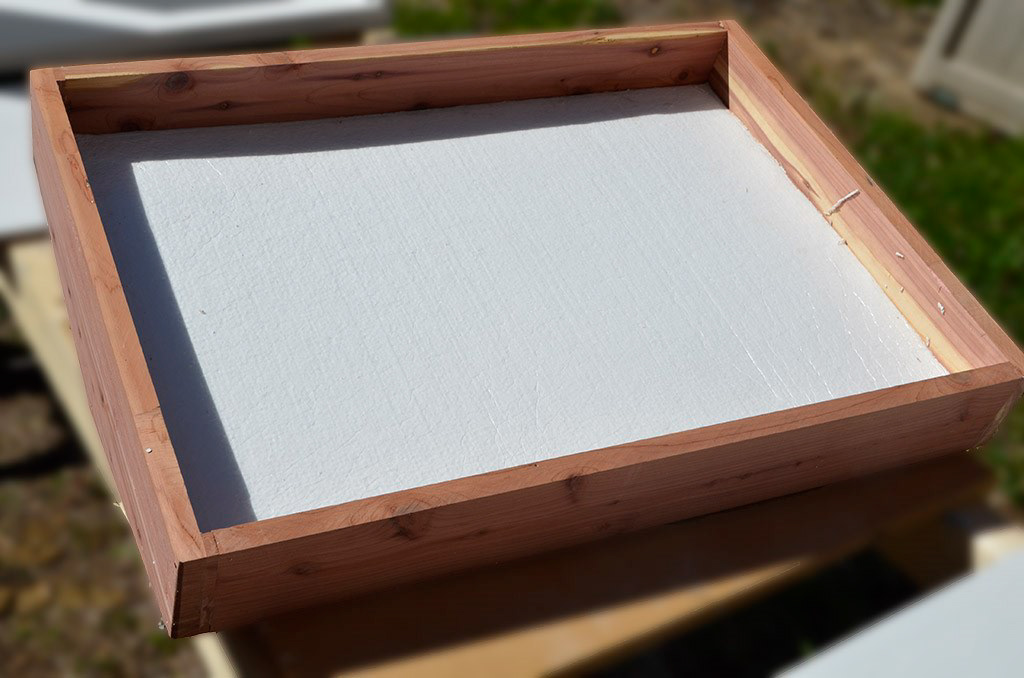
The inside of the roof. To try to protect the bees from too much heat in the summer or too cold in the winter we bought a Styrofoam panel from Lowe's. Very nice panel with a radiant heat barrier on top (the shinny metal that is visible),…
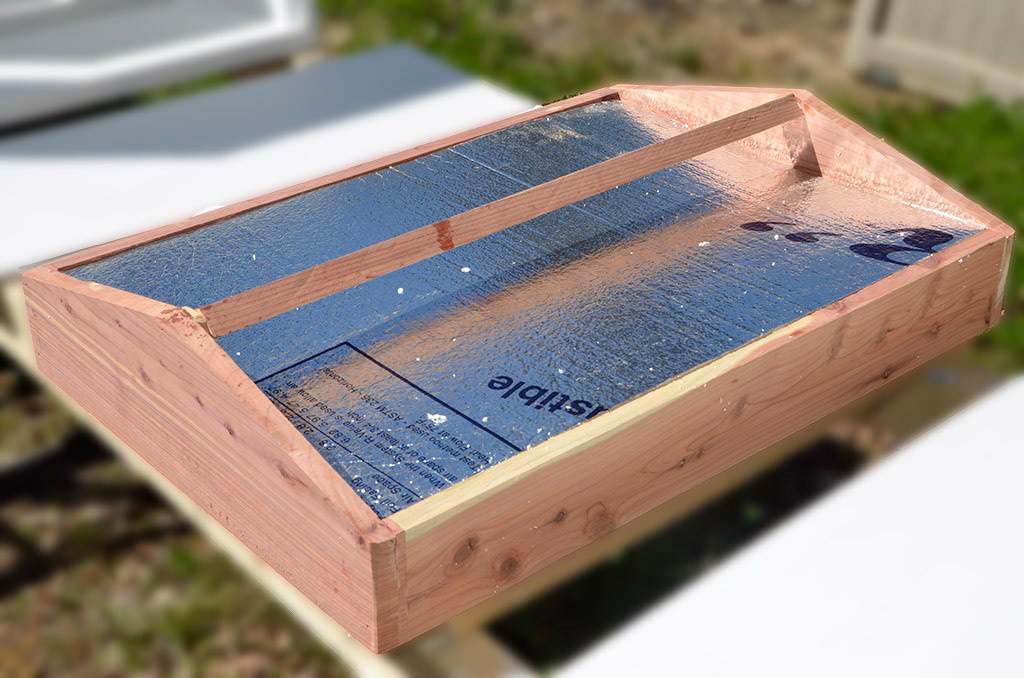
… 1' of Styrofoam and a thin plastic barrier on the bottom side. Very neat, We cut it 1/8th of an inch to wide to that it fit by pressure. (Viewed from below).
The roof, with one side open to assess the situation

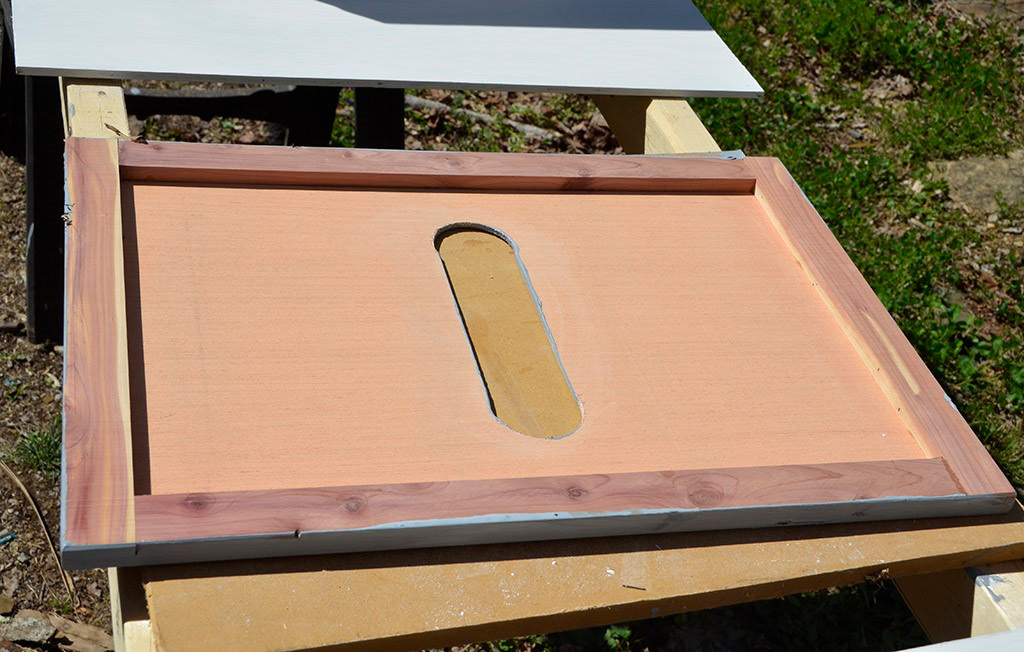
The "inner cover" is the last part before the roof (the "telescoping cover"). As far as I understand, its main function is to prevent the bees from gluing (propolis) the roof to the hive. Normally there is a small access hole for the bees to be able to exit via the top of the hive, when it is too hot.
I showed the plans for this beehive to Michael Bush (http://www.bushfarms.com/bees.htm) who is the big guru in "Natural beekeeping" (no medication, no chemicals). He did not like the bottom entrance I had made (it is too attractive to mice) and though the gap for screened bottom board and the mesh could be increased and the gap under the "Slatted bottom rack" should be increased to 2".
So on the fly, we modify the plans totally, to not use a bottom entrance and move access to the top. Because of that, I made the slot thru the inner cover much larger to accommodate greater traffic.
Fantastic to have such feedback !
The new 1/8" mesh for the "screened bottom board"
Starting to epoxy the outside wood. One of 6 layers !!!!!!
Next we start working on the frames that will support the honeycomb. Frames have a top bar, with some rather detail joints, 2 side bars that fits in the joints, and a simpler bottom bar. In this drawing I made a triangular lower edge, that we may do or change
First the side bar. These have to be 1 and 3/8"…. … which in decimal (I HATE those units!!) is 1.375, so at 3.5/1000 of an inch, close enough the bees wont complain !
Then we need to cut a 1/2" deep by 7/8" wide groove on both sides. I modified the design of Stephen to allow the tops and bottom groove to be the same. This required a big dado, and this blade is quite frightening to me.
Thao routing the edges:
Then sanded to exactly 3/8"
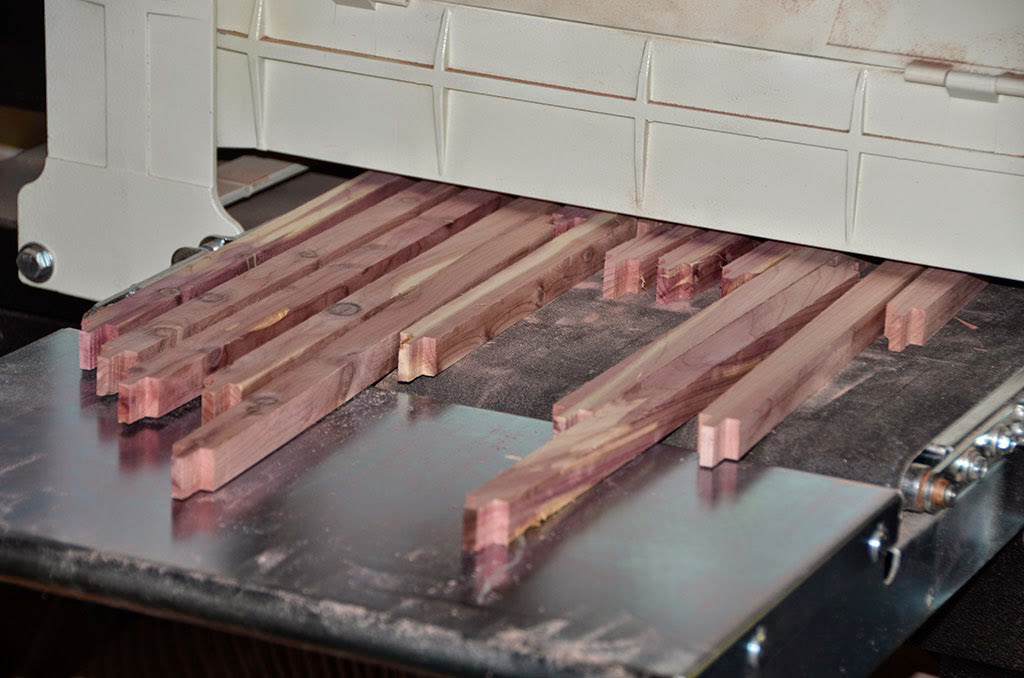
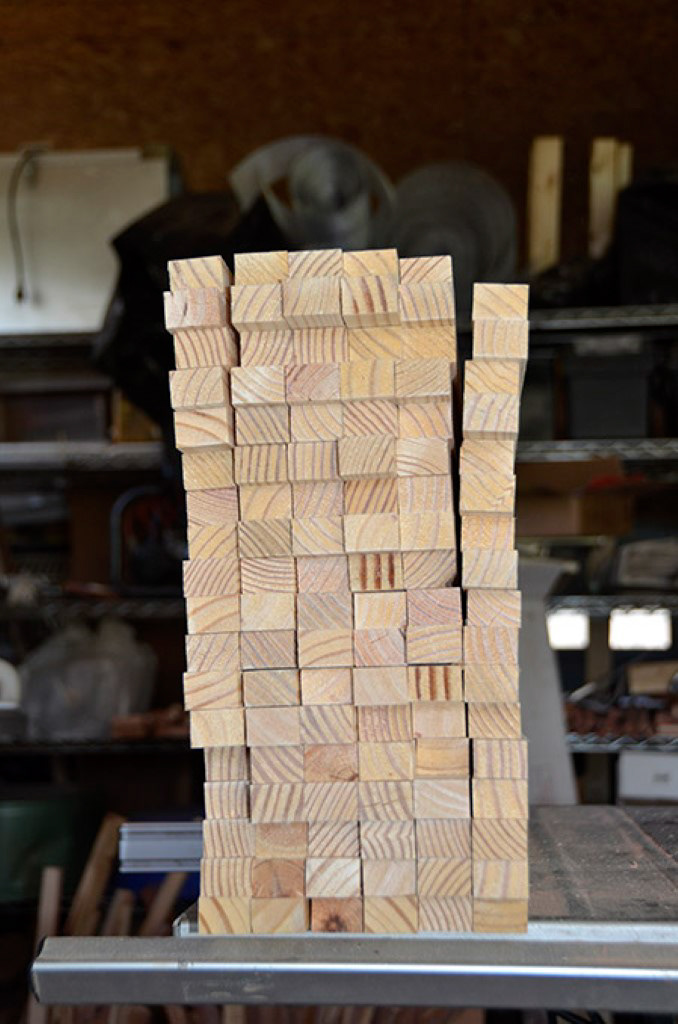
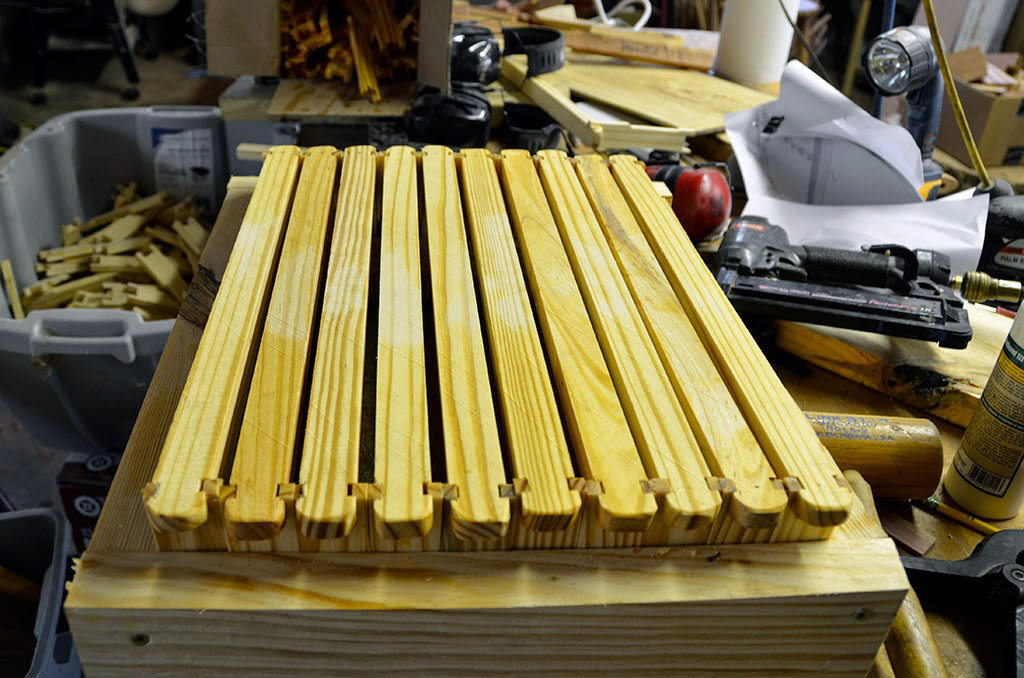
A billion of them !
Next the blanks for the top bar:
Checking the fit of the side and top bar. They fit !
Trying the first frame (not glued, jut fitted together)
Cutting the little slant in the ear of the top bar.
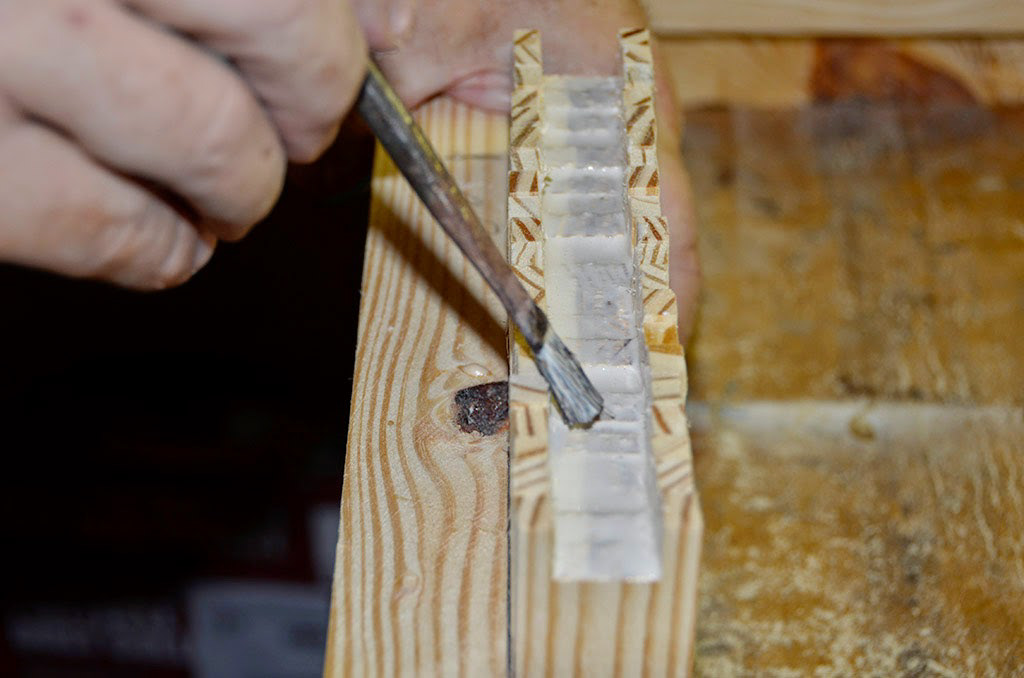
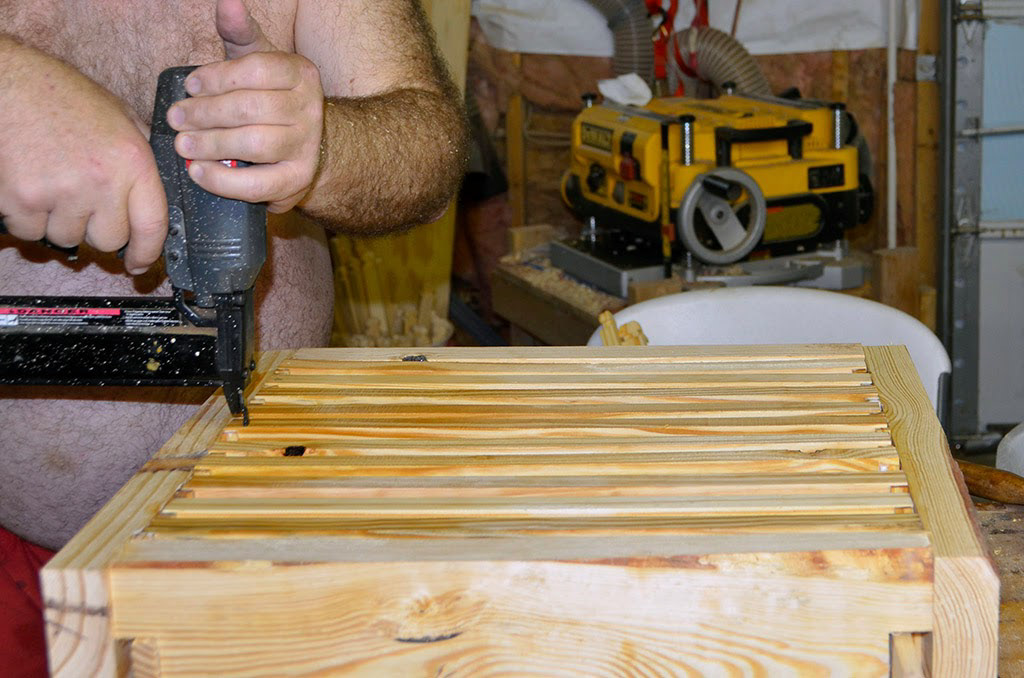
By stacking 20 end-bars on the inside of the jig one end...…they can be all smeared with glue, which is faster then doing one at a time, and gives a more thoroughly glued joint.
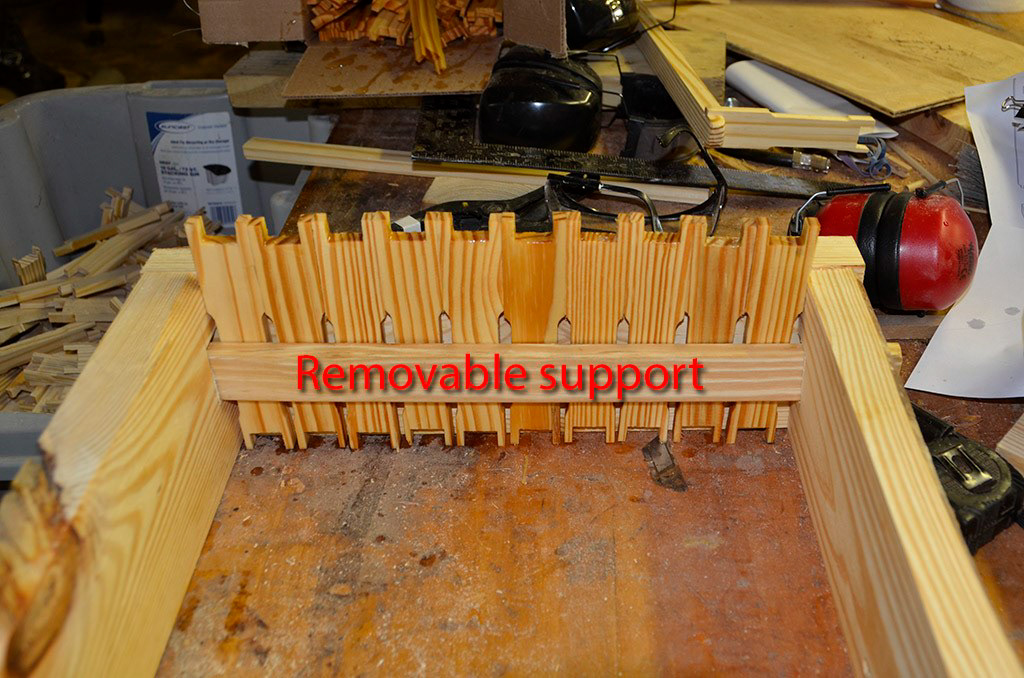
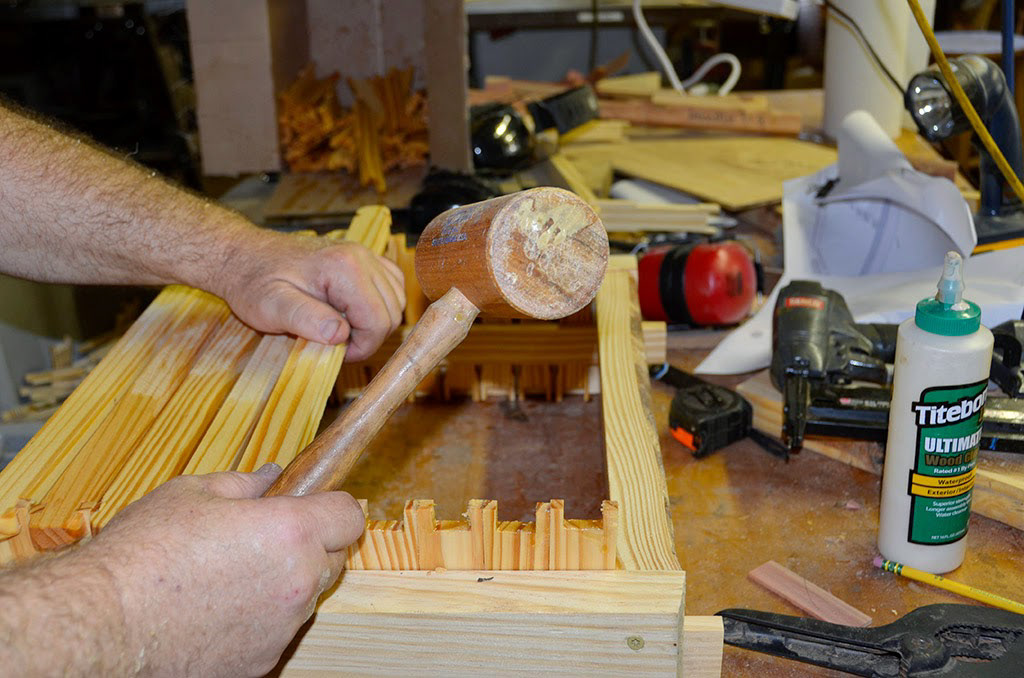
The top bar fit is so tight that each has to be hammered in place.
A thin mail
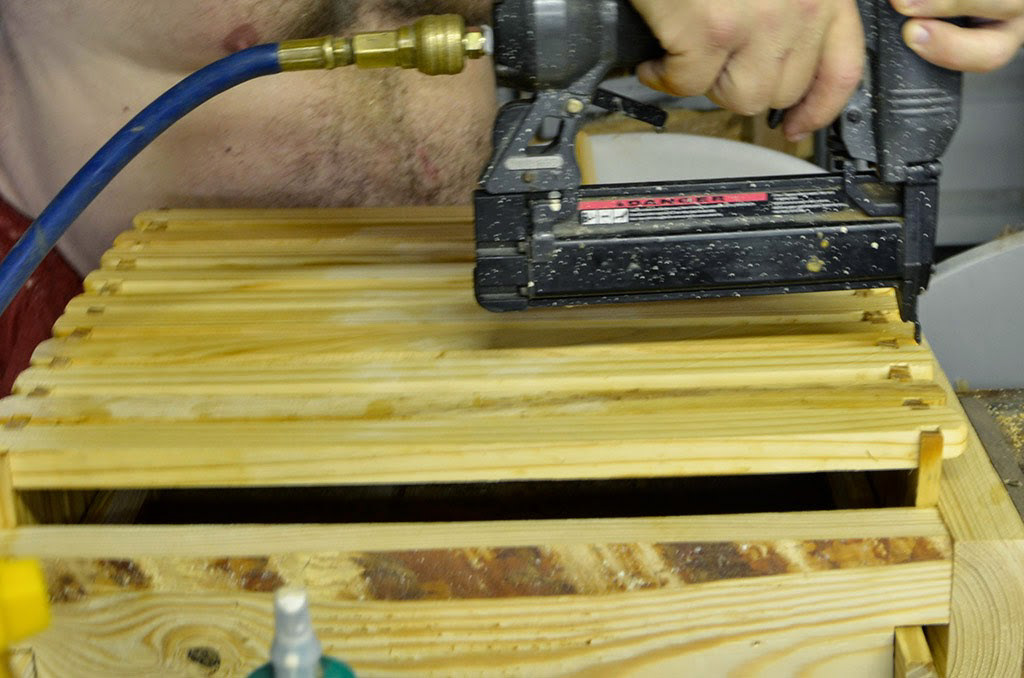
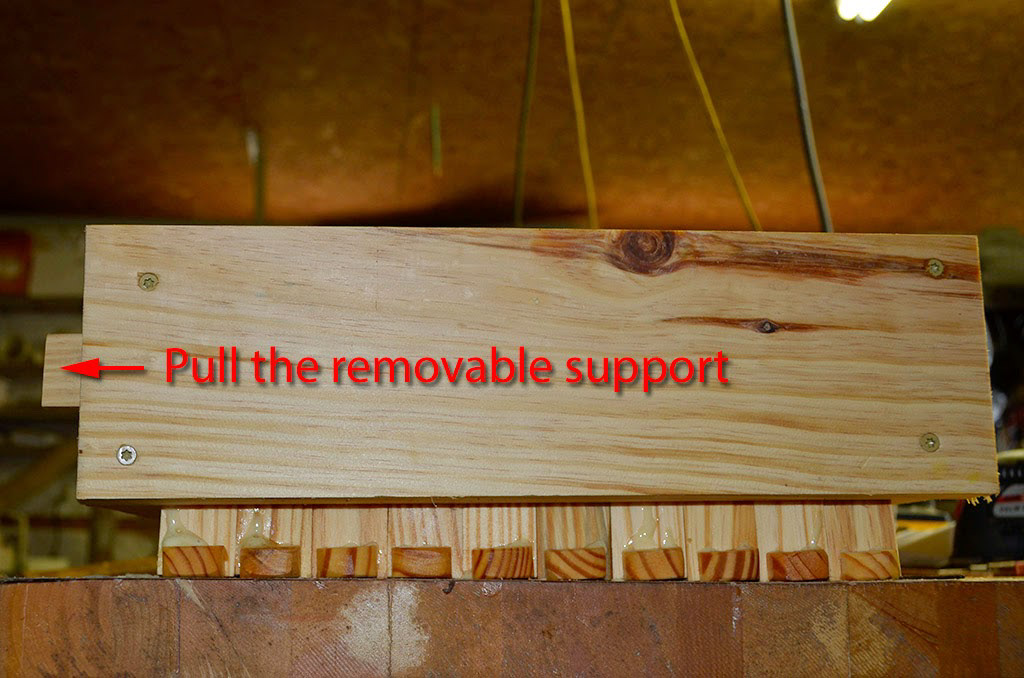
The jig with the frames is flipped over, and the bottom bars inserted and nailed.
The removable support is pulled out, the frames removed and the cycle repeated.
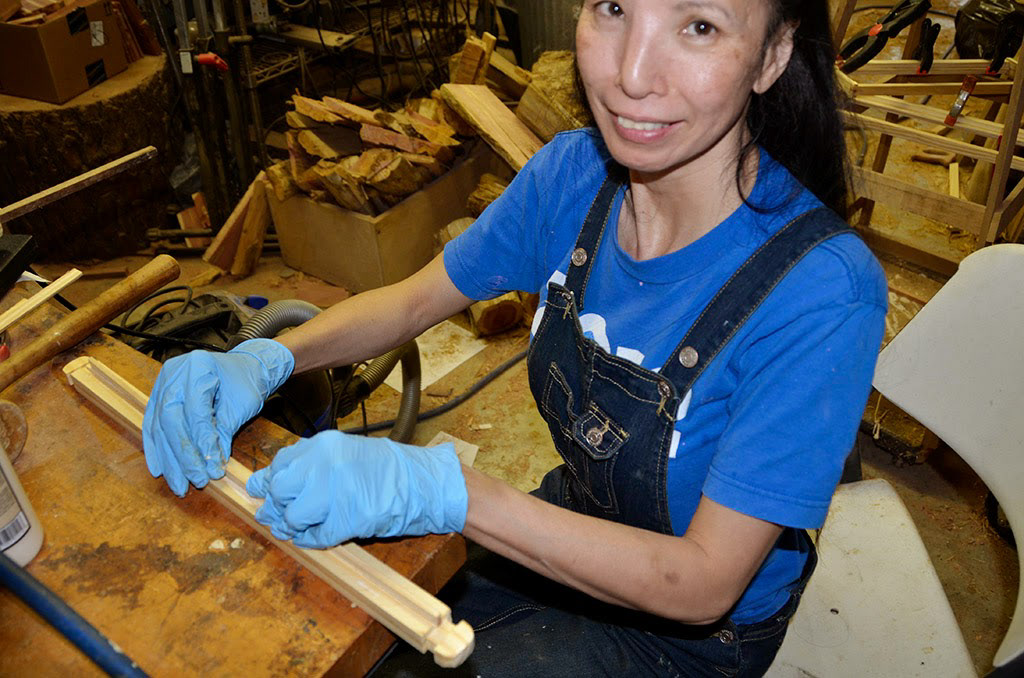
Thao gluing the bee comb guide under the top bar.
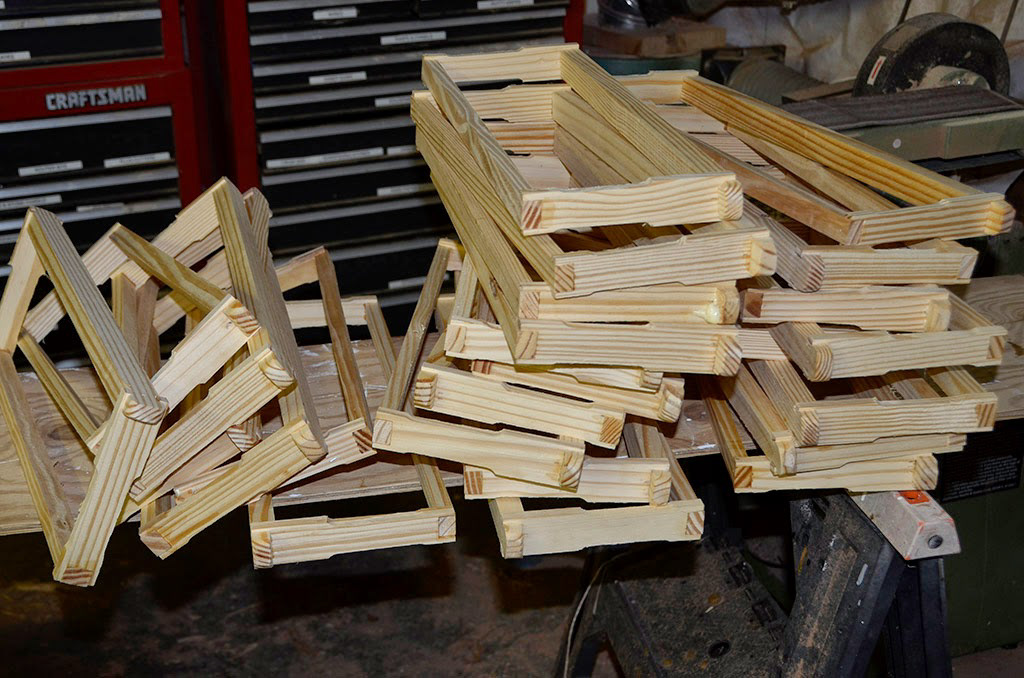
Piles of frames started to clutter the toolshop!
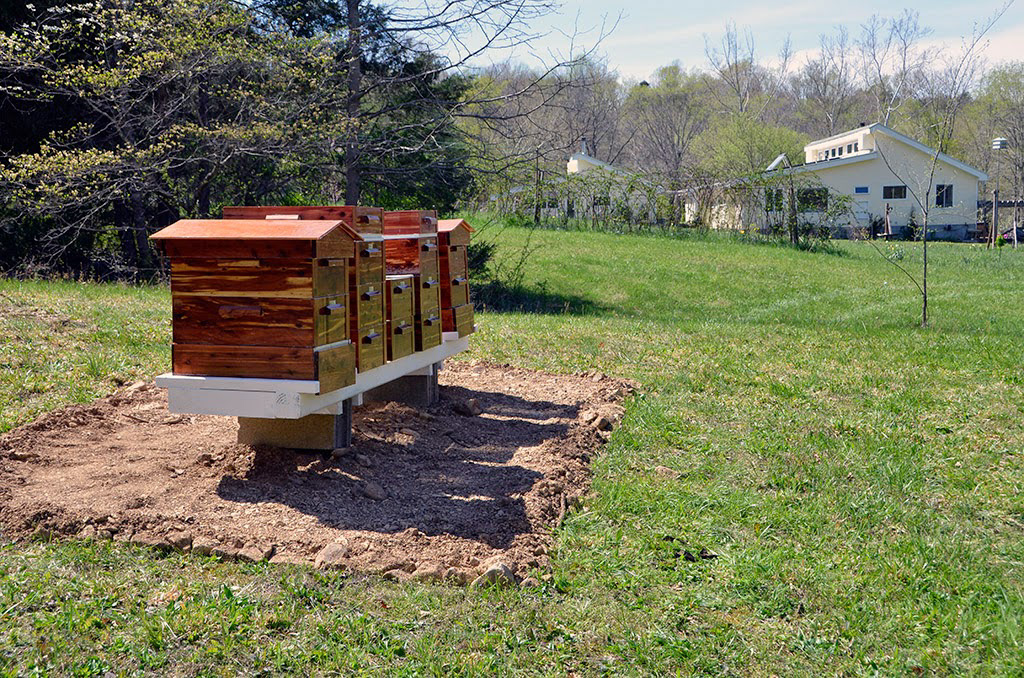
Setting up in the garden!
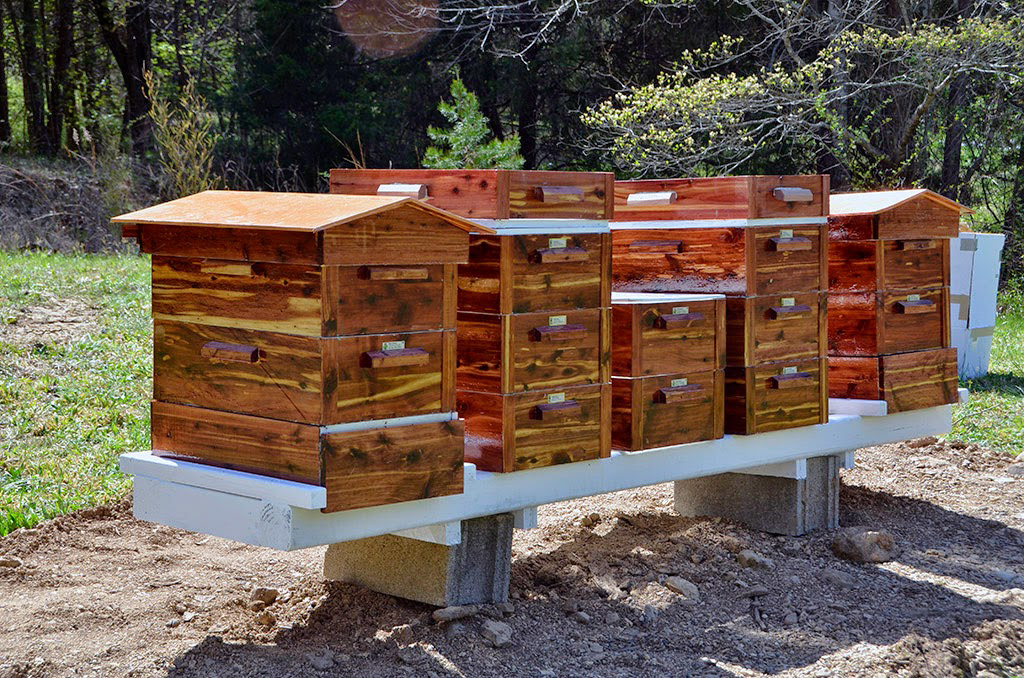
The proud builder !